Posts: 5,203
Threads: 110
Joined: Jan 2012
Reputation:
20
Location: Devon
Car Model/Spec: Estate, DT, GTI6 and 205


Thanks: 1
Given 30 thank(s) in 30 post(s)
These are the mist jets i've bought in the past and seem to be the right ones. They should come in Fiat packaging http://www.ebay.co.uk/itm/Two-2-Pair-Mis...1438.l2649
Great work with the car i must say, nice to see you giving it a lot of care and really going to town with cleaning it up. They really are a great cars to learn stuff on. Keep up the good work!
Posts: 1,778
Threads: 213
Joined: Jul 2013
Reputation:
2
Location: The North
Car Model/Spec: HDI
Thanks: 52
Given 16 thank(s) in 16 post(s)
Yeah ive had Fiat ones like the ones Frosty linked you for about 3 years now, they are great!
New wheels look sweet, but I just wouldnt be able to get over the fact that they most likely cost more than what the car is worth, those wheels are rare to find though and the car looks good 
Posts: 141
Threads: 12
Joined: Mar 2017
Reputation:
0
Location: Surrey
Car Model/Spec: Golf6R, Ph1 172 (x2!)
Thanks: 2
Given 2 thank(s) in 2 post(s)
Time for an update as I've done a few more bits and bobs to the 306 in between a trip up to Donnington for the French Car Show which was an awesome weekend of cars and camping.
One of the things I wanted to do to the HDI was a decent stereo install. I've been reading various forums and it seems you can never have too much sound proofing so I went and ordered some sheets of SilentCoat to sound deaden the panels and stop any vibration followed by a budget roll of underlay for wood flooring which comes in an adhesive foam roll and can be used as a way of sound proofing.
I didn't realise the SilentCoat could be used sparingly and spaced out at the time so I went a bit overboard with it on the doors..

If I'm honest I might have used too much sound proofing foam as well because I can;t get the internal door handles to sit right which will mean a but more cutting back. Door card all covered
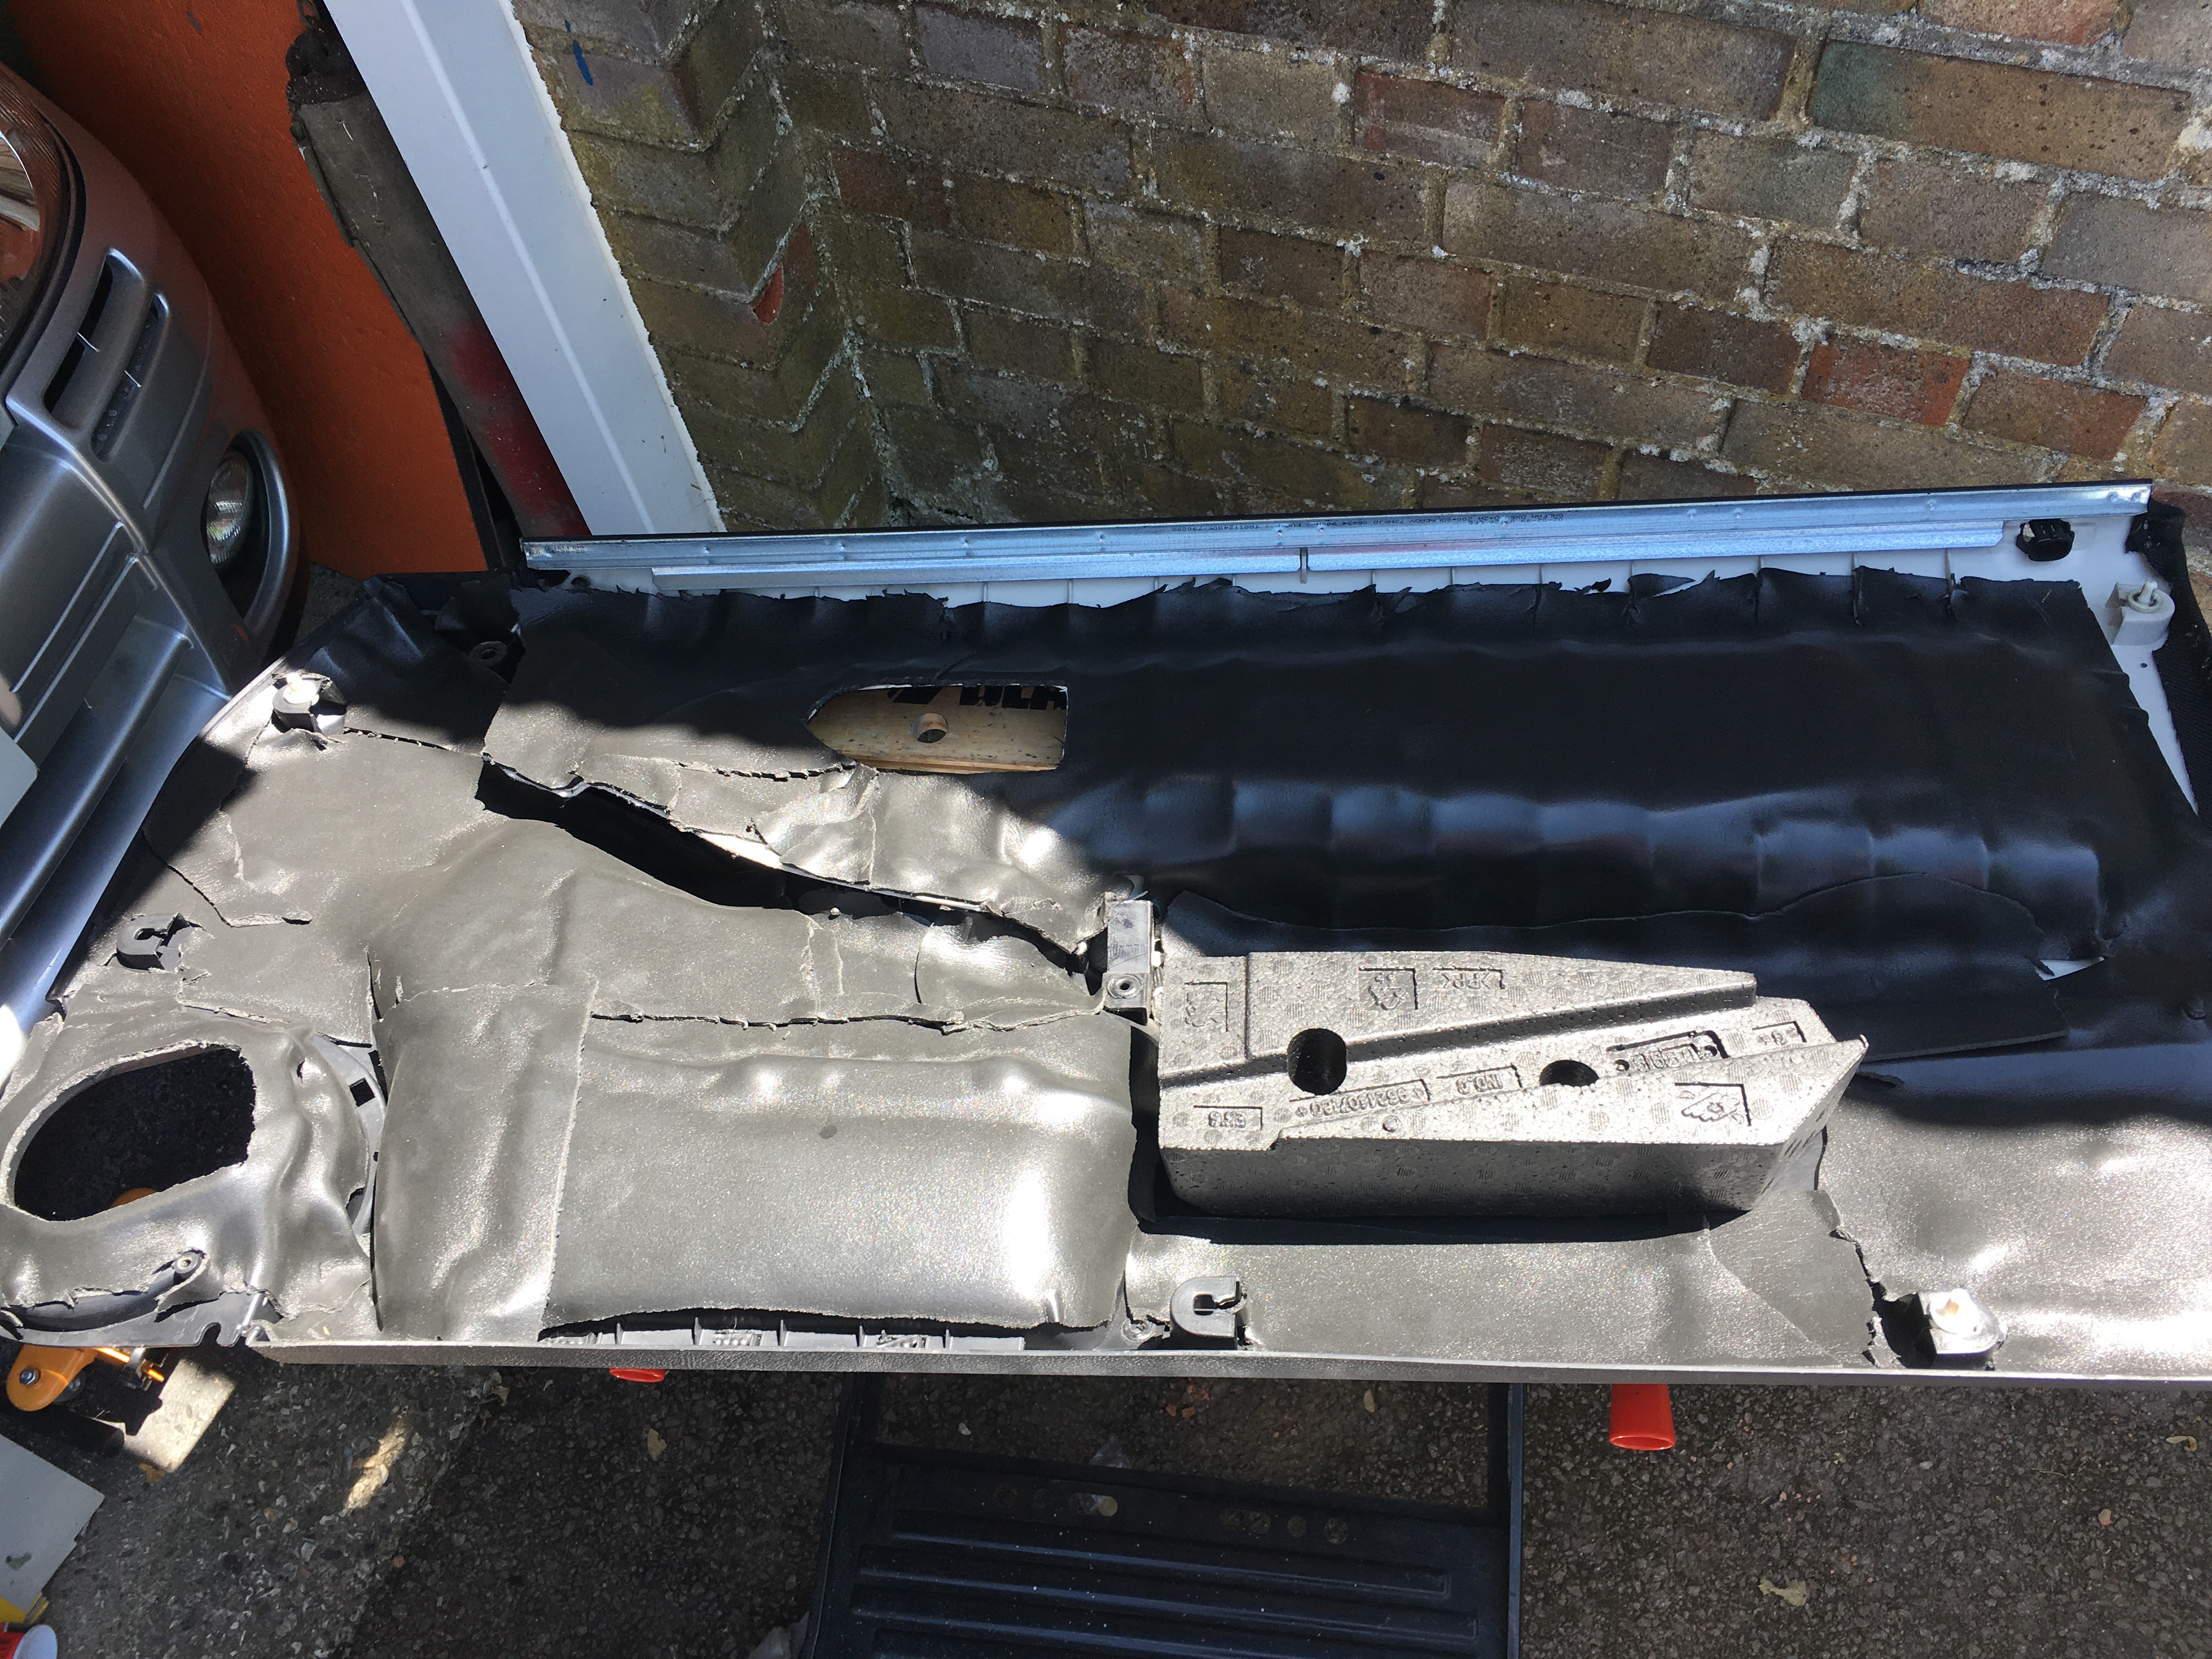
I added yet more on the actual door for good measure..
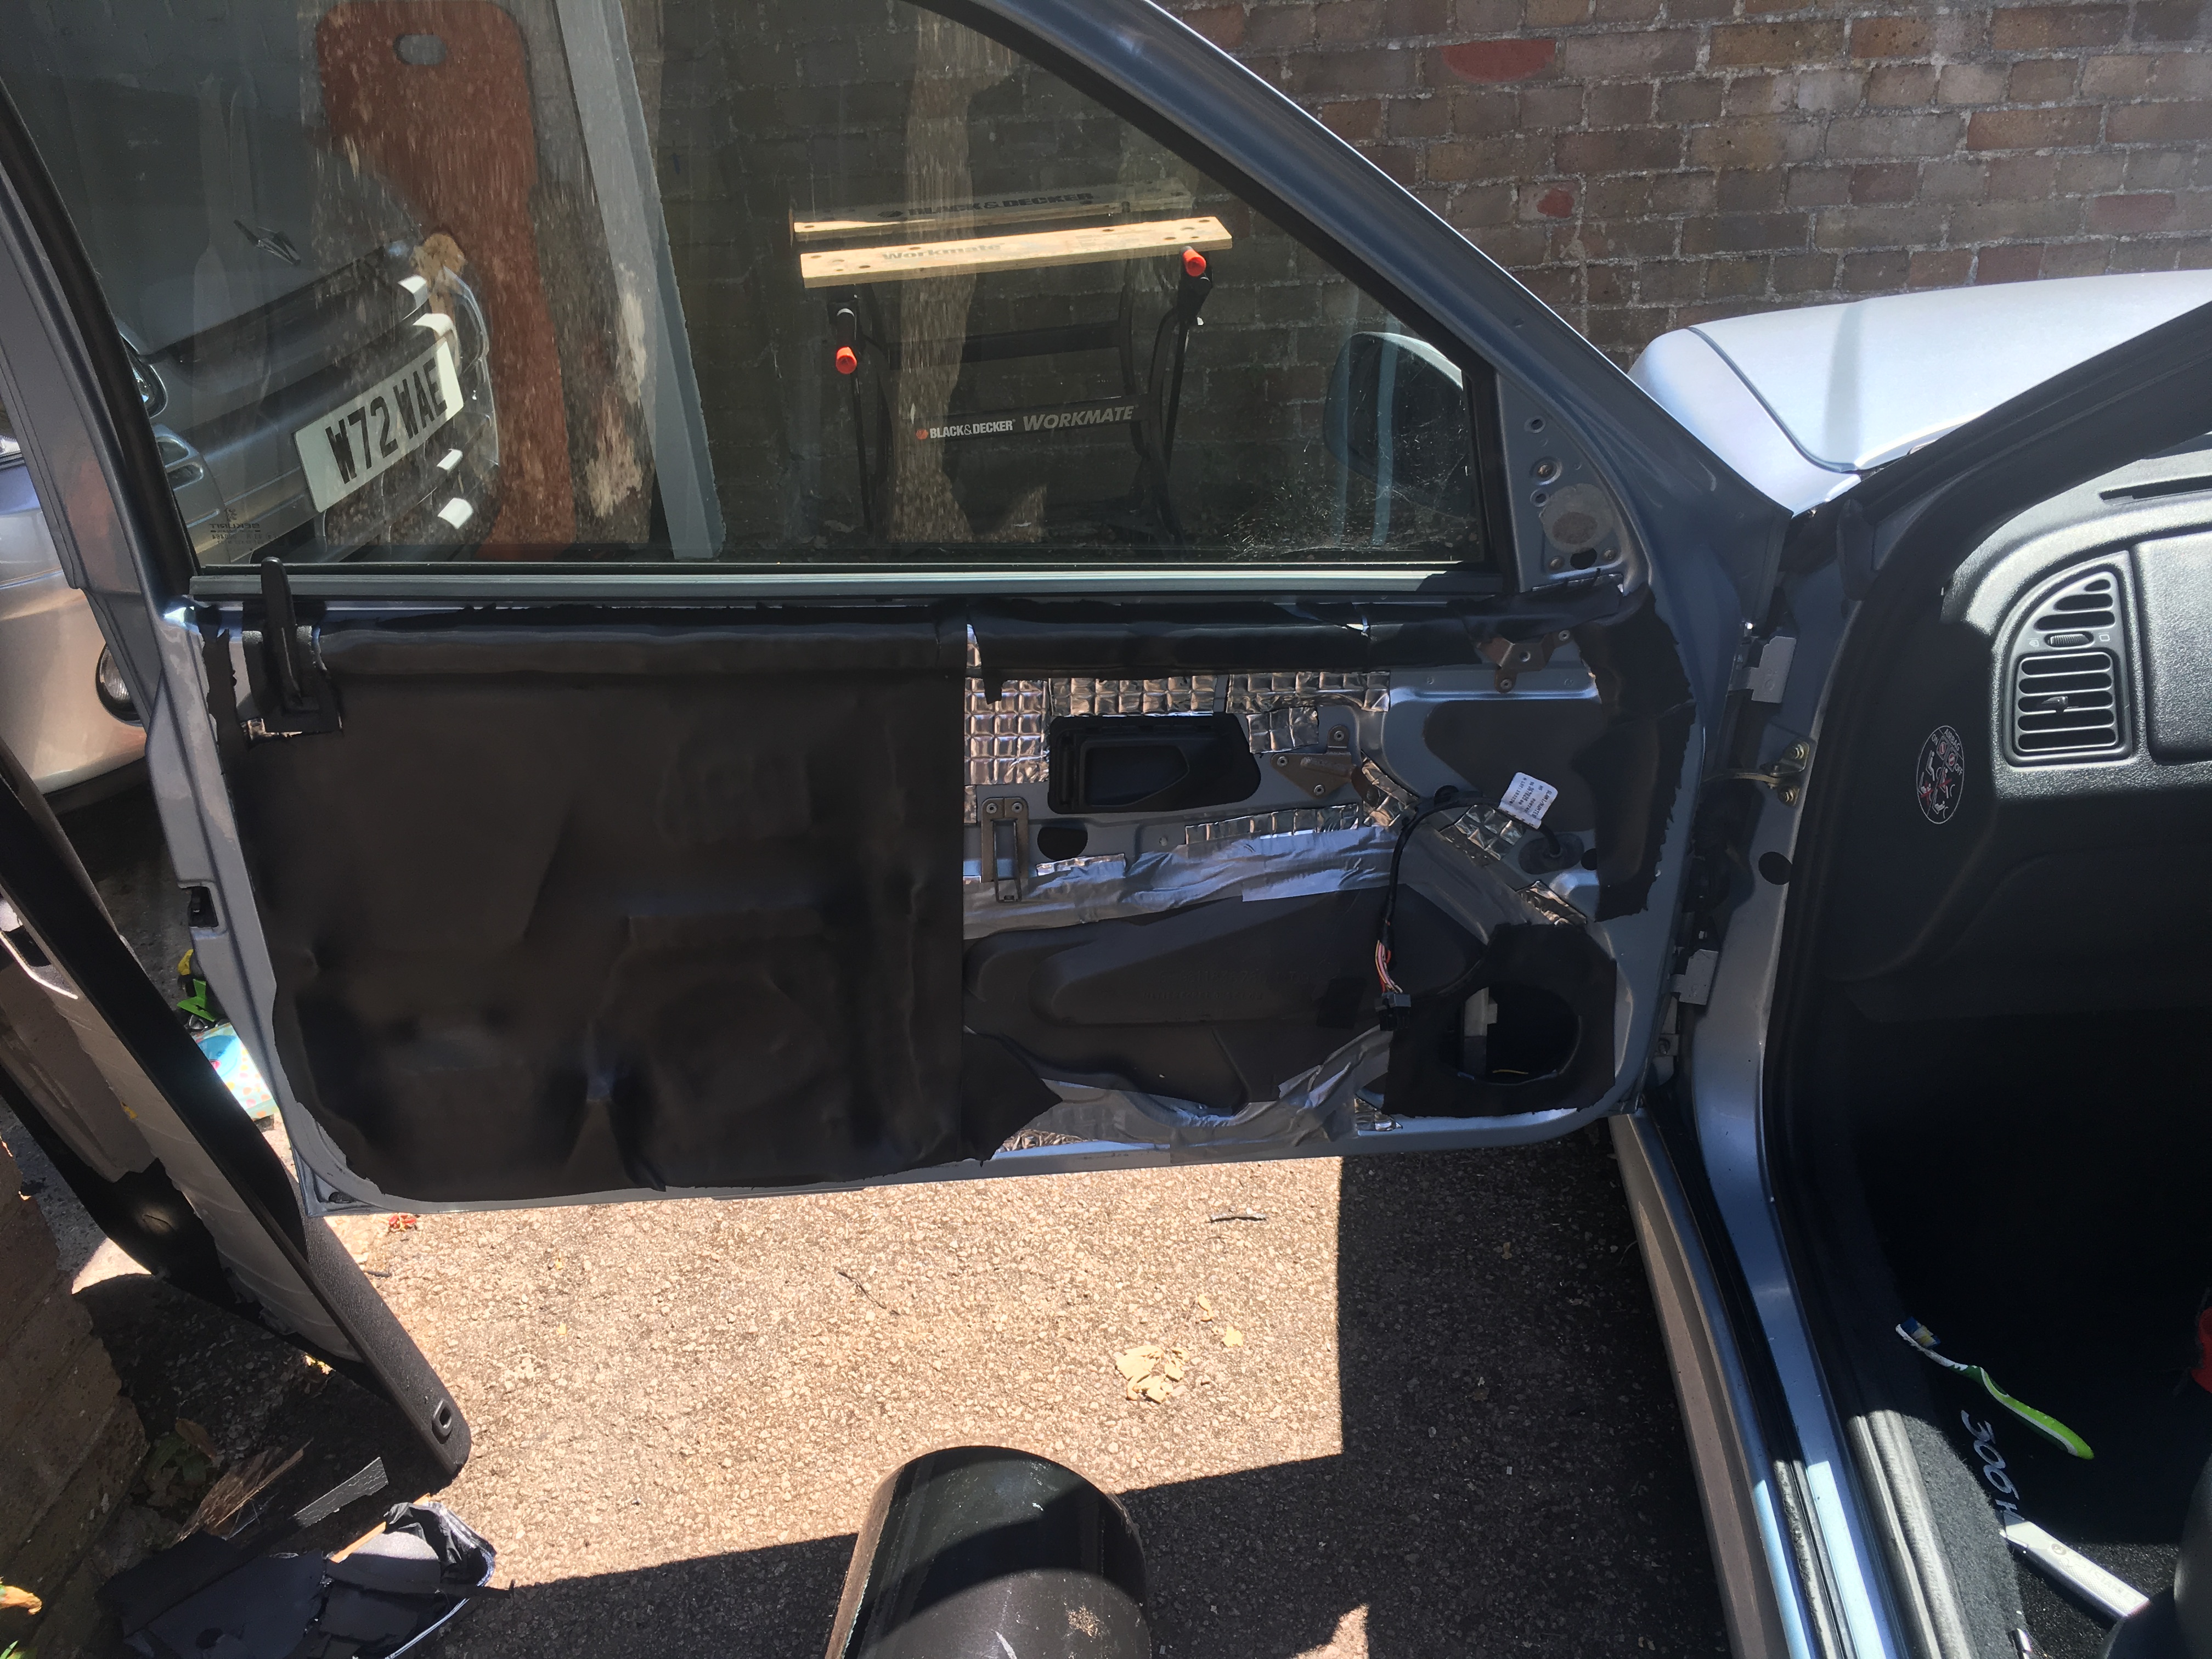
There were quite a few dents in the car in particular a massive one on the front wing and the driver's side door so I eventually managed to get a slot with Gary from GB Dents who did the work on my Clio - he's really meticulous at what he does and it has made a pretty big visual impact.

One of the most noticeable things about the car was the sagging/peeling weather strips on the b pillars. I ordered some more online and using a hairdryer took the old stuff off. The glue underneath was more trouble than I thought to remove so after trying IPA I used 2000 grit sandpaper to get rid of the residue and then reapplied the new strips. I did the passenger side first and it had a few tiny air bubbles but the drivers' side was much better.
Before

And following on from FCS I ordered a few goodies including a set of Heko wind deflectors which I fitted at the same time.
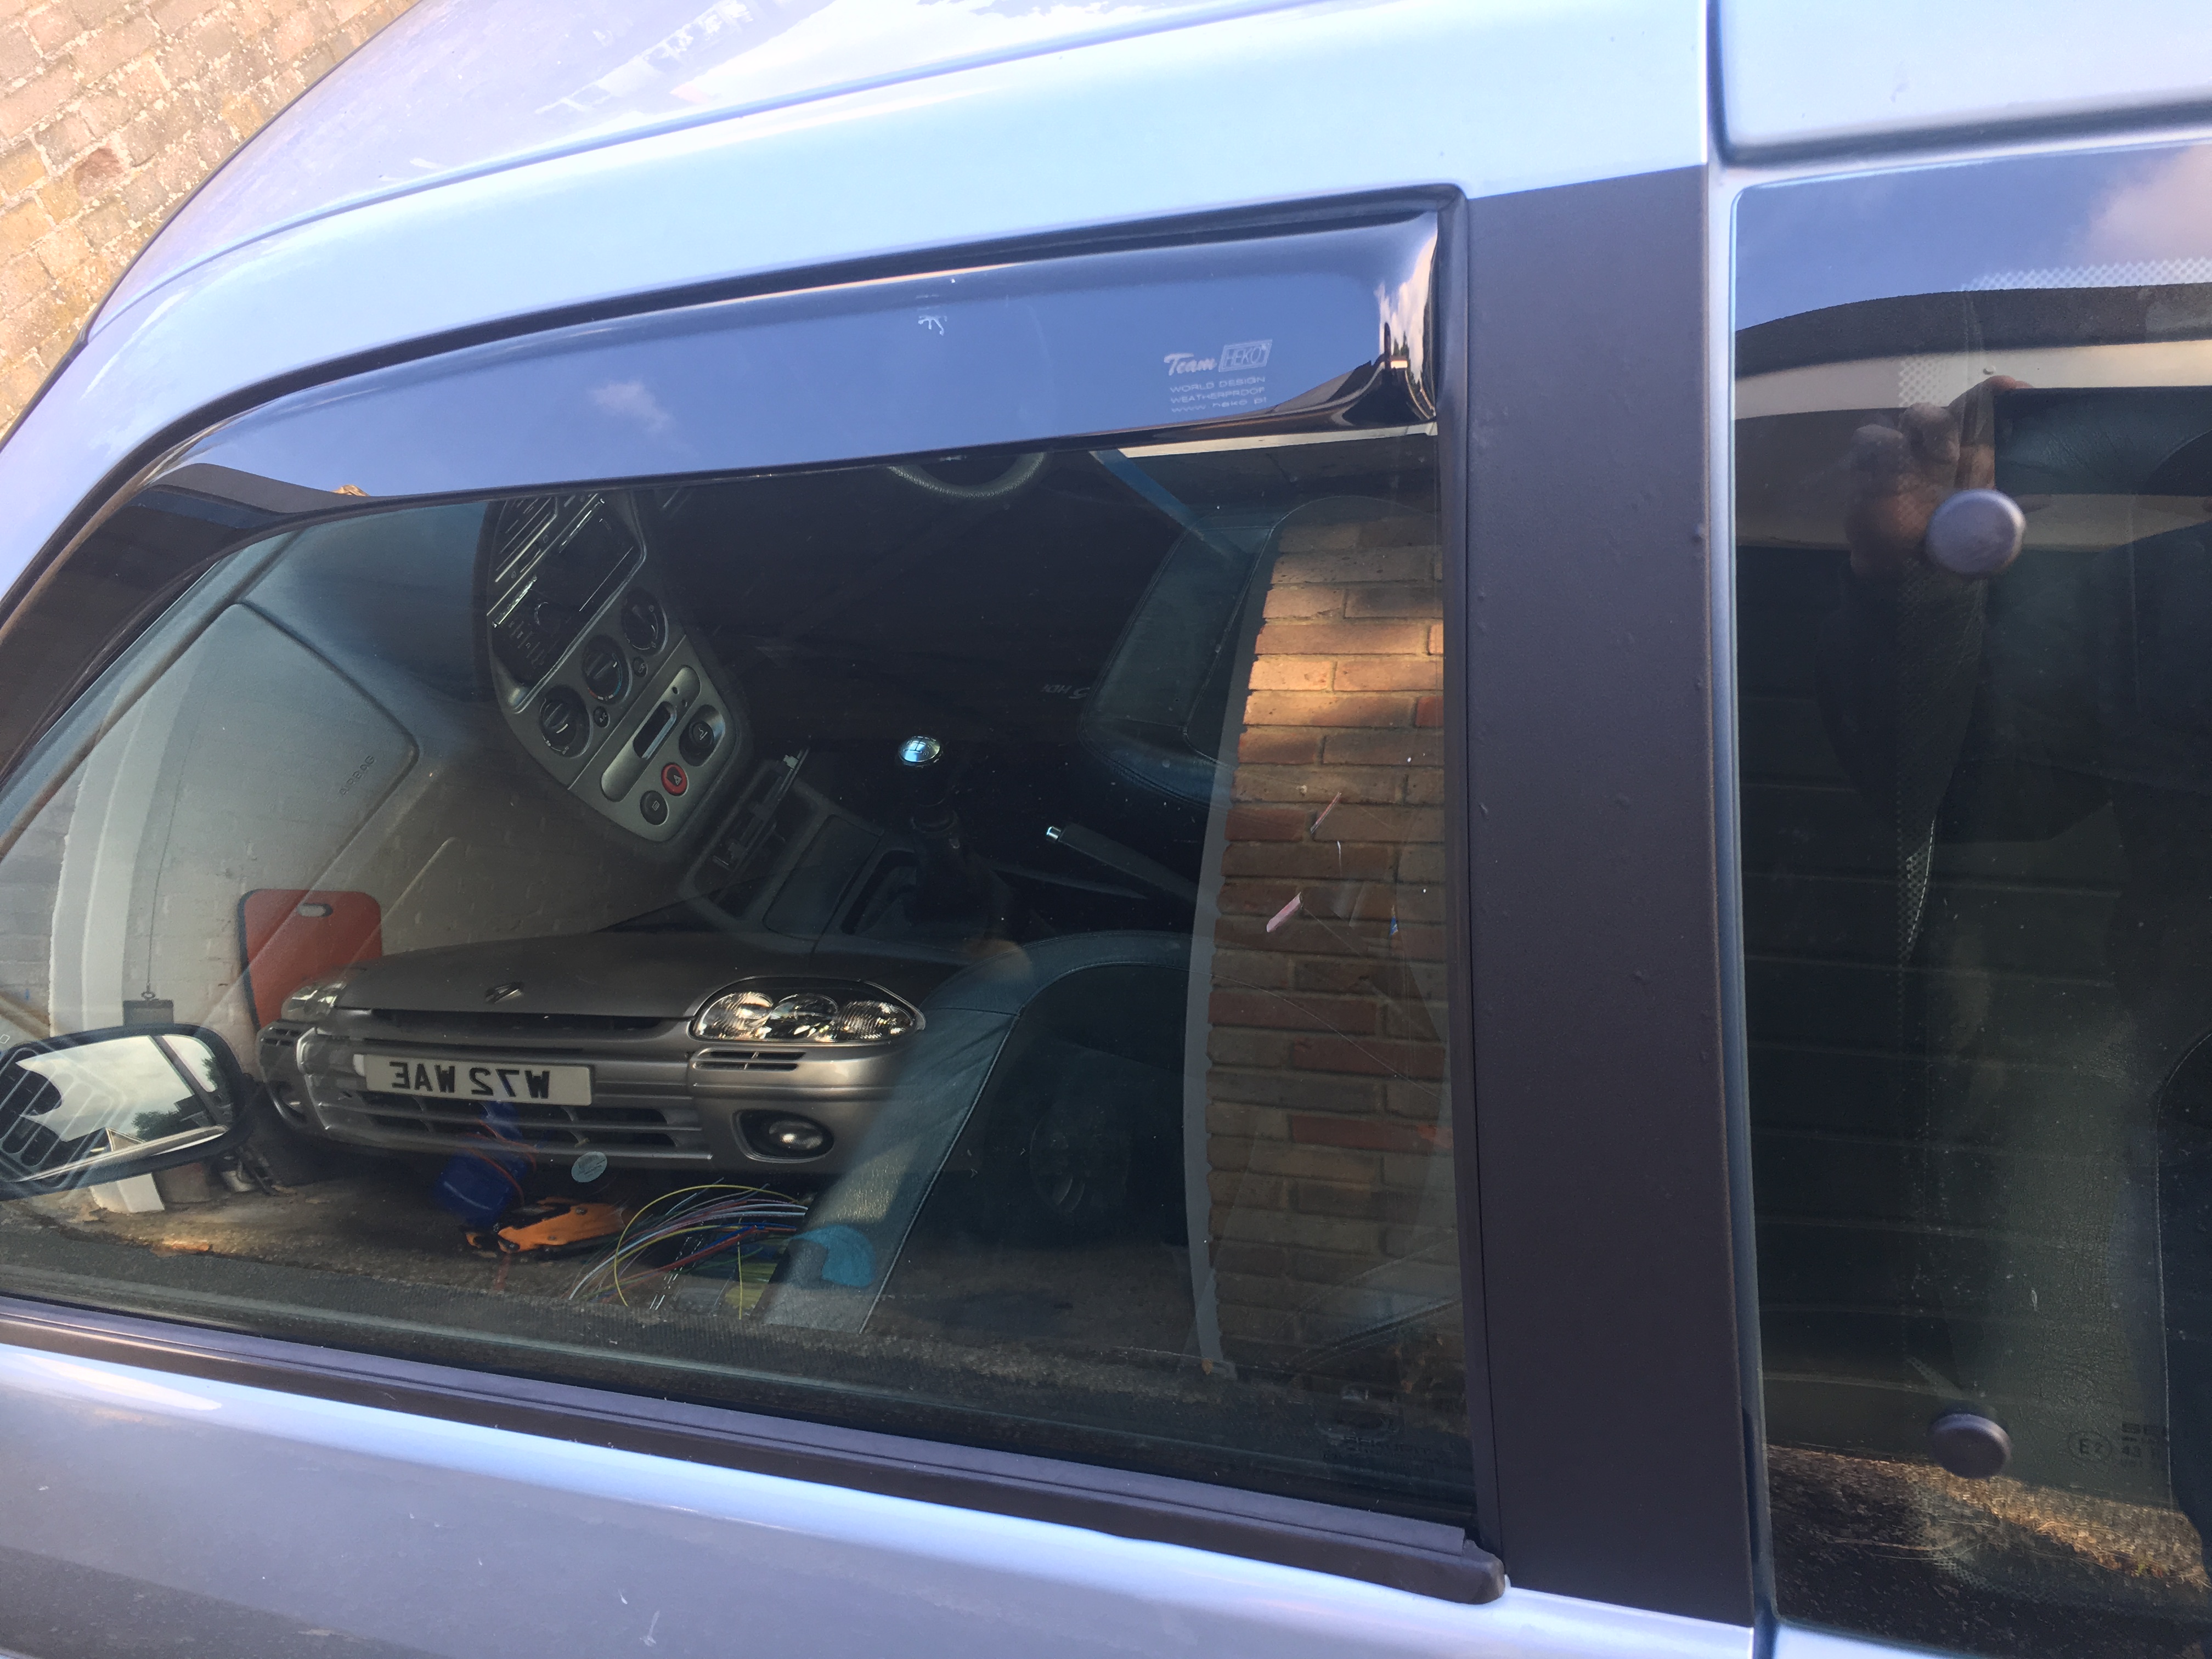
Driver's side was better as I had figured out how best to apply them..

I spoke to a few of the guys at FCS and asked if it was possible to retrofit aircon to my car, to which I received a somewhat confused response because all HDIs were supposed to come with aircon as standard anyway and it was odd that mine didn't have it?! It wasn't until a week or so later that I realised I had fitted a newer (less scratched) dash surround I got from a breakers yard and as it was from a non-aircon model I'd stupidly just covered up my aircon button...oops! Sadly the aircon didn't respond to regassing so it's a nother thing to add to the list.
Buttons hiding behind the fascia.

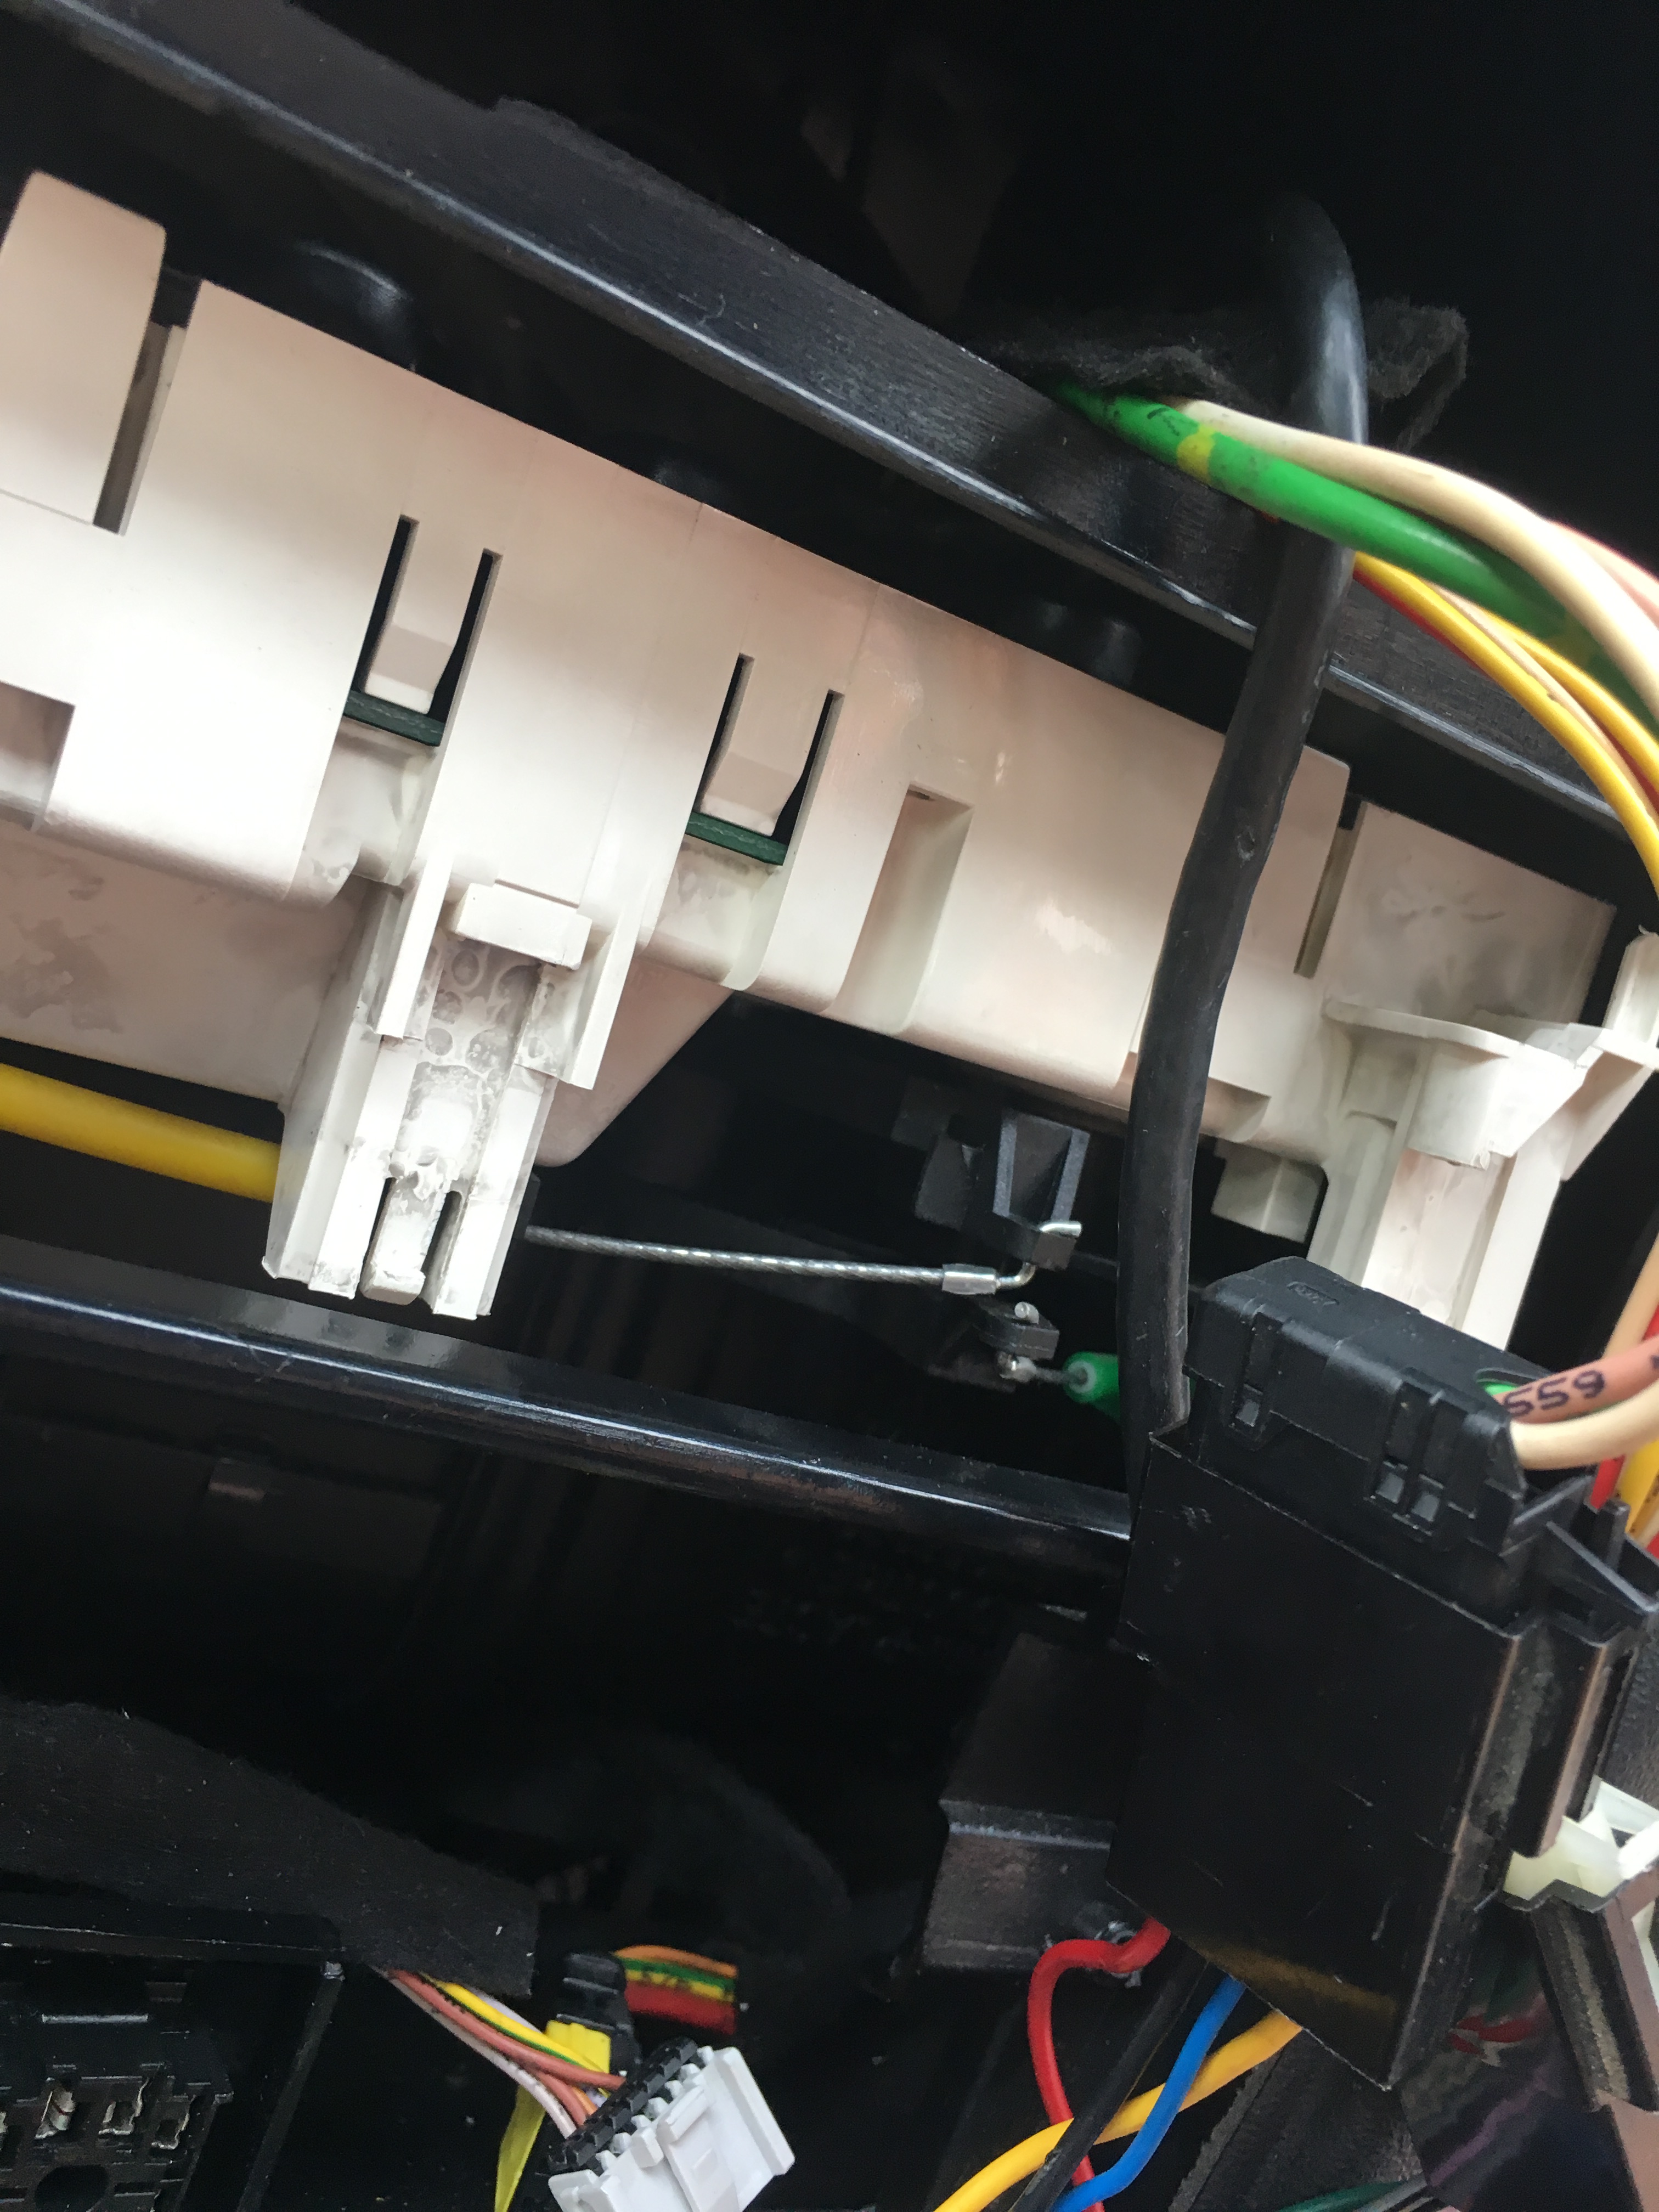
I had previously snapped my yellow heater control dial cable so I sourced and fitted another one - I now can now control both the temperature and airflow in the car which is a bonus. It was a bit of a pain to fit as there wasn't much clearance but it eventually clicked into place
Next on my to do list is to solder in a new loom to get the drivers' side window and speaker working again. Not really looking forward to this if I'm honest but I'll be using Cully's guide from the forum which seems pretty detailed.
One final shot of the dent work going on just because I thought it was a cool angle that showed the cars lines nicely...

Thanks for reading!
190k Moonstone 3dr HDI sold
..on the lookout for a 6/rallye
Posts: 141
Threads: 12
Joined: Mar 2017
Reputation:
0
Location: Surrey
Car Model/Spec: Golf6R, Ph1 172 (x2!)
Thanks: 2
Given 2 thank(s) in 2 post(s)
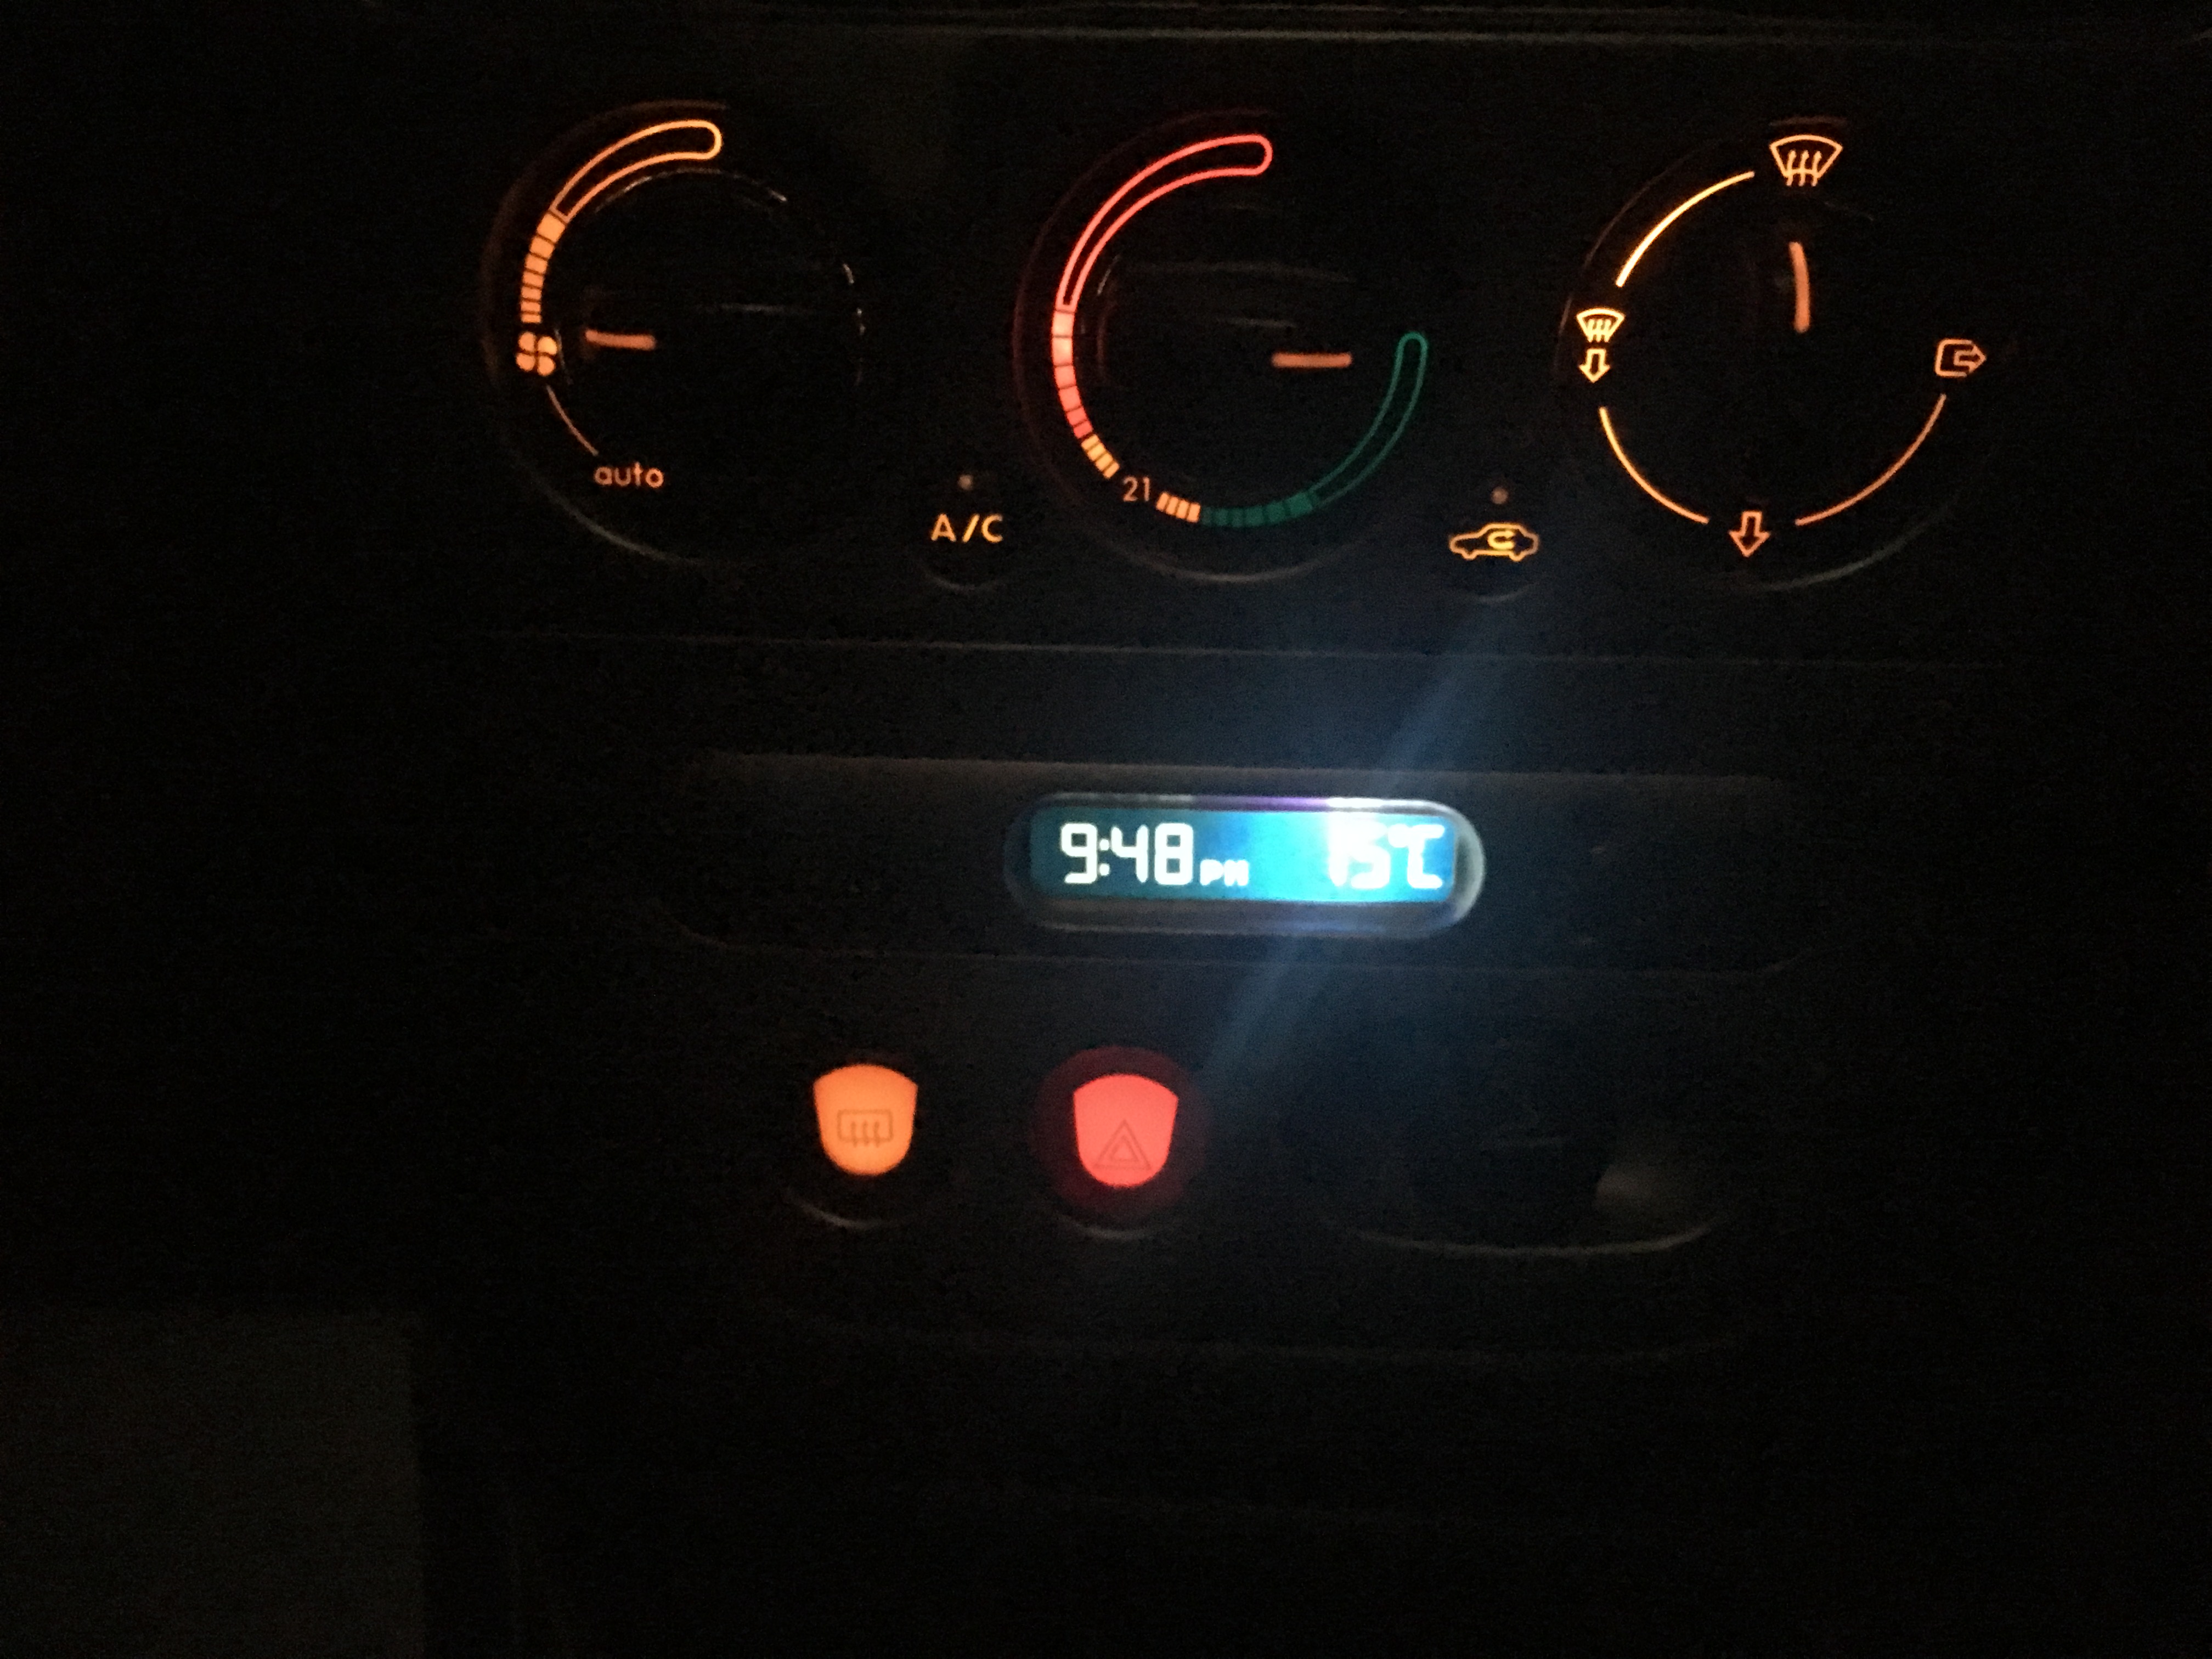
I finally took the dash out again, having changed all the bulbs for ones I got from www.crazyleds.co.uk I wanted to make a better job of removing the yellow dye on the rear of the dials so the dash now properly lights up white. I wasn't aggressive enough with sandpapering the dye off the dials first time round, I felt the instructions were a bit confusing, but they look really nice now and the white light looks a lot fresher.
Before - you can see that the rev counter is a kind of green colour as not all the dye was removed and the speedo still has a reddish/orange tinge to it. The milometer stopped working but I think this was a loose wire.
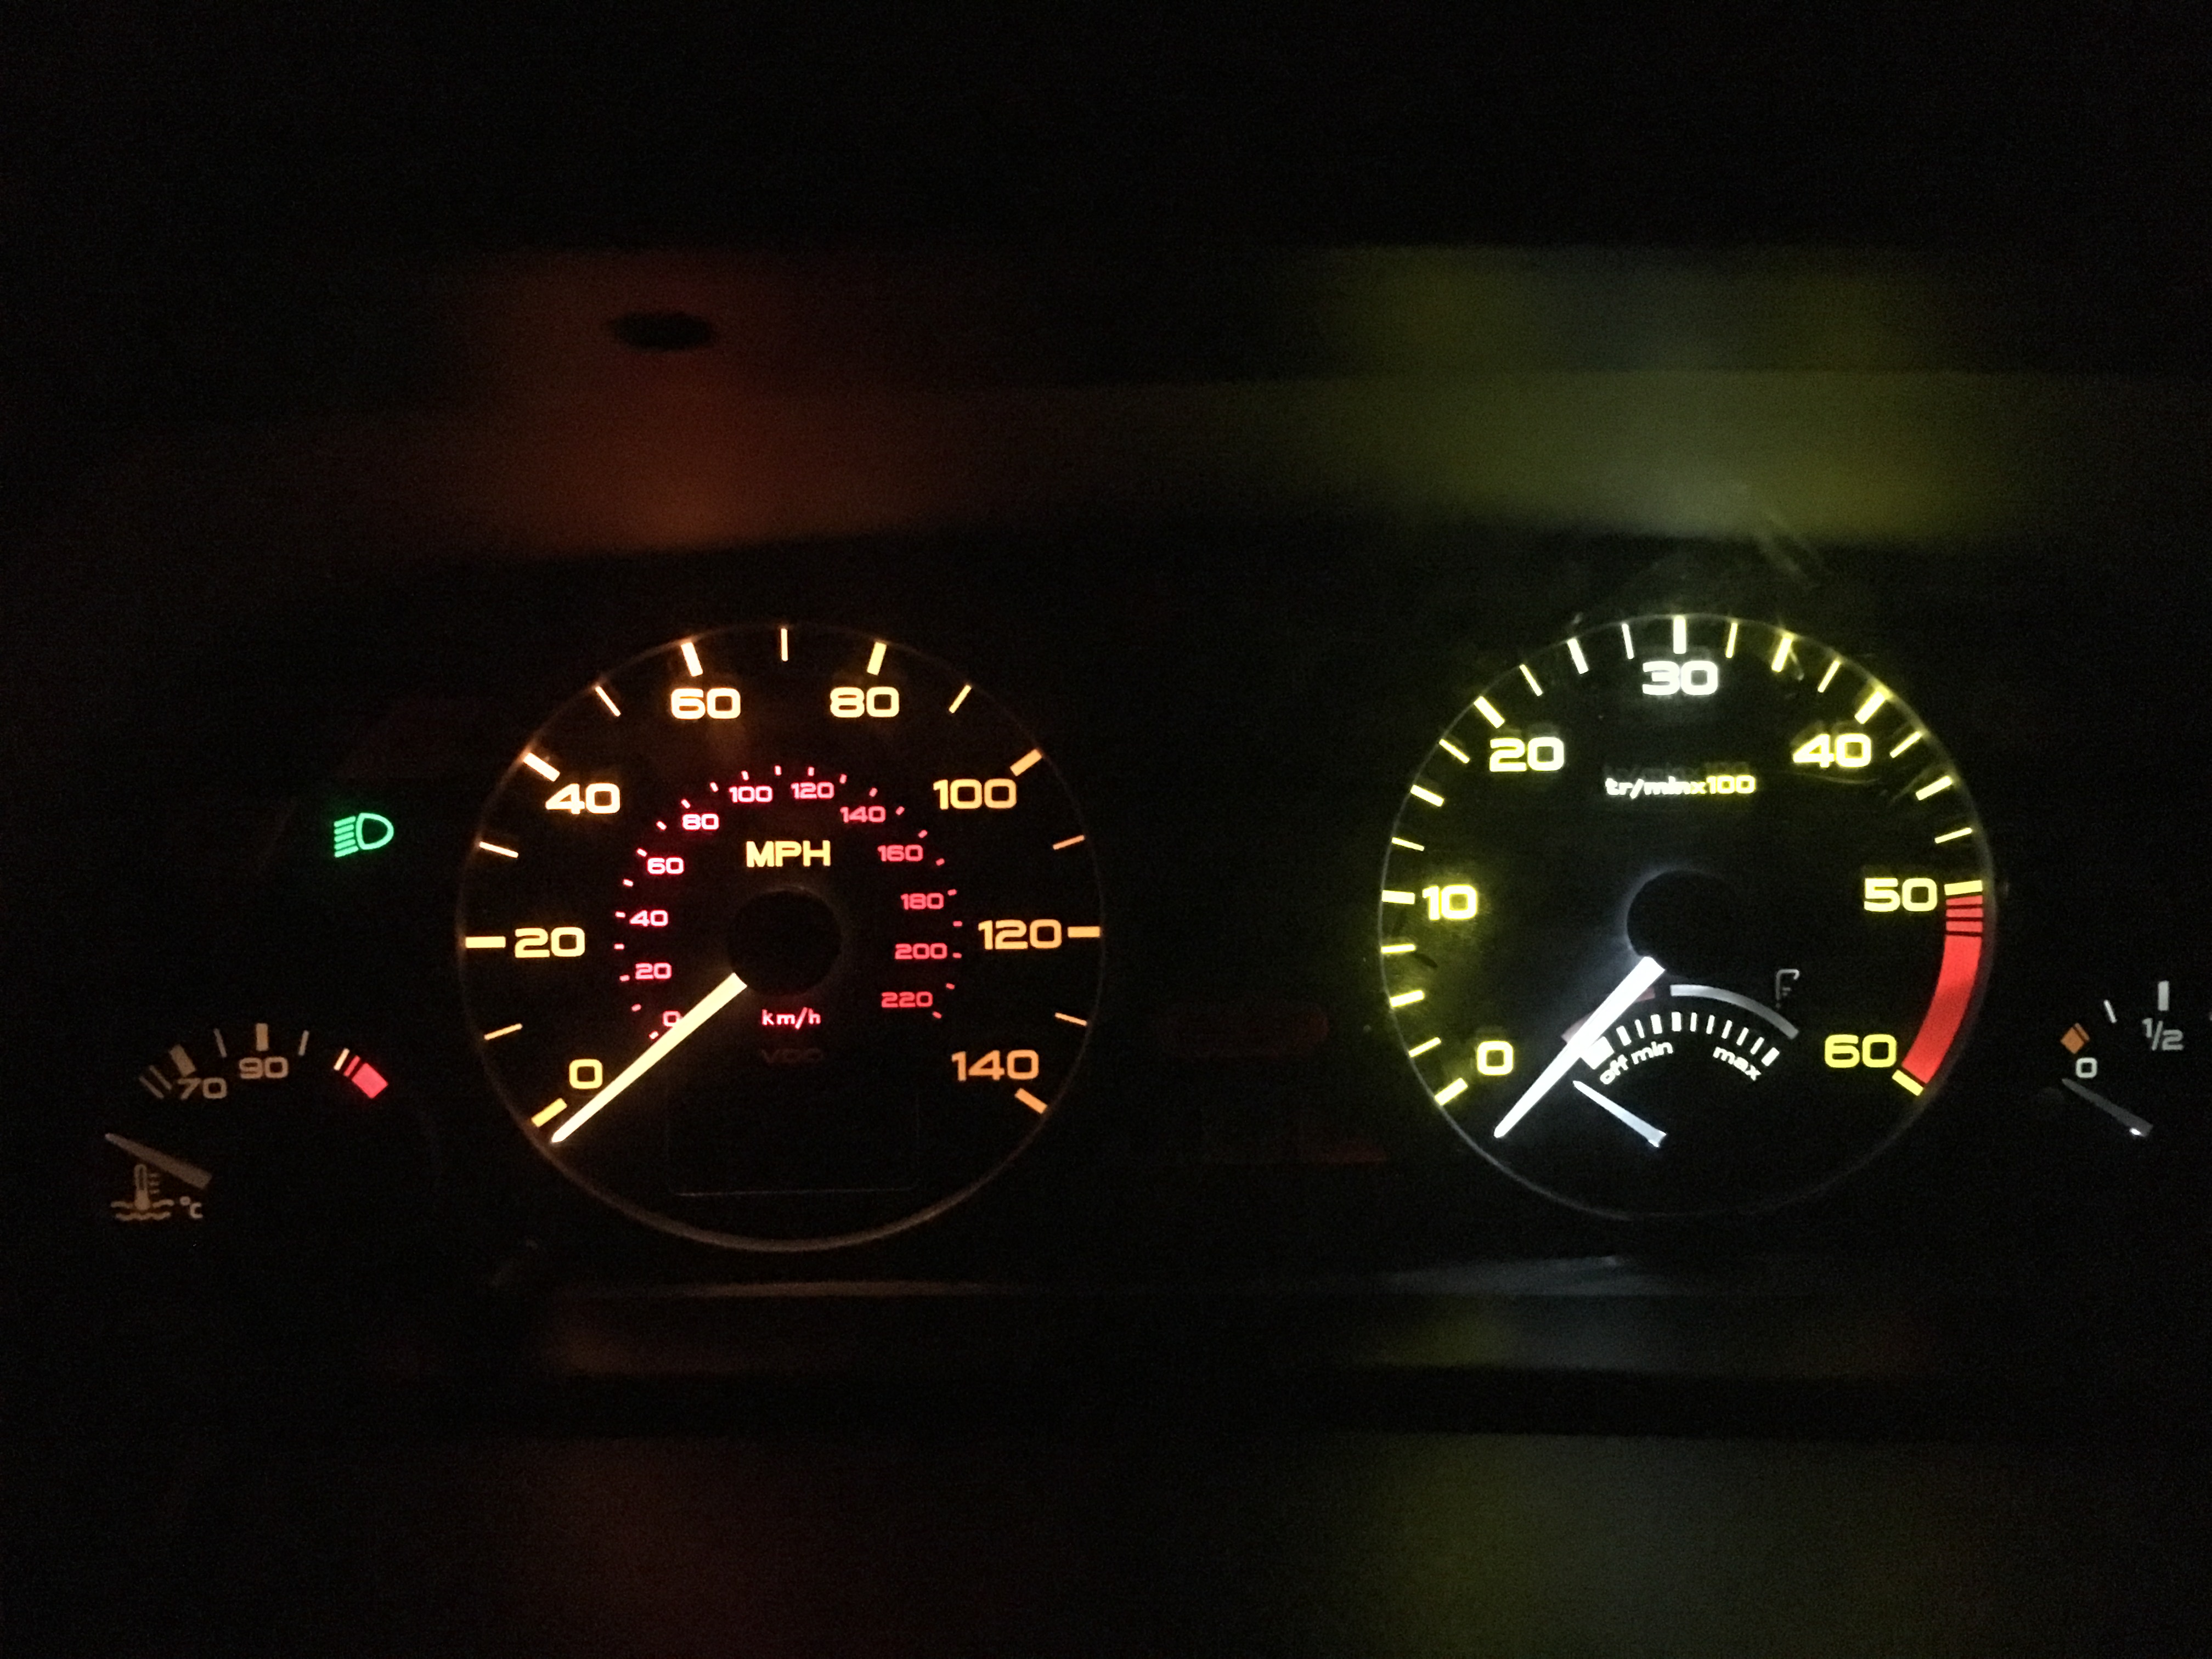
After - both dials nice and white and the milometer is displaying in blue just like the clock...

190k Moonstone 3dr HDI sold
..on the lookout for a 6/rallye
Posts: 13,881
Threads: 476
Joined: Dec 2011
Reputation:
81
Location: Ipswich
Car Model/Spec: 306 Rallye
Thanks: 4
Given 104 thank(s) in 102 post(s)
Good read and great work. With the clock you can cut a piece of paper to go in place of the filter. this will stop the bright spots.
Posts: 141
Threads: 12
Joined: Mar 2017
Reputation:
0
Location: Surrey
Car Model/Spec: Golf6R, Ph1 172 (x2!)
Thanks: 2
Given 2 thank(s) in 2 post(s)
Cheers fella, I actually installed the white filters that came with the crazyleds kit behind both the milometer and the clock - I think it must be a smudge on my iPhone camera making it look like a bright spot/flare. If anything I'd like to make the fuel gauge and the temperature sensors brighter but they weren't bright when they had normal bulbs so I don't think that's even possible.
190k Moonstone 3dr HDI sold
..on the lookout for a 6/rallye
Posts: 141
Threads: 12
Joined: Mar 2017
Reputation:
0
Location: Surrey
Car Model/Spec: Golf6R, Ph1 172 (x2!)
Thanks: 2
Given 2 thank(s) in 2 post(s)
Time for an update on this as I've been doing a few bits and bobs to it over the last few months.
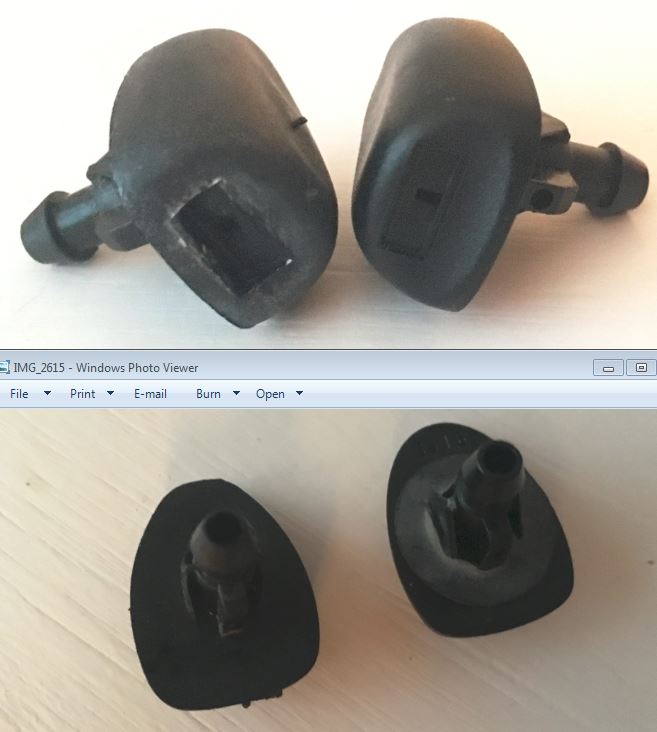
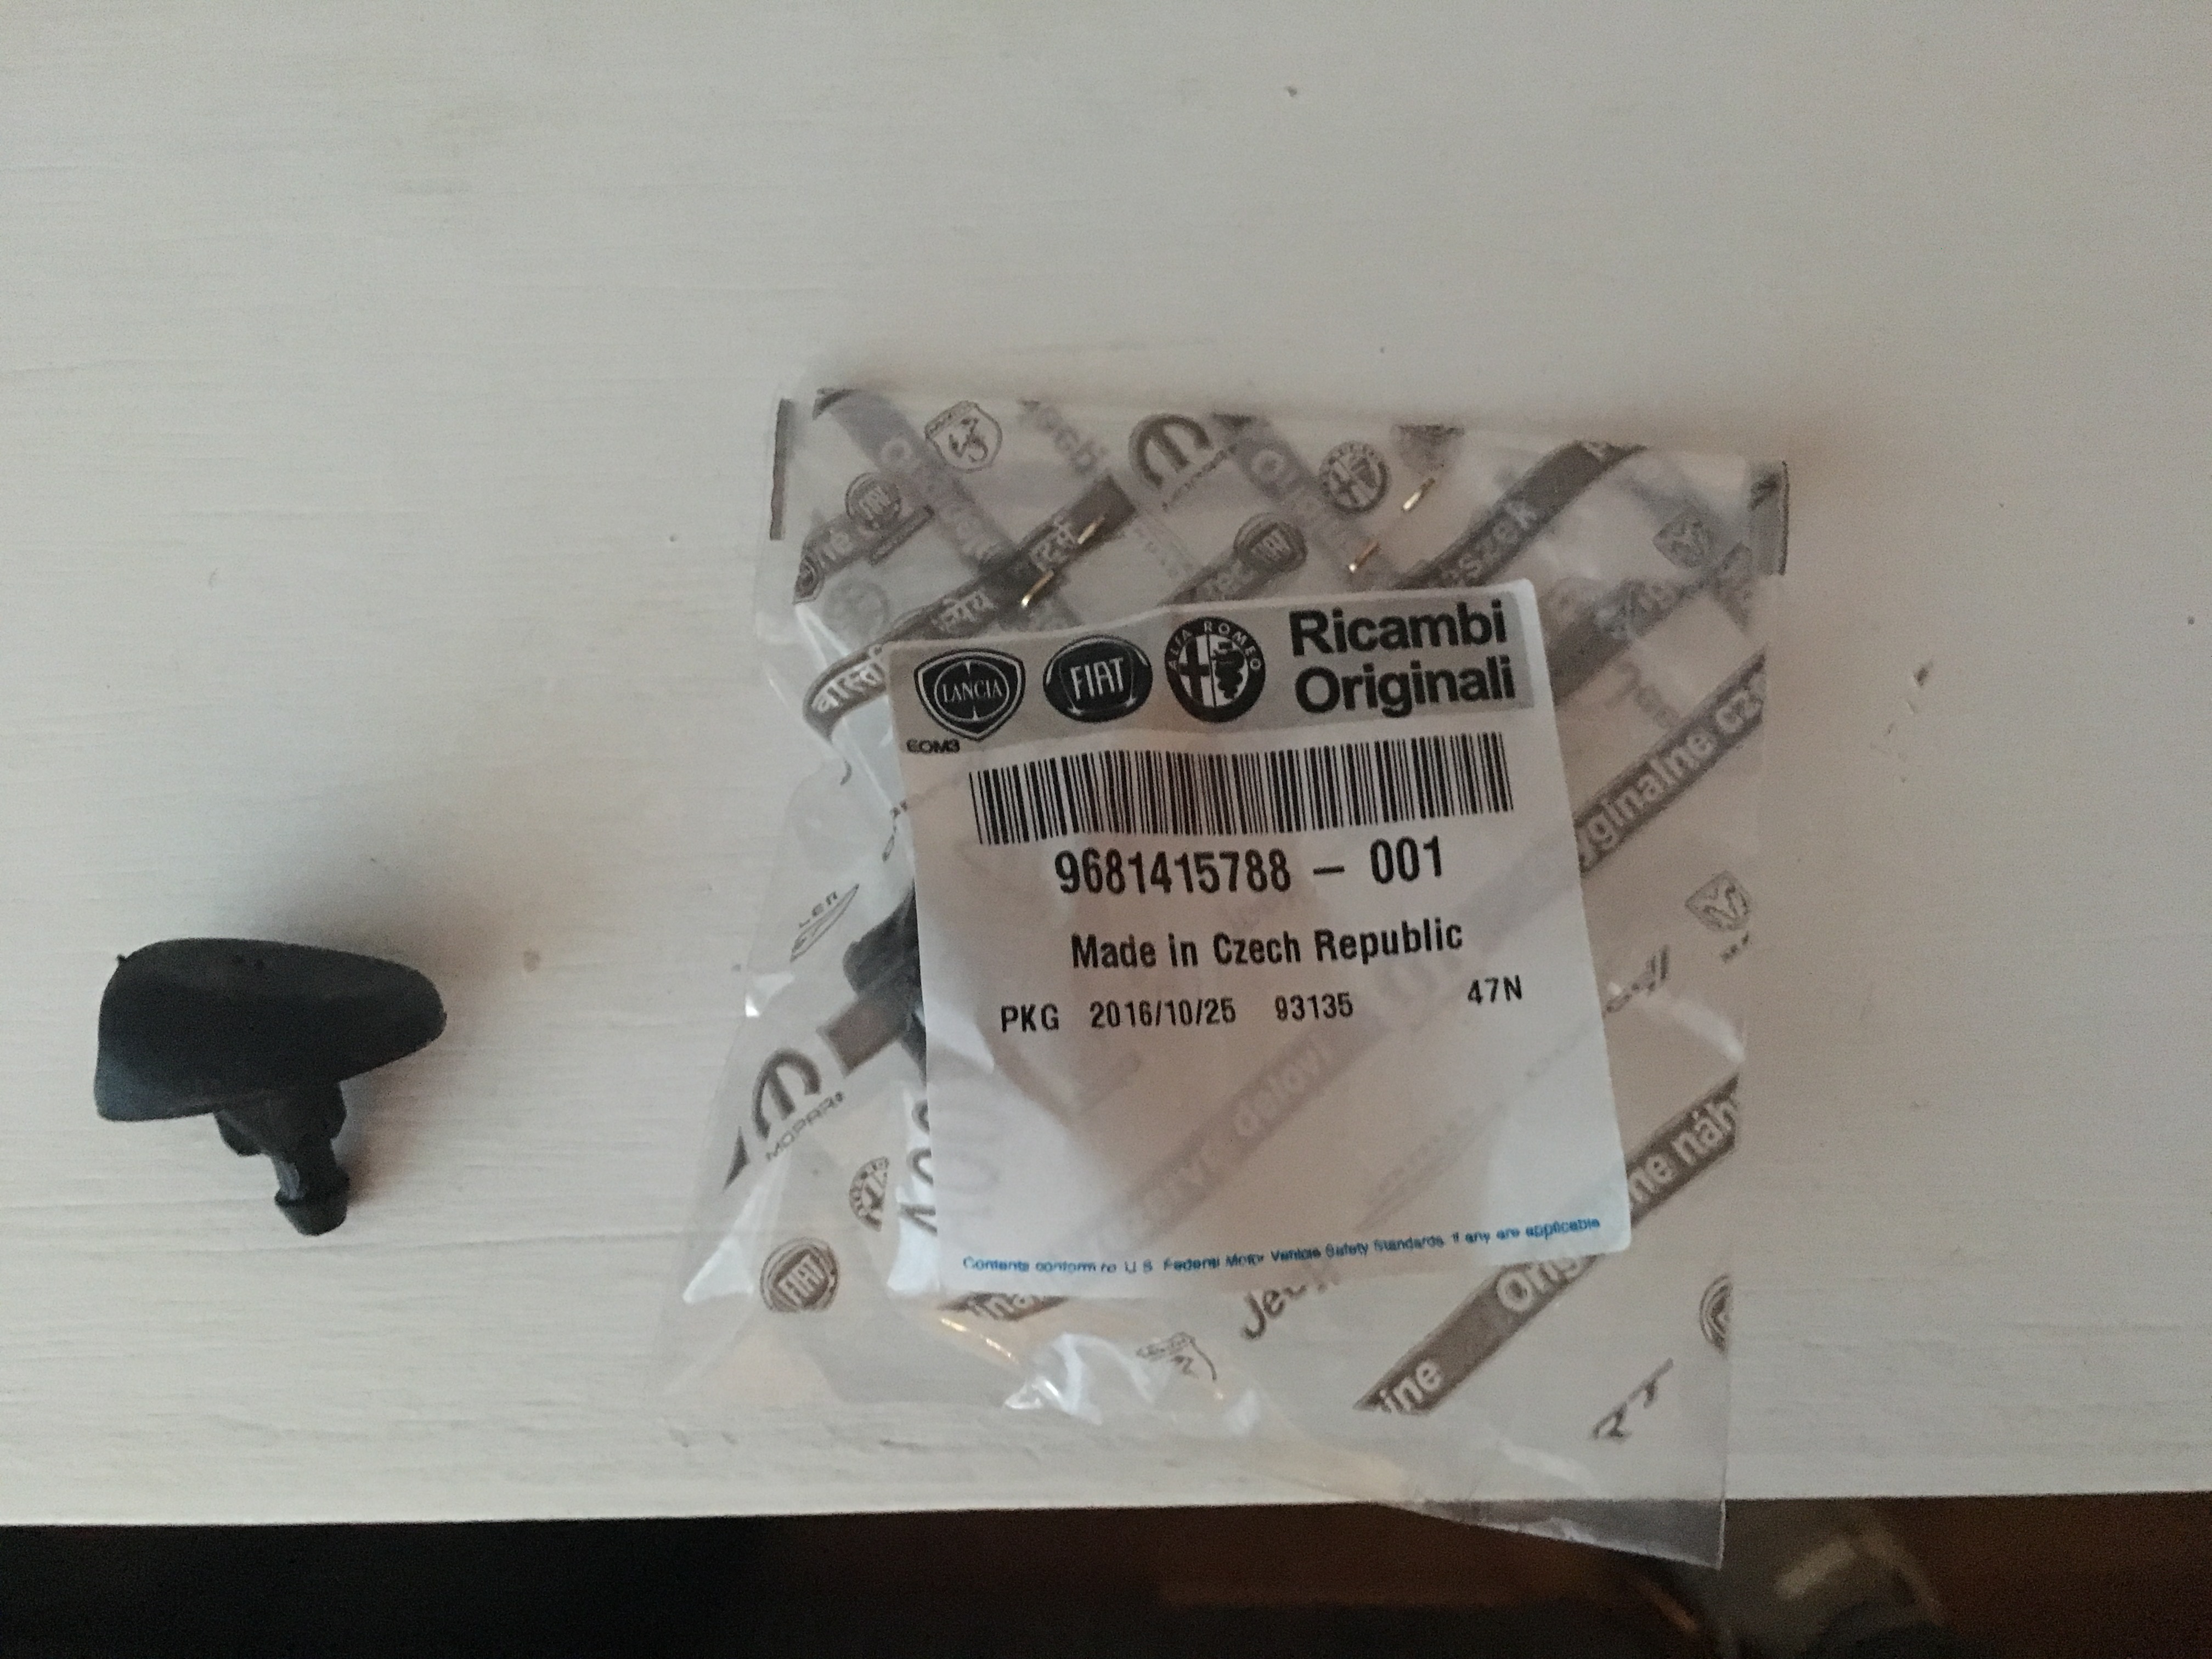
First up, after the third attempt I got the right washer jets which are indeed labelled Fiat (thanks Frosty!). Picture for comparison between the one that didn't work (on the left) and the one that did (on the right) and in packaging with reference number in case anyone needs it in future.
The jets worked perfectly after fitting but unfortunately they no longer work - it's not the fuse and I tried squirting them with the jets removed which didn't work so I've ordered another pump as the current pump just makes a clicking noise when I pull the stalk.
After the joy of new jets it was time for another trip to Southampton to see Alex who fitted new Sachs OEM replacement shocks all round with Eibach proline springs on the front together with a new top mount kit, bump stops and dust boots.
There was quite a different in the spring size but the drop isn't all that noticeable because I didn't realise that as they're effectively gti6 springs and the engine doesn't weigh as much there would be very little appreciable difference. Whilst I was probably hoping for more of a drop to offset the look of the really low back end I am really pleased with the way the car handles and rides now though - it soaks up bumps even on 17"s and I feel so much more confident driving it, especially after getting the tracking sorted out.
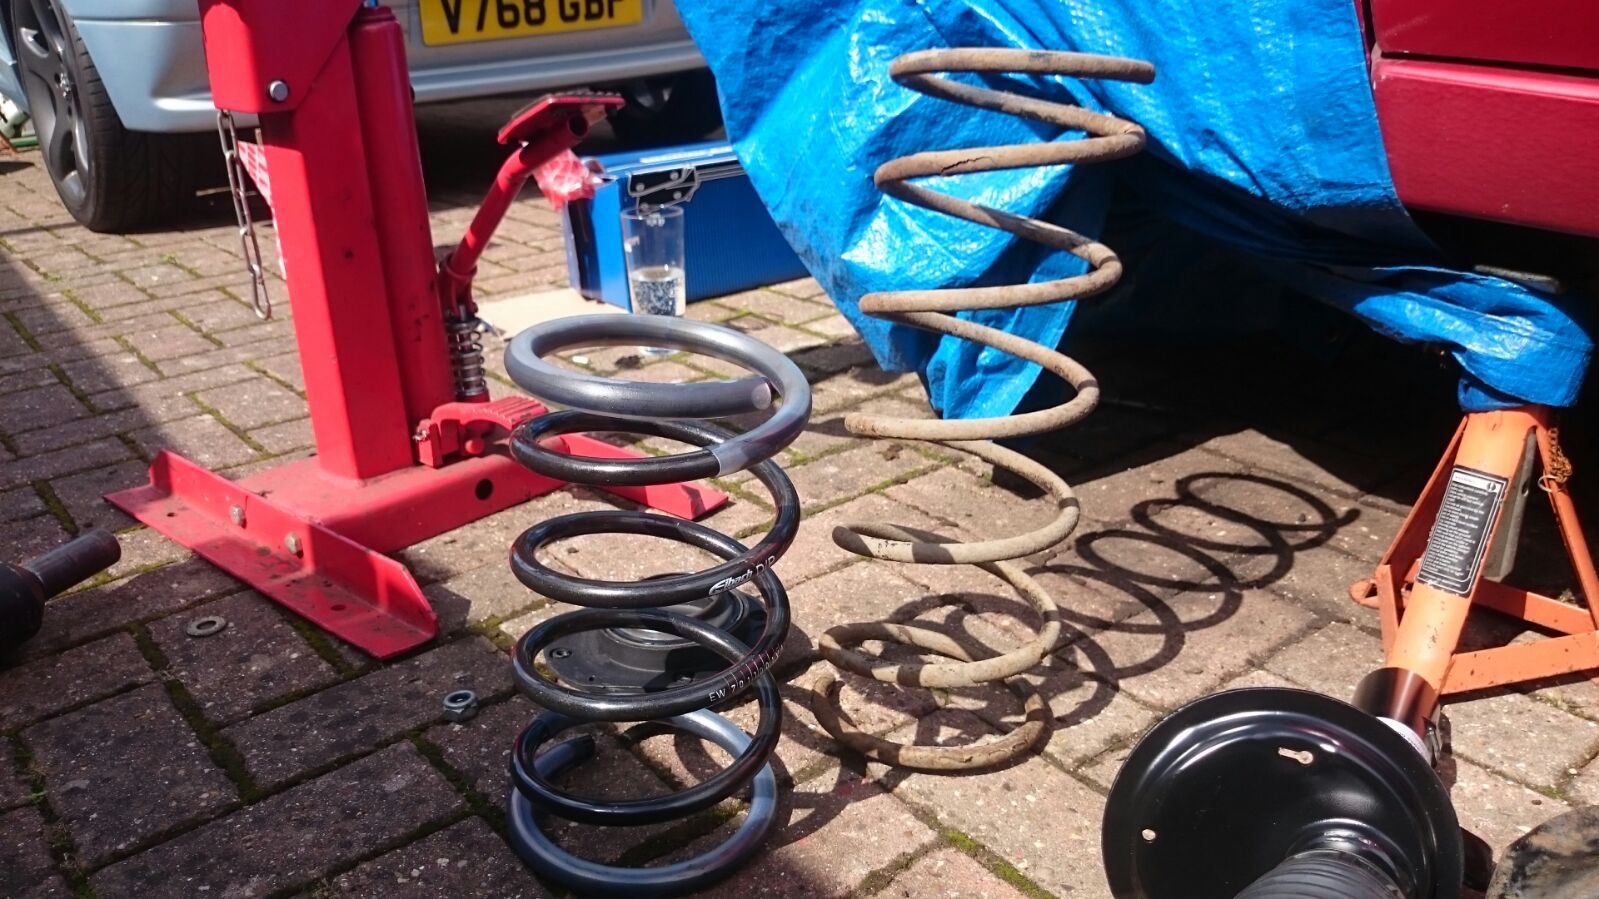
There has been a drop but the stance hasn't changed much really:
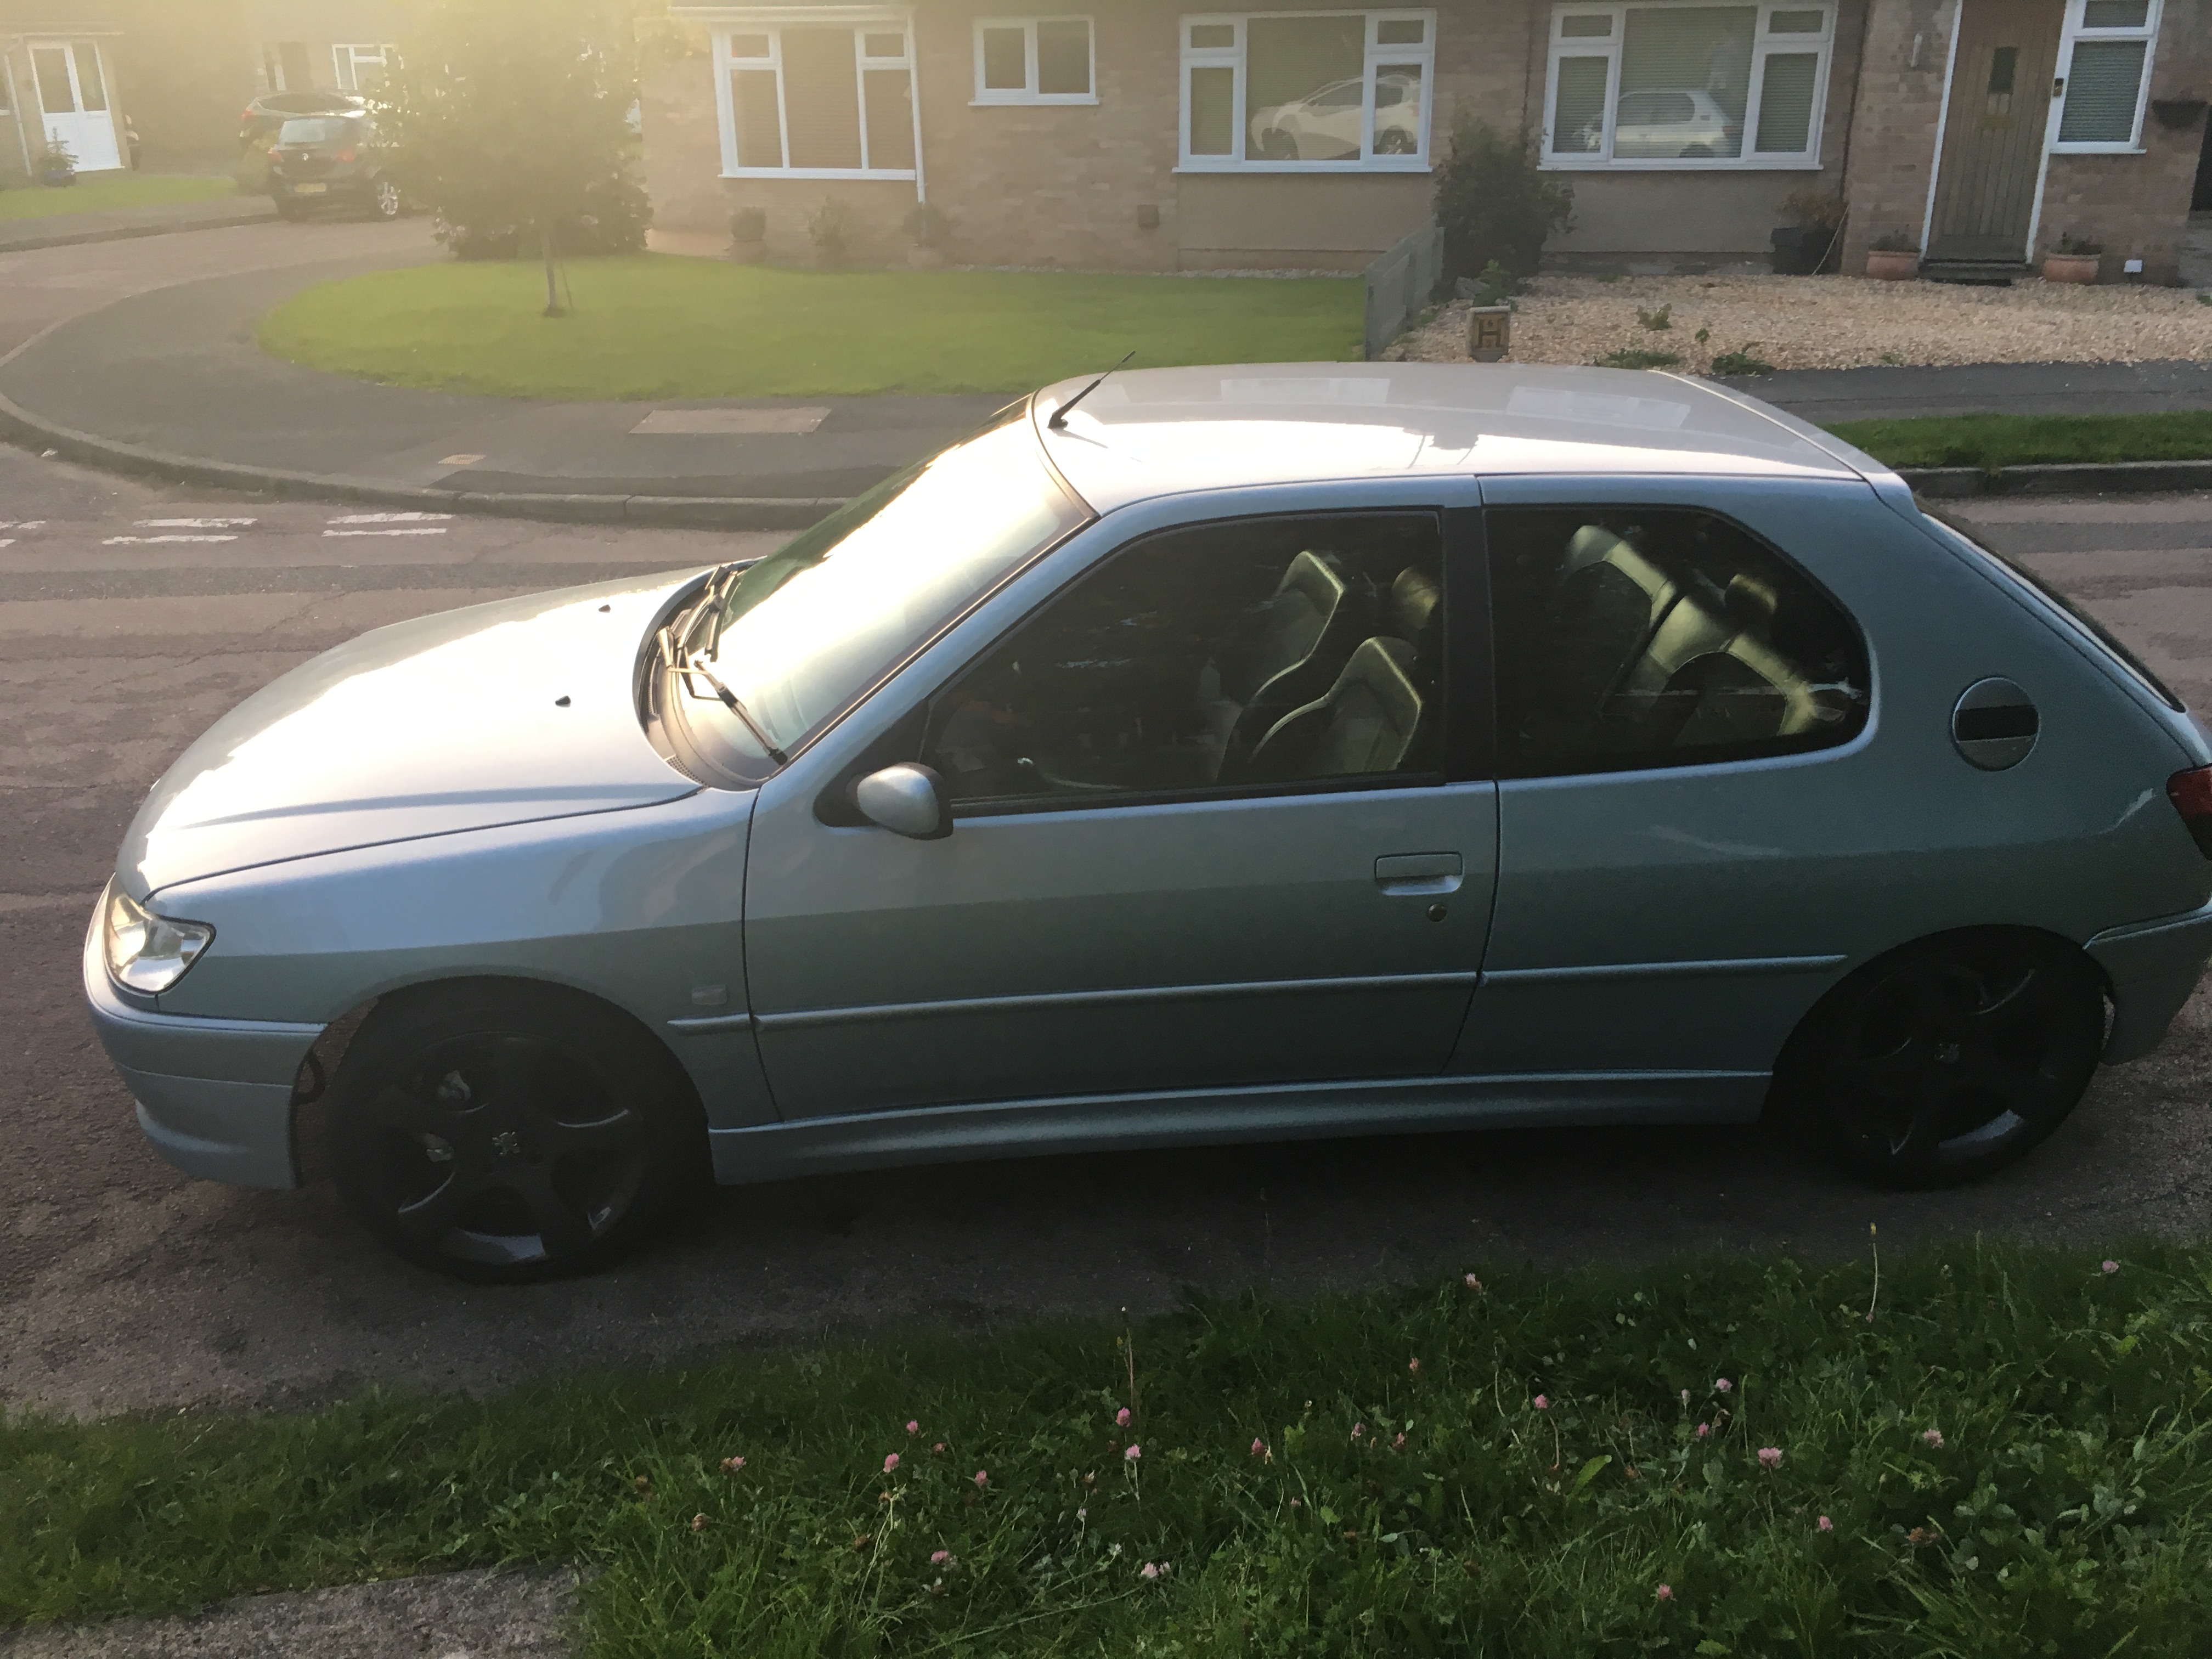
I am considering raising the rear to make it look more balanced as it rides so well with the new springs/shocks and I reckon it would be a shame to put ebay springs on the front and screw up the ride/handling

190k Moonstone 3dr HDI sold
..on the lookout for a 6/rallye
Posts: 141
Threads: 12
Joined: Mar 2017
Reputation:
0
Location: Surrey
Car Model/Spec: Golf6R, Ph1 172 (x2!)
Thanks: 2
Given 2 thank(s) in 2 post(s)
01-10-2017, 10:18 AM
(This post was last modified: 01-10-2017, 10:21 AM by partybish.)
With the suspension sorted I moved on to a job I had been putting off for a while which was rewiring my driver's door loom. I followed cully's really helpful guide and gathered the parts (I got the loom which was part no. 6542 VQ from a German ebay seller for about £57 and postage on top).
The new loom had plenty of length on it but quite a few wires coming from my A pillar had broken so getting them to match up right was a bit of a pain.


I used a cable marking/numbering kit (Hellerman Tyton)from ebay which was really helpful in numbering the old wires
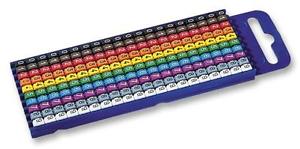
Also I'd never really soldered much before but I found a guide on youtube which was pretty helpful - twisting the wires around each other made things a lot easier as the wires didn't need to be held in place to solder and the joins ended up being a lot smaller meaning I could use the smallest heatshrink to fit over them.
https://www.youtube.com/watch?v=Zu3TYBs65FM
Here's a few notes I made in case they are of use to anyone. As I said a fair few wires had broken off so when it came down to the last few wires it was a bit trial and error.
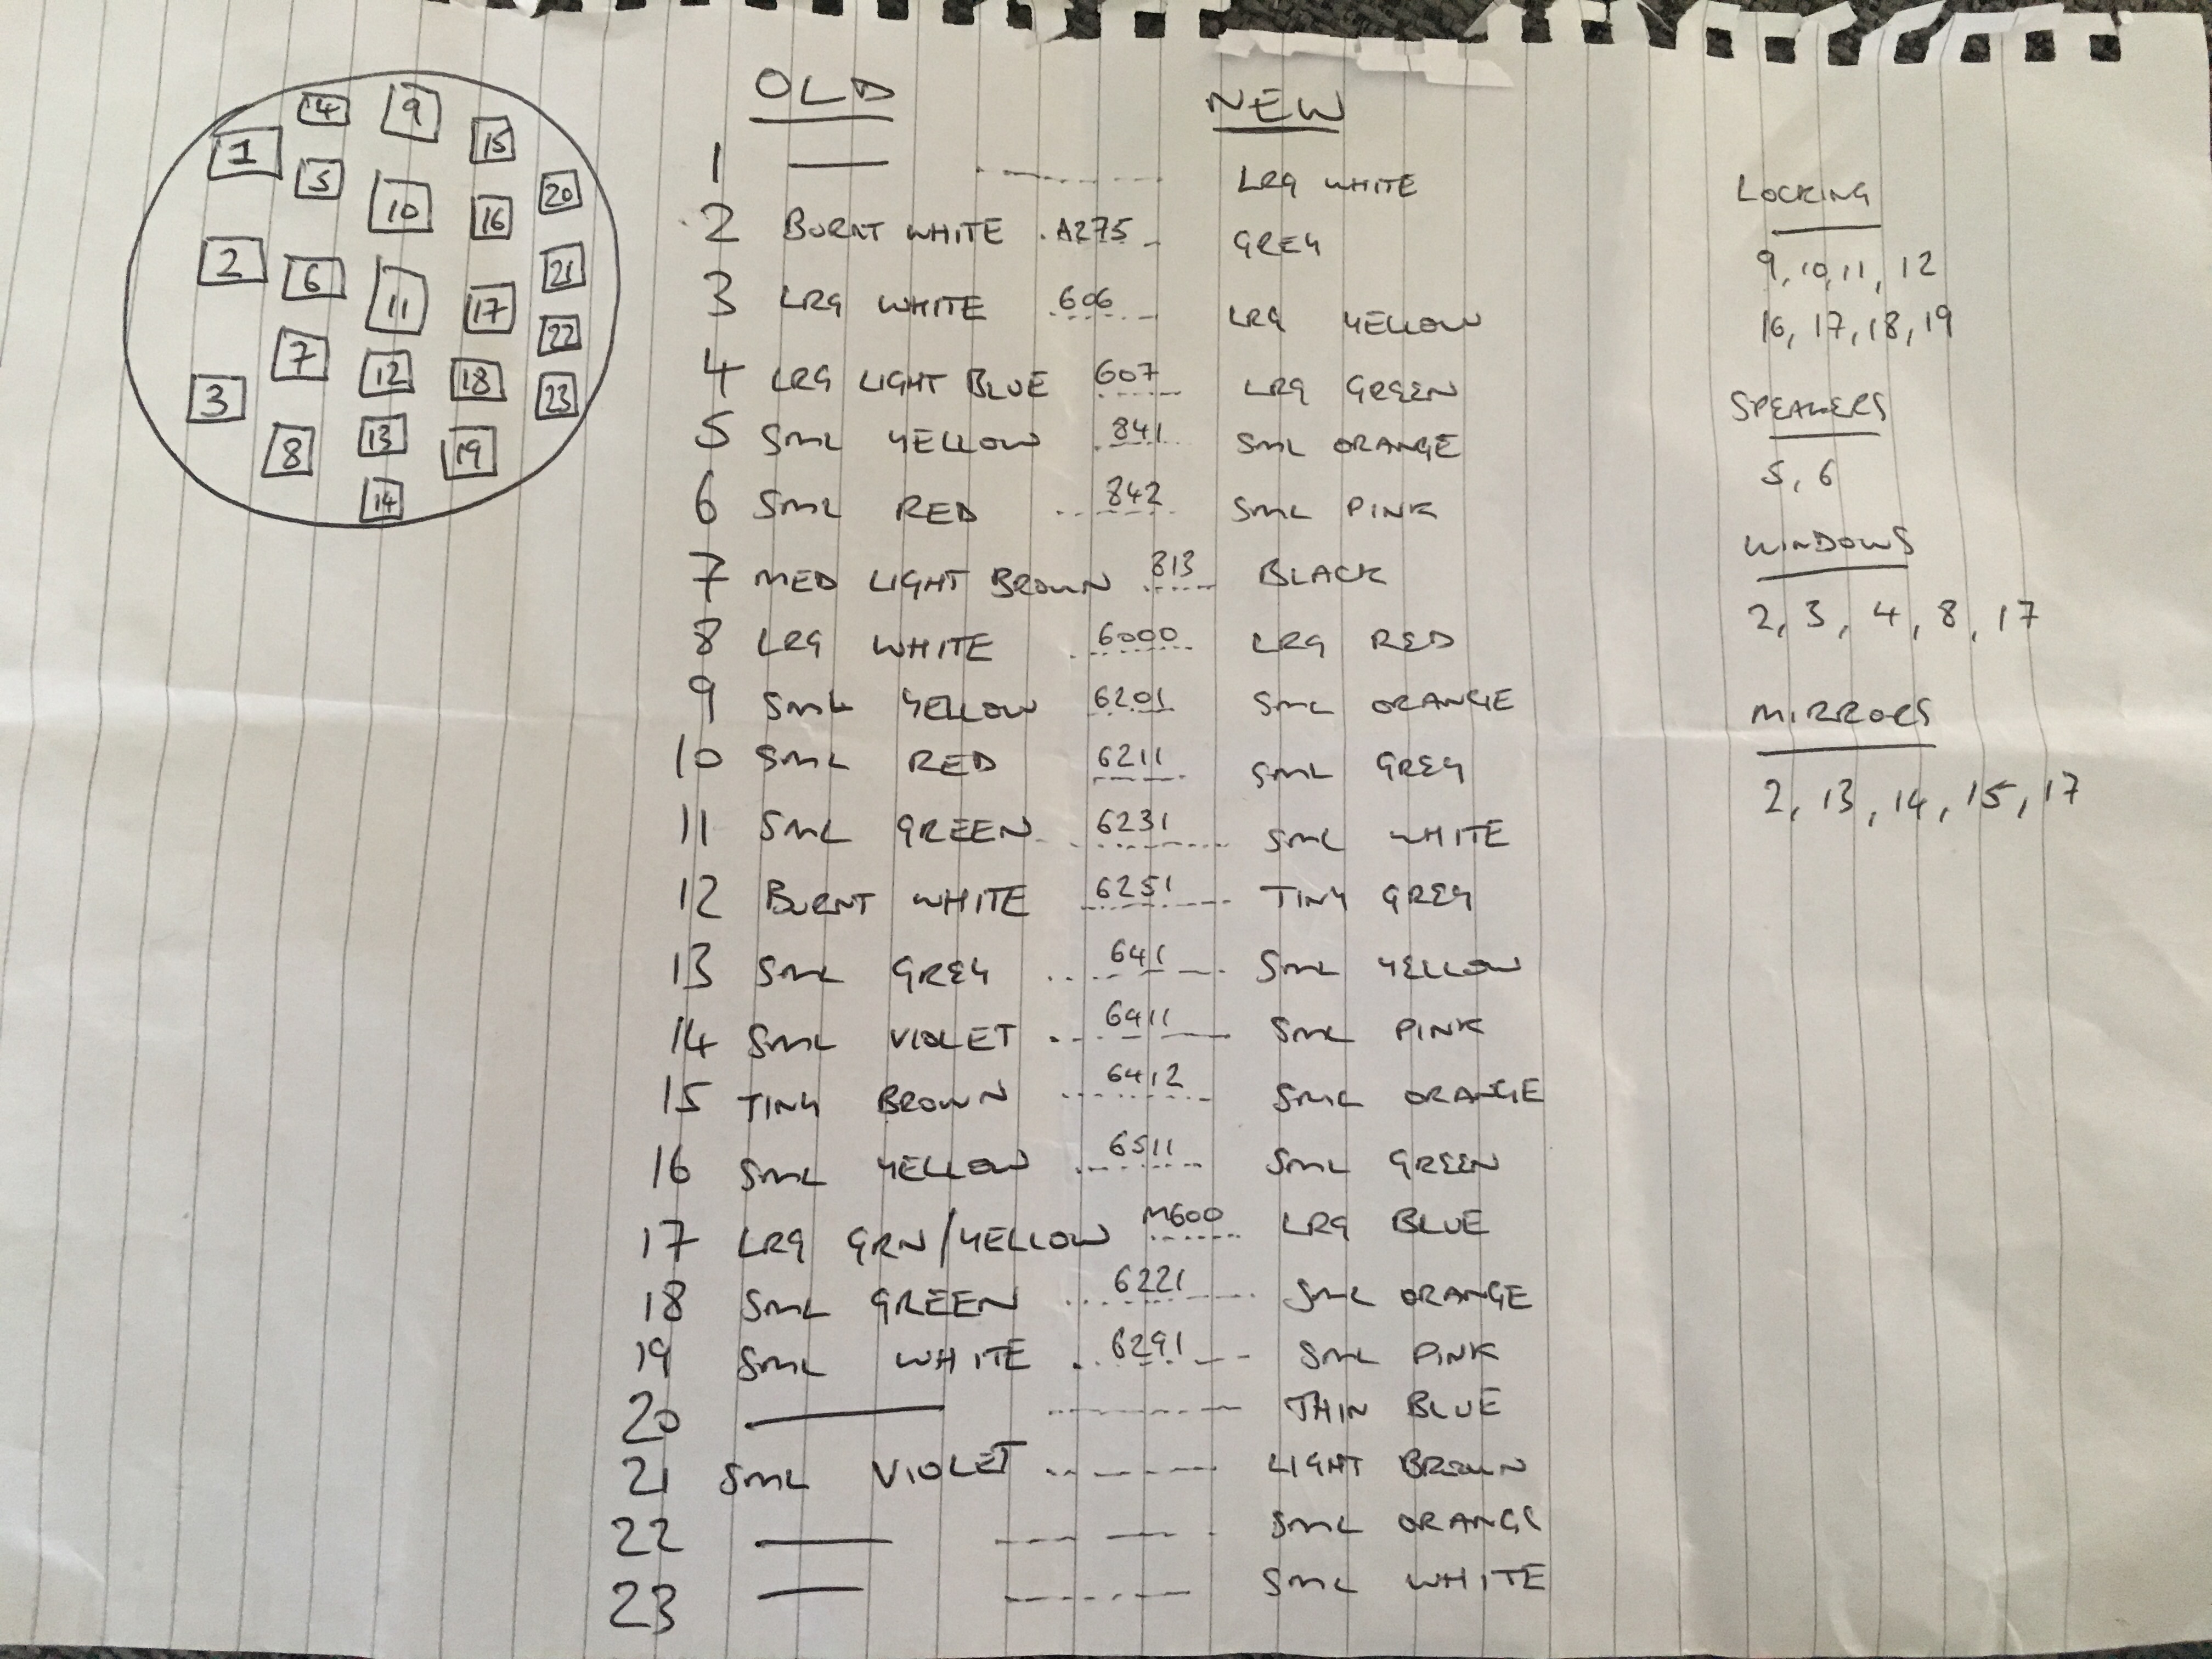
Taking the door off really helped

It was massively satisfying once I'd finished it all off. I now have working electric windows, mirrors, central locking and the deadlocks work again which feels like quite a big fix given the majority of the electrics haven't worked from when I first bought the car 

With my new found soldering skills I took the opportunity to tidy up the stereo wiring and wrap it all with Tesa tape. I also fitted a connects 2 adaptor so my pioneer headunit works with the OEM remote stalk. I will properly solder the wires going to the rear wiper at some point too.
Before:

Afterwards they were much tidier but I'm still having a problem getting them to fit in behind the headunit because of the harness adaptor for the stereo and the stalk adaptor - if anyone has any tips on how to do this - I was wondering if I could remove the glove box and reach in behind to get the cables to sit right?

190k Moonstone 3dr HDI sold
..on the lookout for a 6/rallye
Posts: 141
Threads: 12
Joined: Mar 2017
Reputation:
0
Location: Surrey
Car Model/Spec: Golf6R, Ph1 172 (x2!)
Thanks: 2
Given 2 thank(s) in 2 post(s)
01-10-2017, 07:53 PM
(This post was last modified: 01-10-2017, 08:00 PM by partybish.)
One of the things I wanted to do with the car was learn about about how to install and setup a decent sound system.
I'd previously bought a set of Focal PS165V1 6.5" components, tweeters and crossovers as they seem to be pretty popular choice of speakers on the forum and the 6.5s are a direct fit (using spacer rings).
For an amplifier I got a Genesis Profile 4 which is a 4 channel amp and the plan was to use two channels for the left and right front speakers and 'bridge' the third and fourth channels for a subwoofer.
I started by applying silent coat to the boot floor.

Followed by some more of the sticky backed foam:

And lastly I took some measurements and cut a false floor out of 10mm MDF

After that I drilled a hole through the passenger footwell and ran a power cable down the passenger side of the car. I ran remote, speaker and three sets of RCA cables down the driver's side (one set for the sub, one for the speakers and a spare set in case I decide to upgrade) and attached a ground cable under the rear bench.
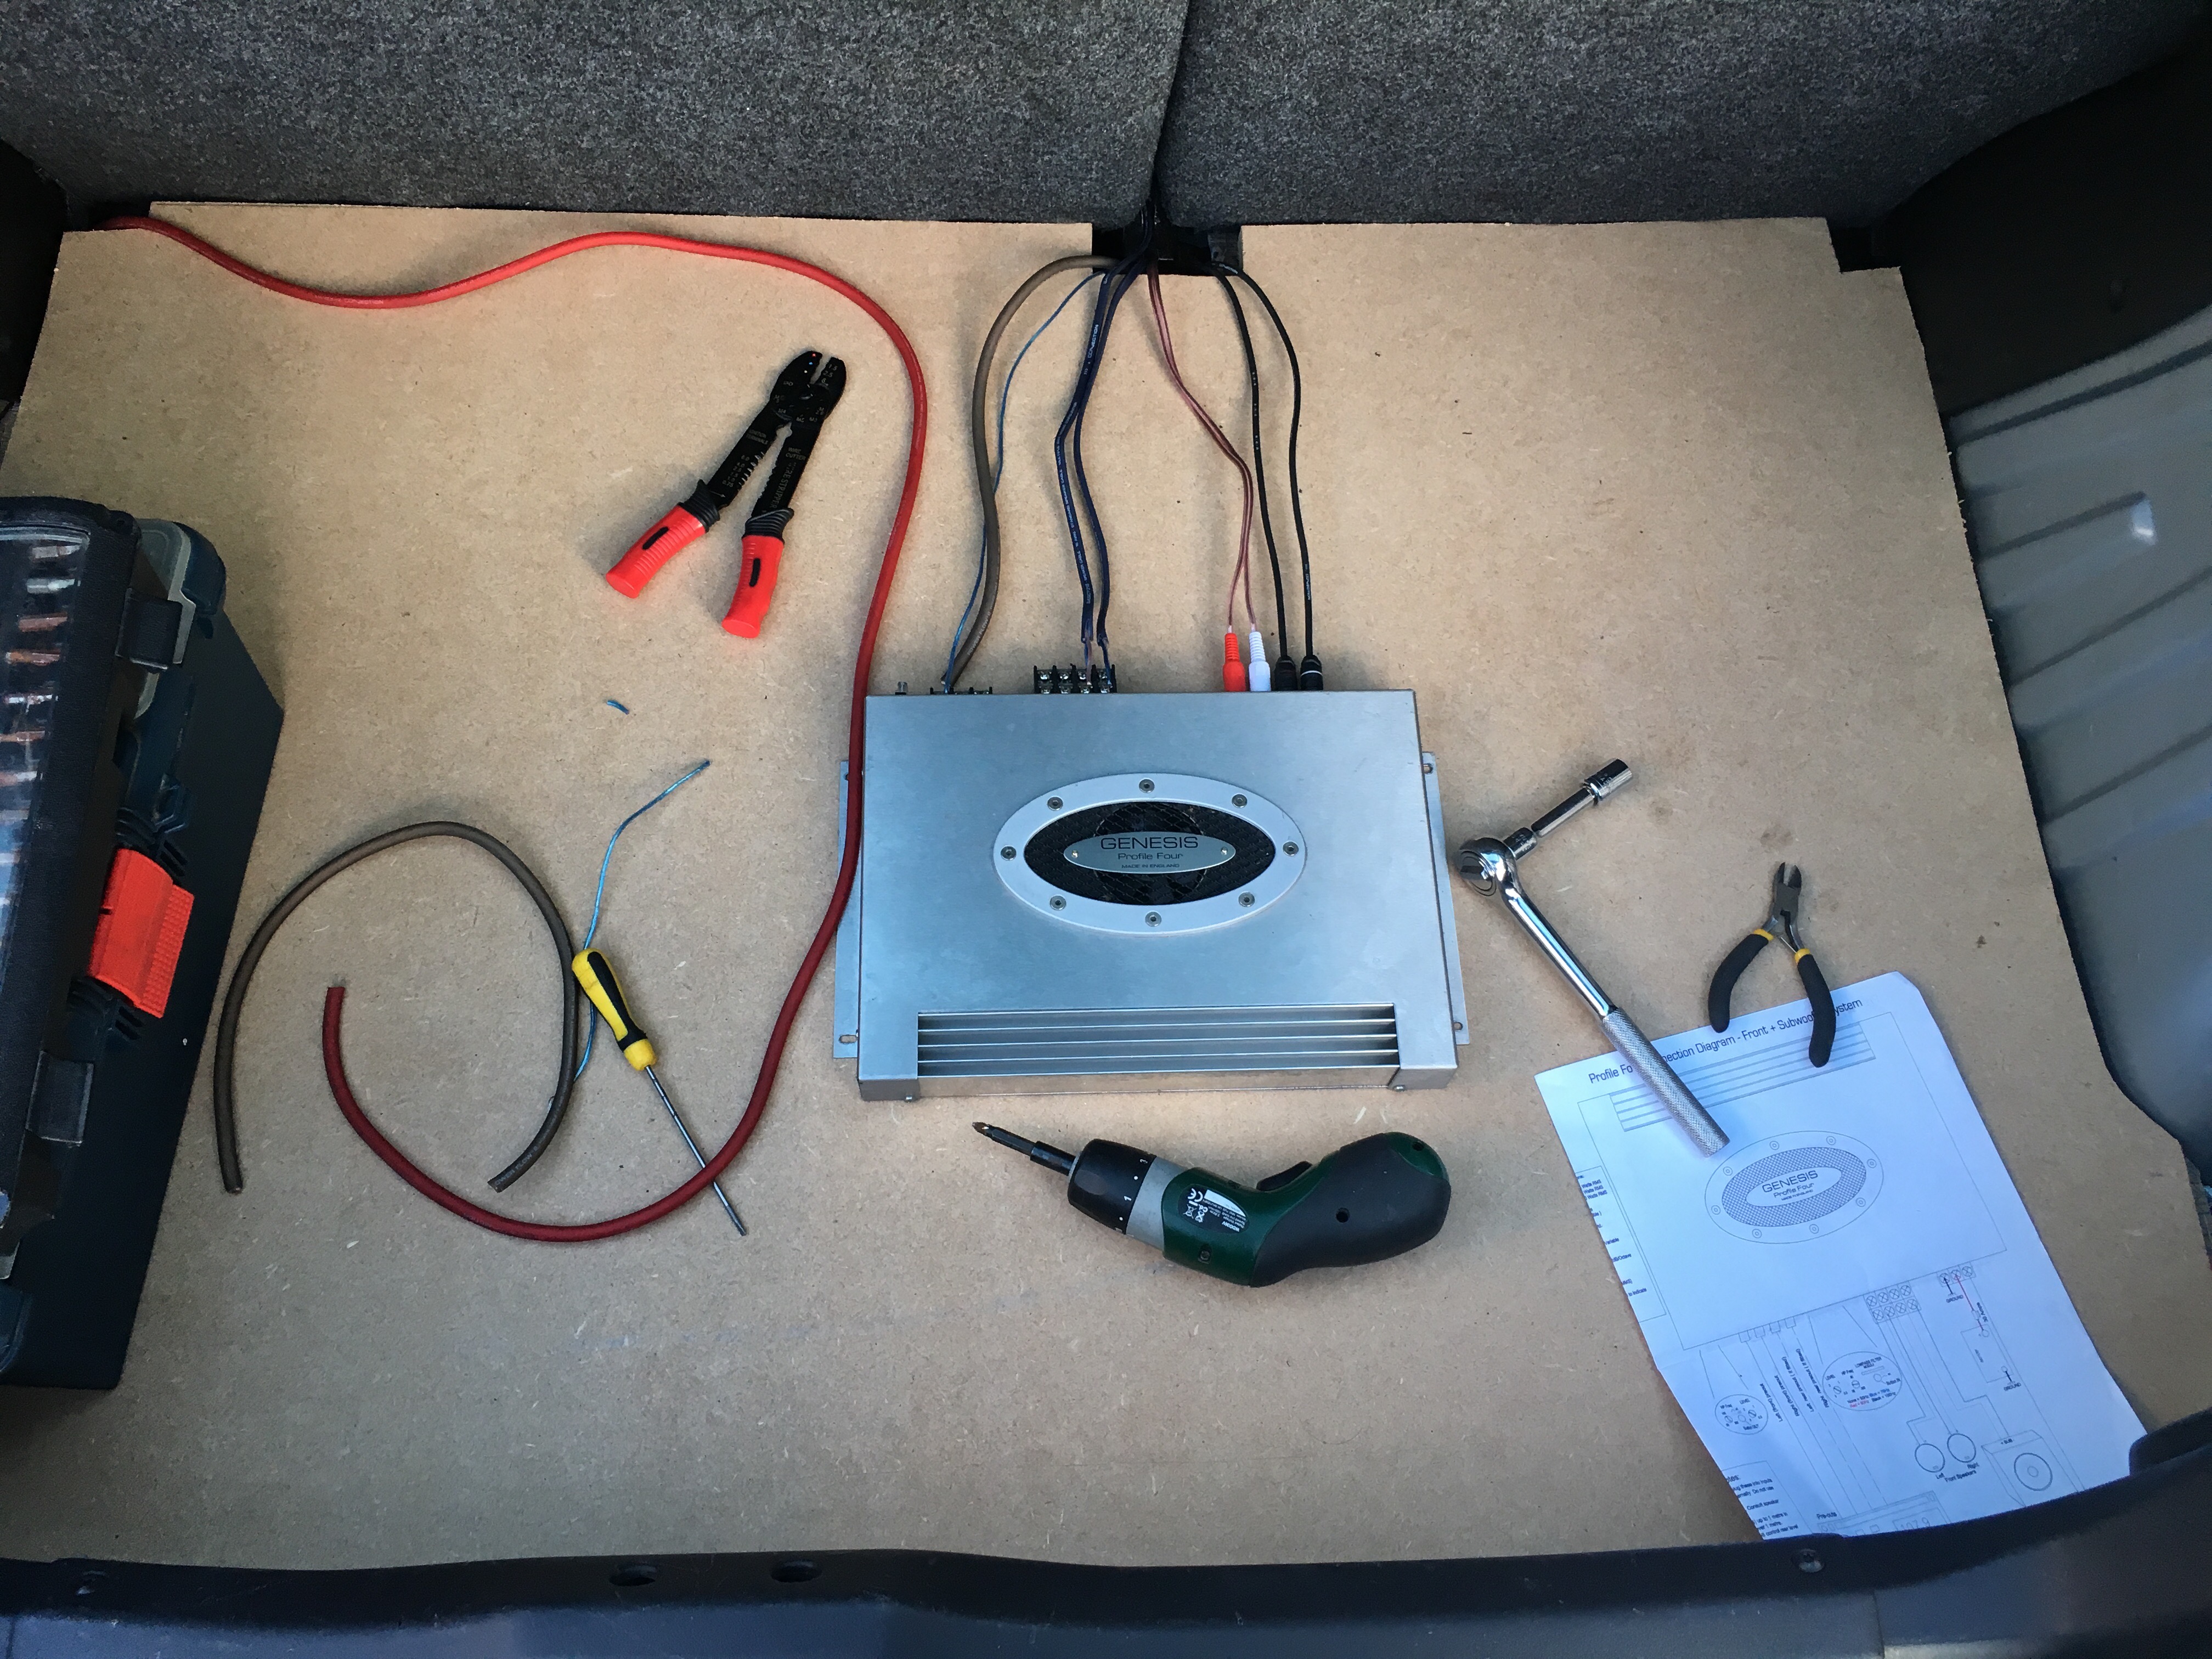
After sorting out the boot and running the cables to the headunit, I then spliced the speaker wire into the door looms and wired up the crossovers within the door card. They probably aren't perfectly placed but the car doesn't get used in the rain much so hopefully they will be OK.

The front components are quite a bit deeper than the standard speakers so I needed to use MDF rings which I cut to fit the door card, I eventually sprayed them black to make them blend in.

MDF treated with a 50/50 water/PVA mix followed by neat PVA to keep the damp out.
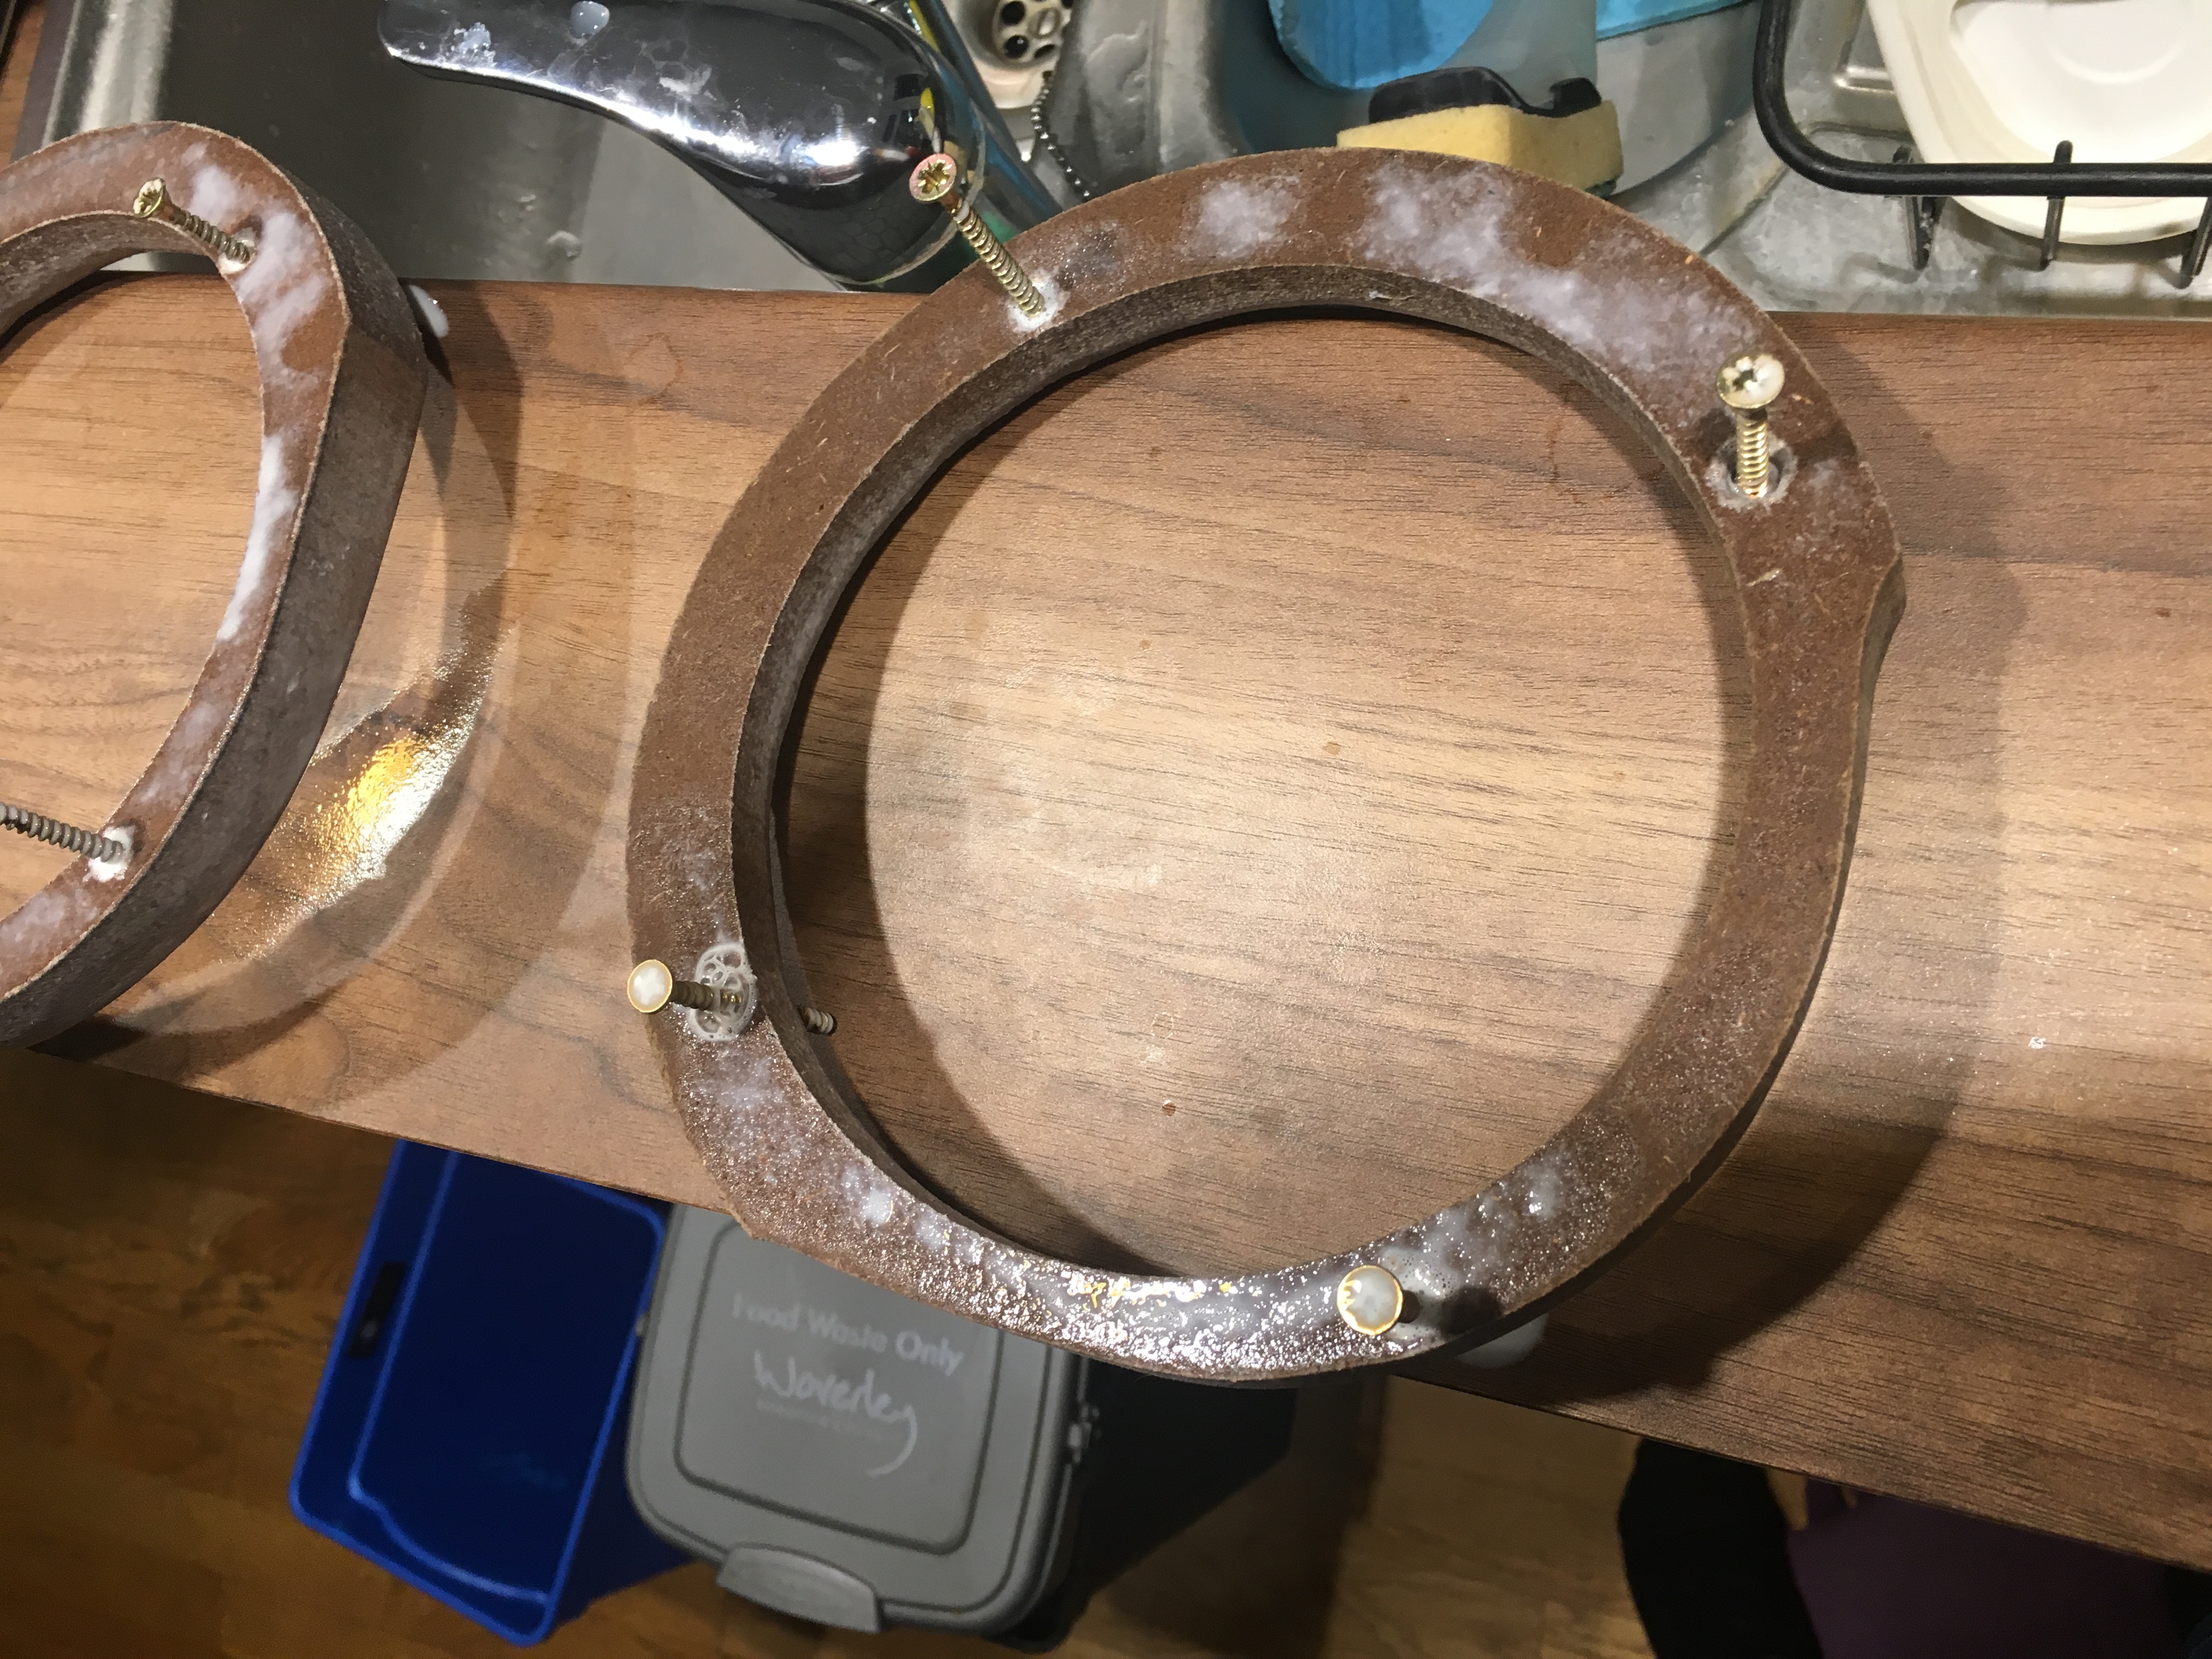
After that I used foam baffles to protect the speakers from water ingress coming down the door

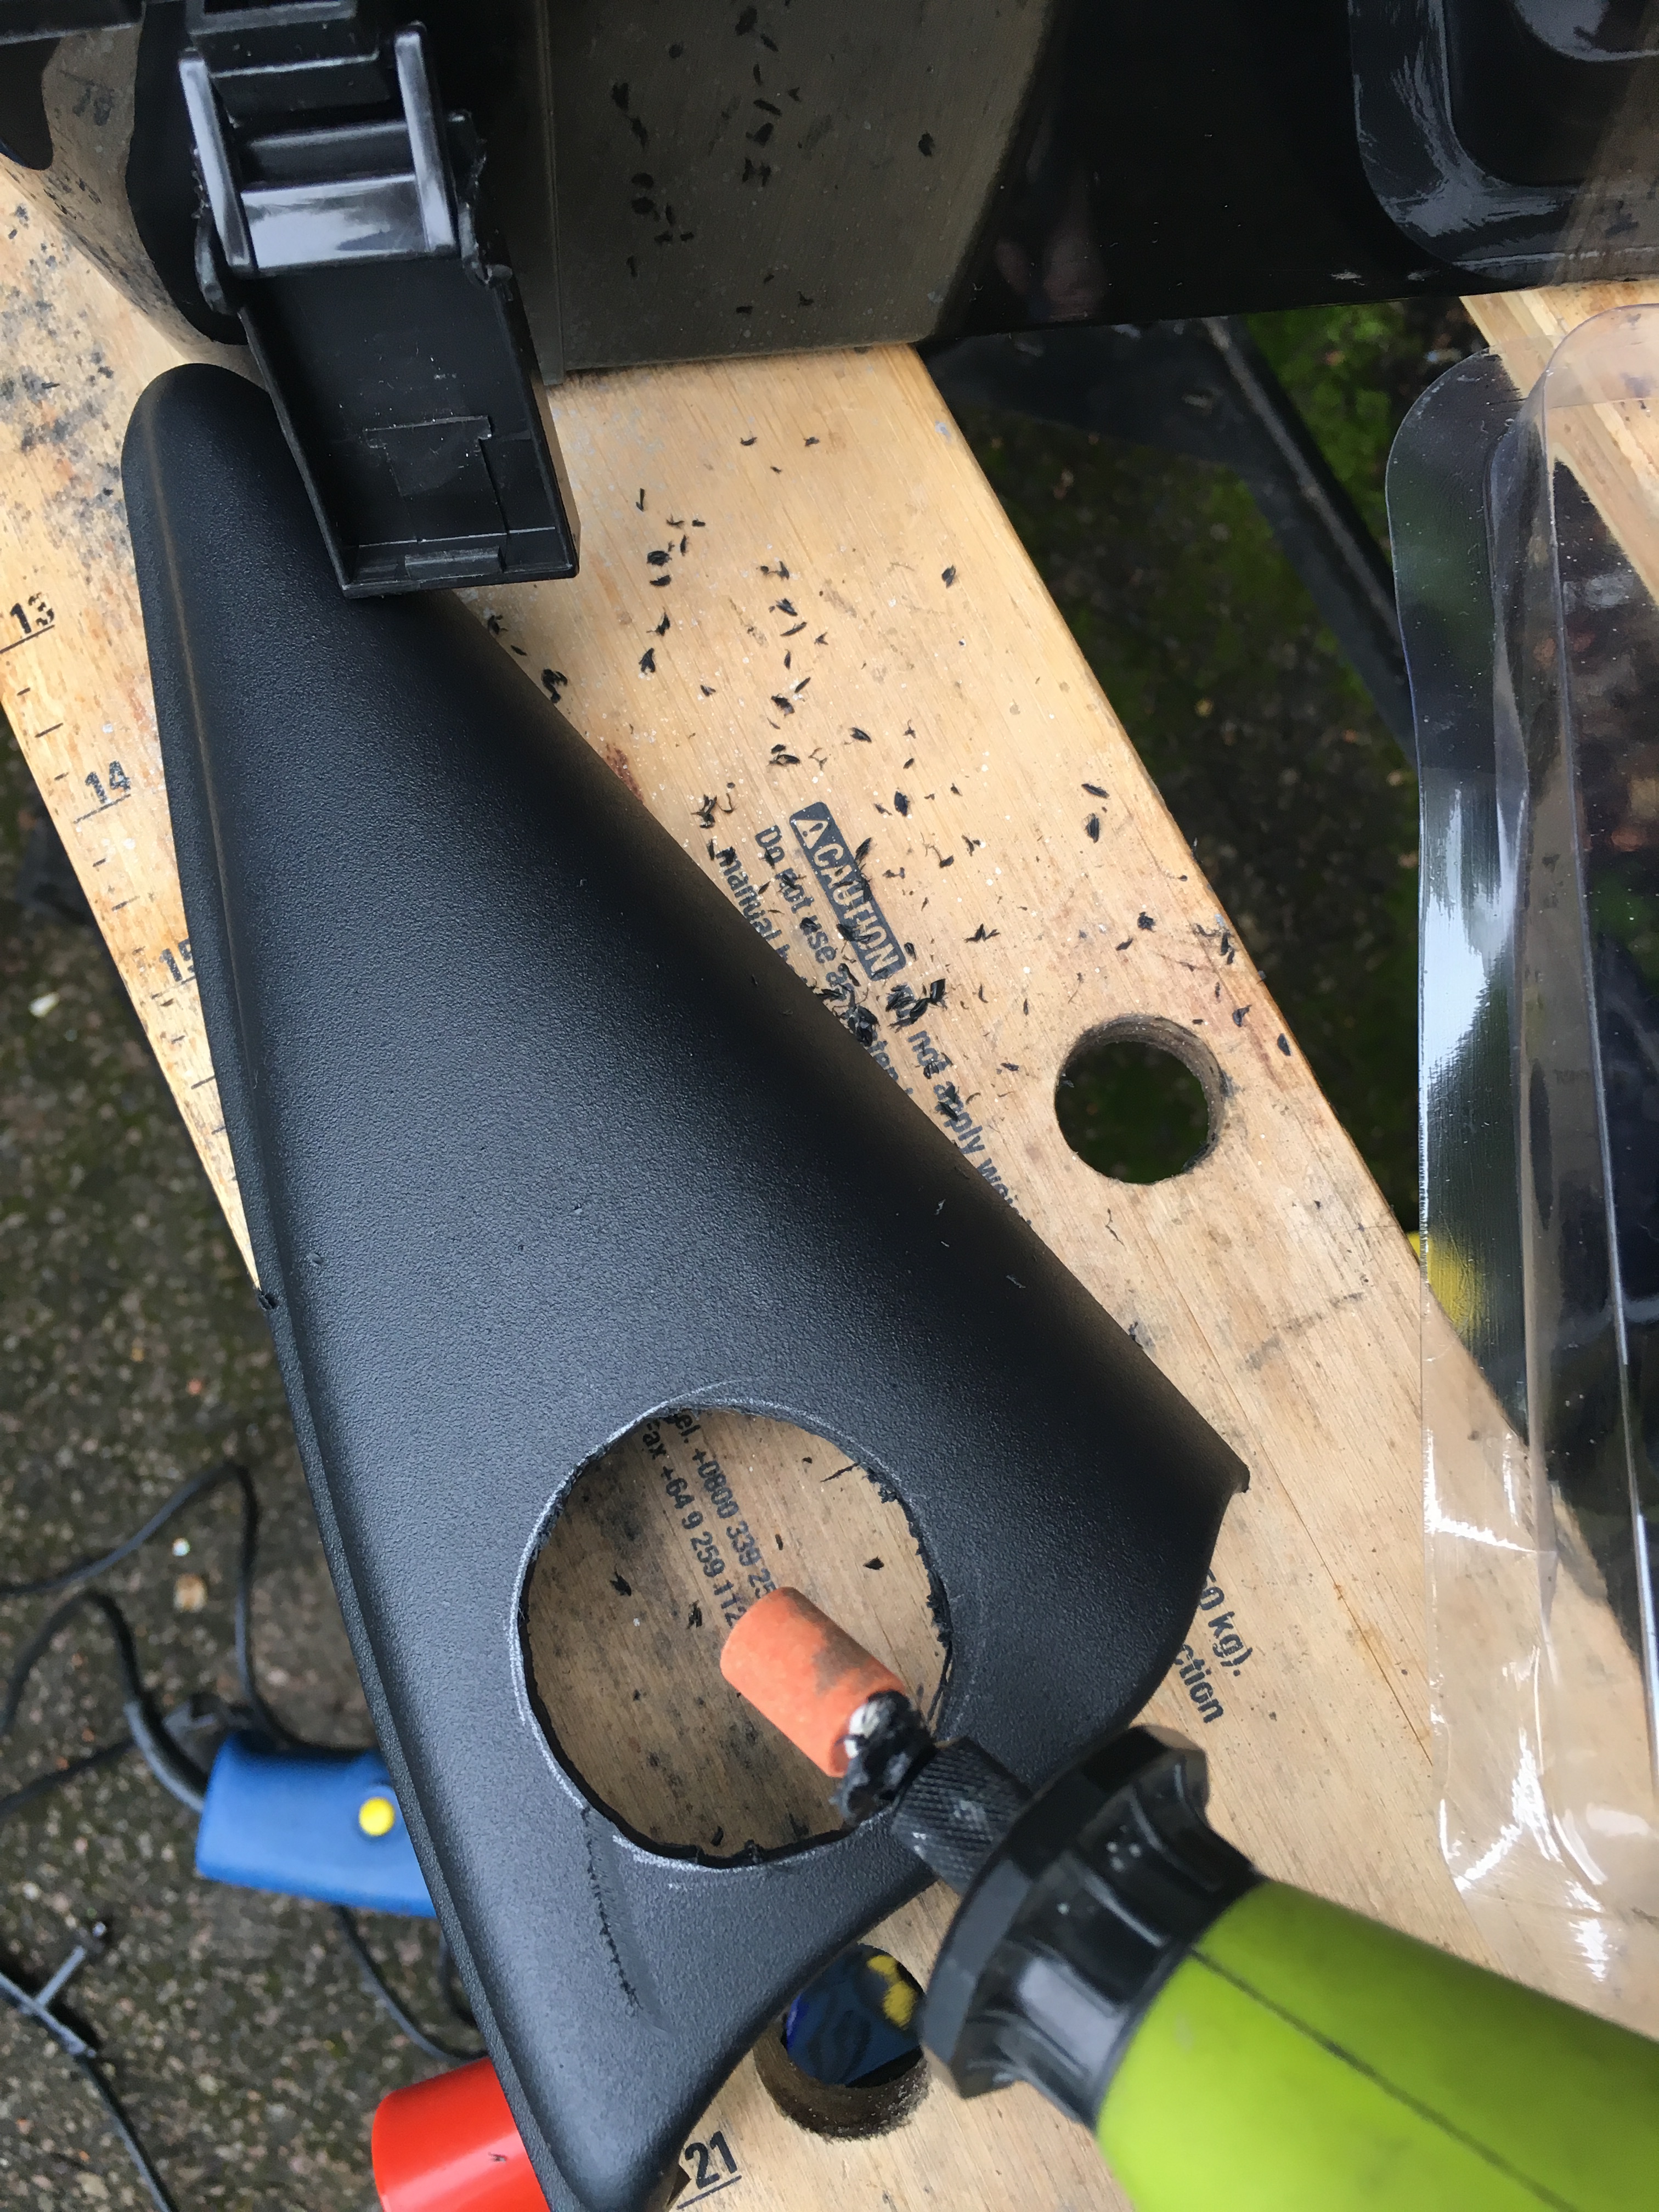
With the tweeters, I drilled holes through the plastic and then used a dremel to get the size right. The tweeters pushed in and with a little superglue and translucent sealant around the edges they were good to go.
In fitting the speakers I wanted to sort out the filthy door cards - there was mud ingrained in them.

I used a detailing brush with neat surfex HD to agitate the dirt out, followed by Autoglym Interior cleaner.
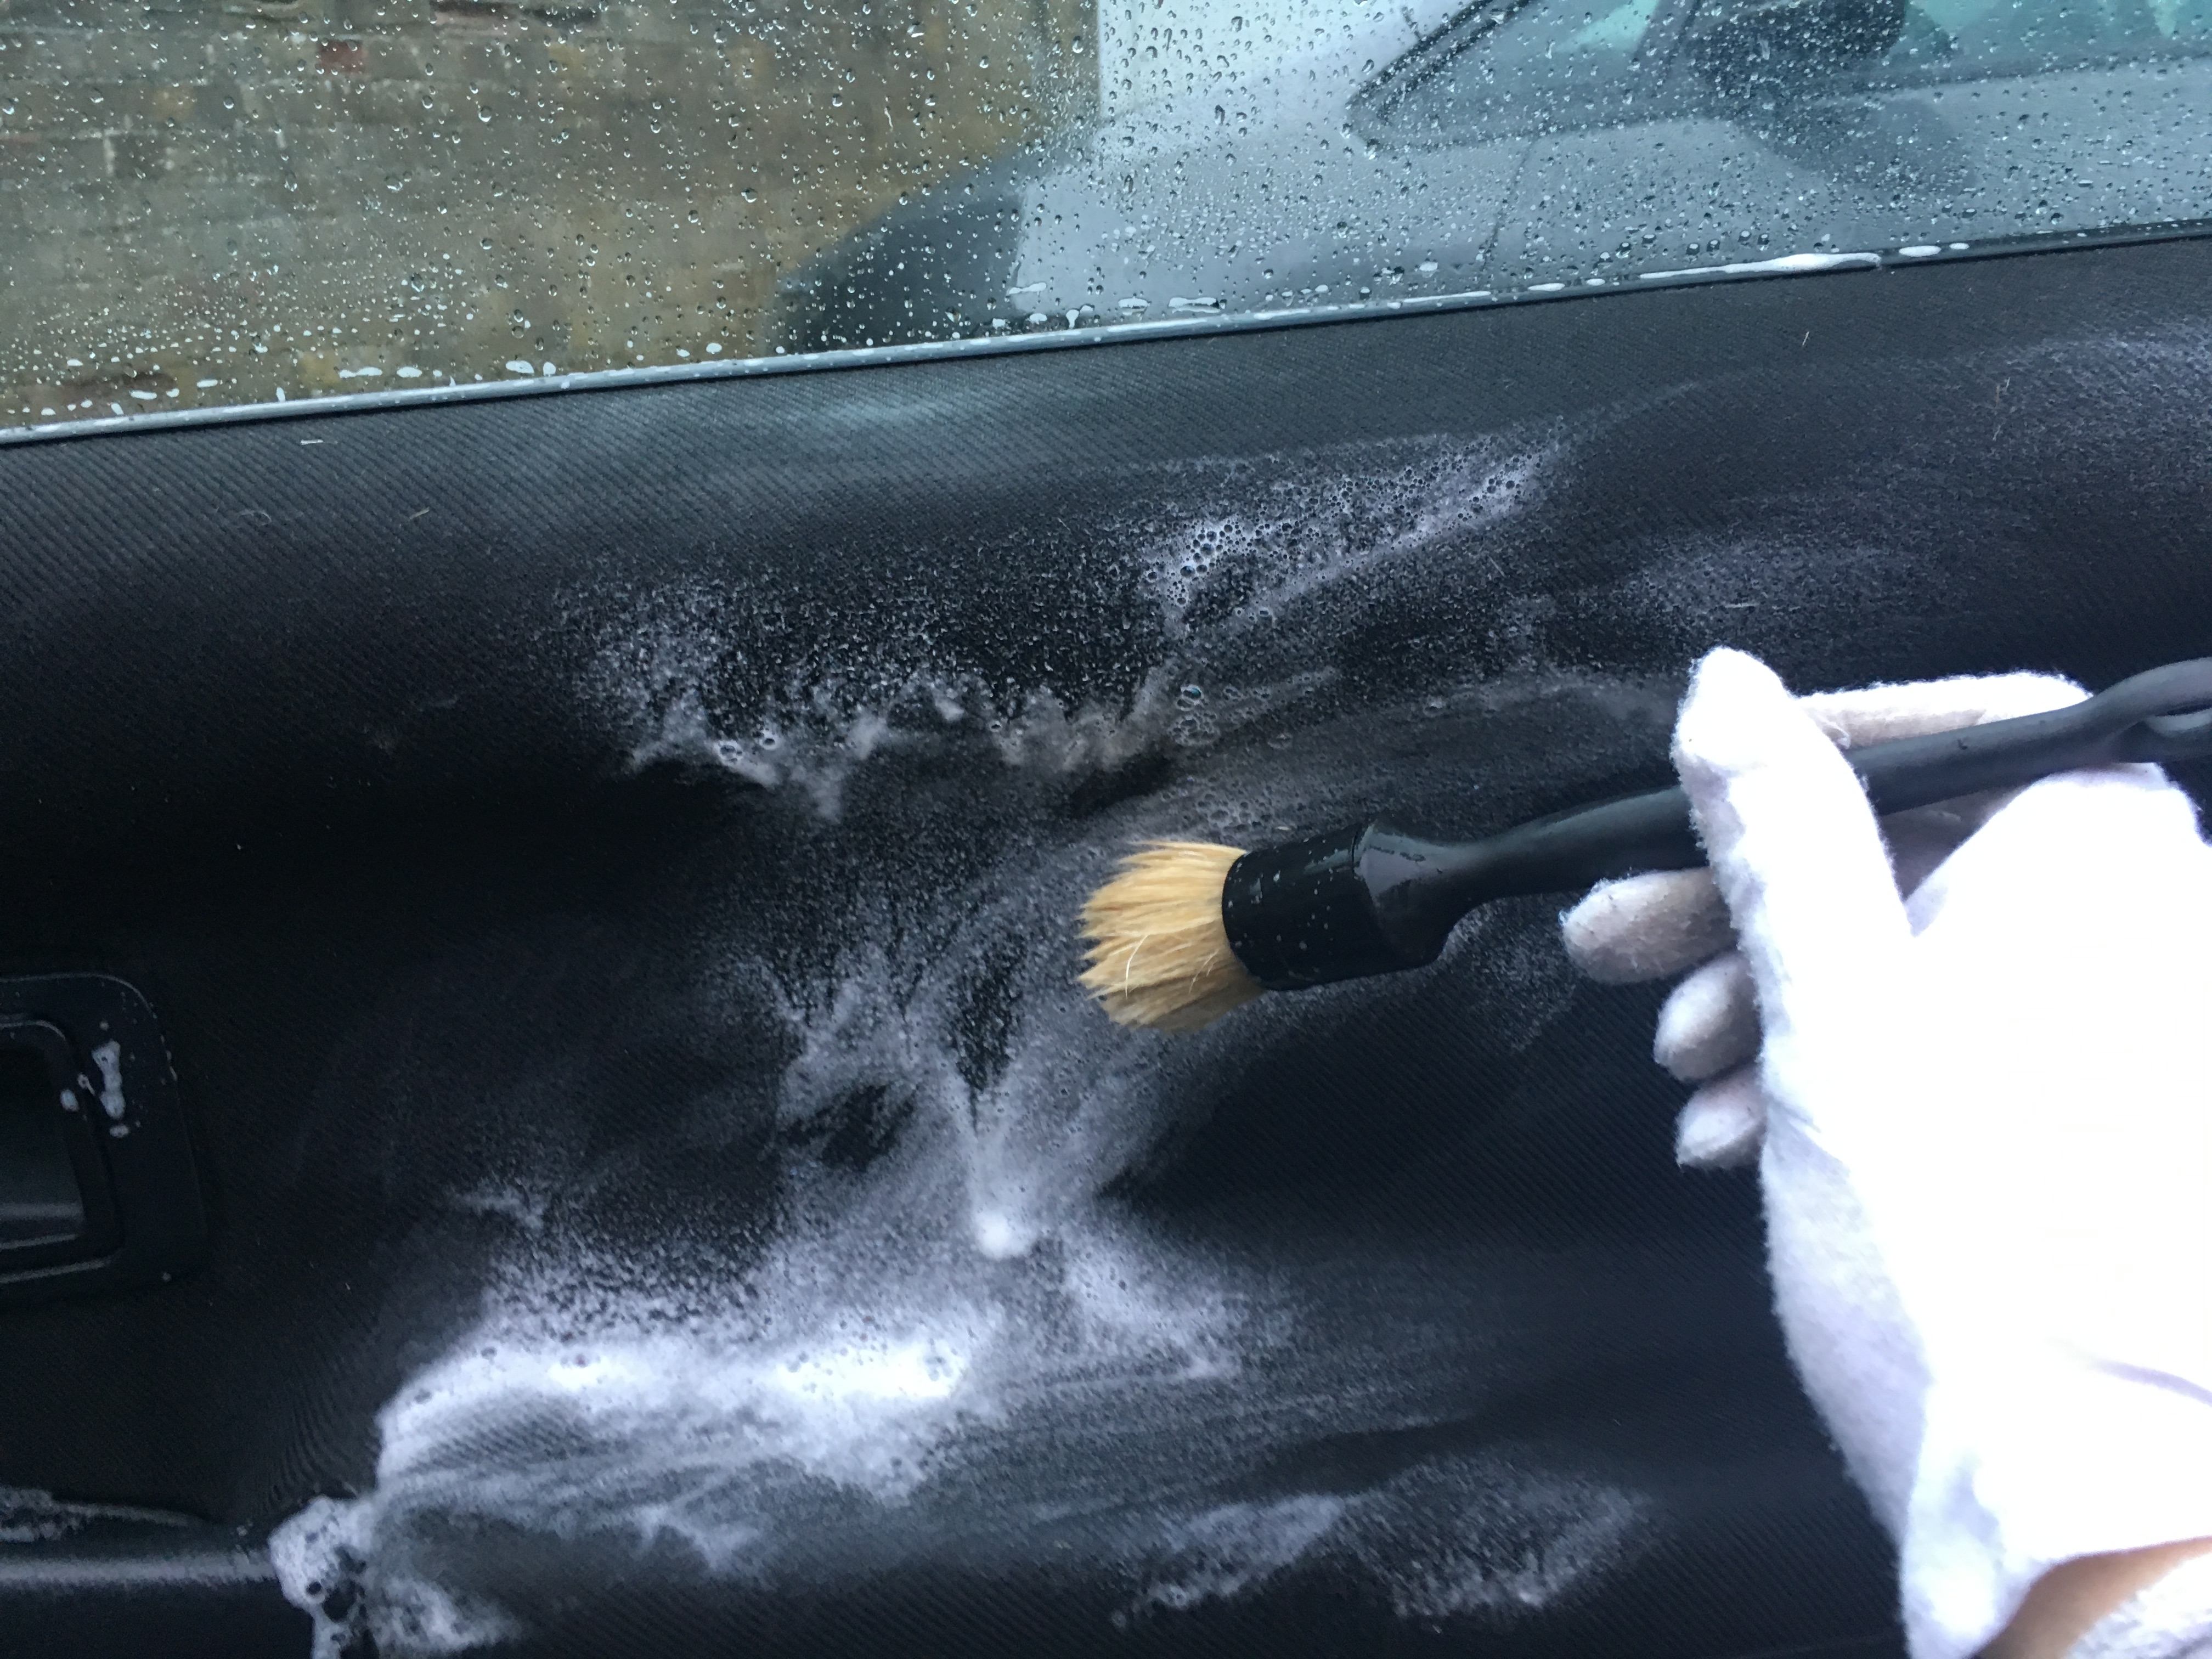
It came up nice and clean but there were a few worn patches so I used black fabric dye on a sponge to fill them in.

Anyway, with the tweeters and components fitted the sound is a really good upgrade on the factory stuff - the headunit and amp separates the frequencies really well and even using an aux input the vocals in songs sound much crisper with the mid and sub bass being very capable.
Components and tweeters in
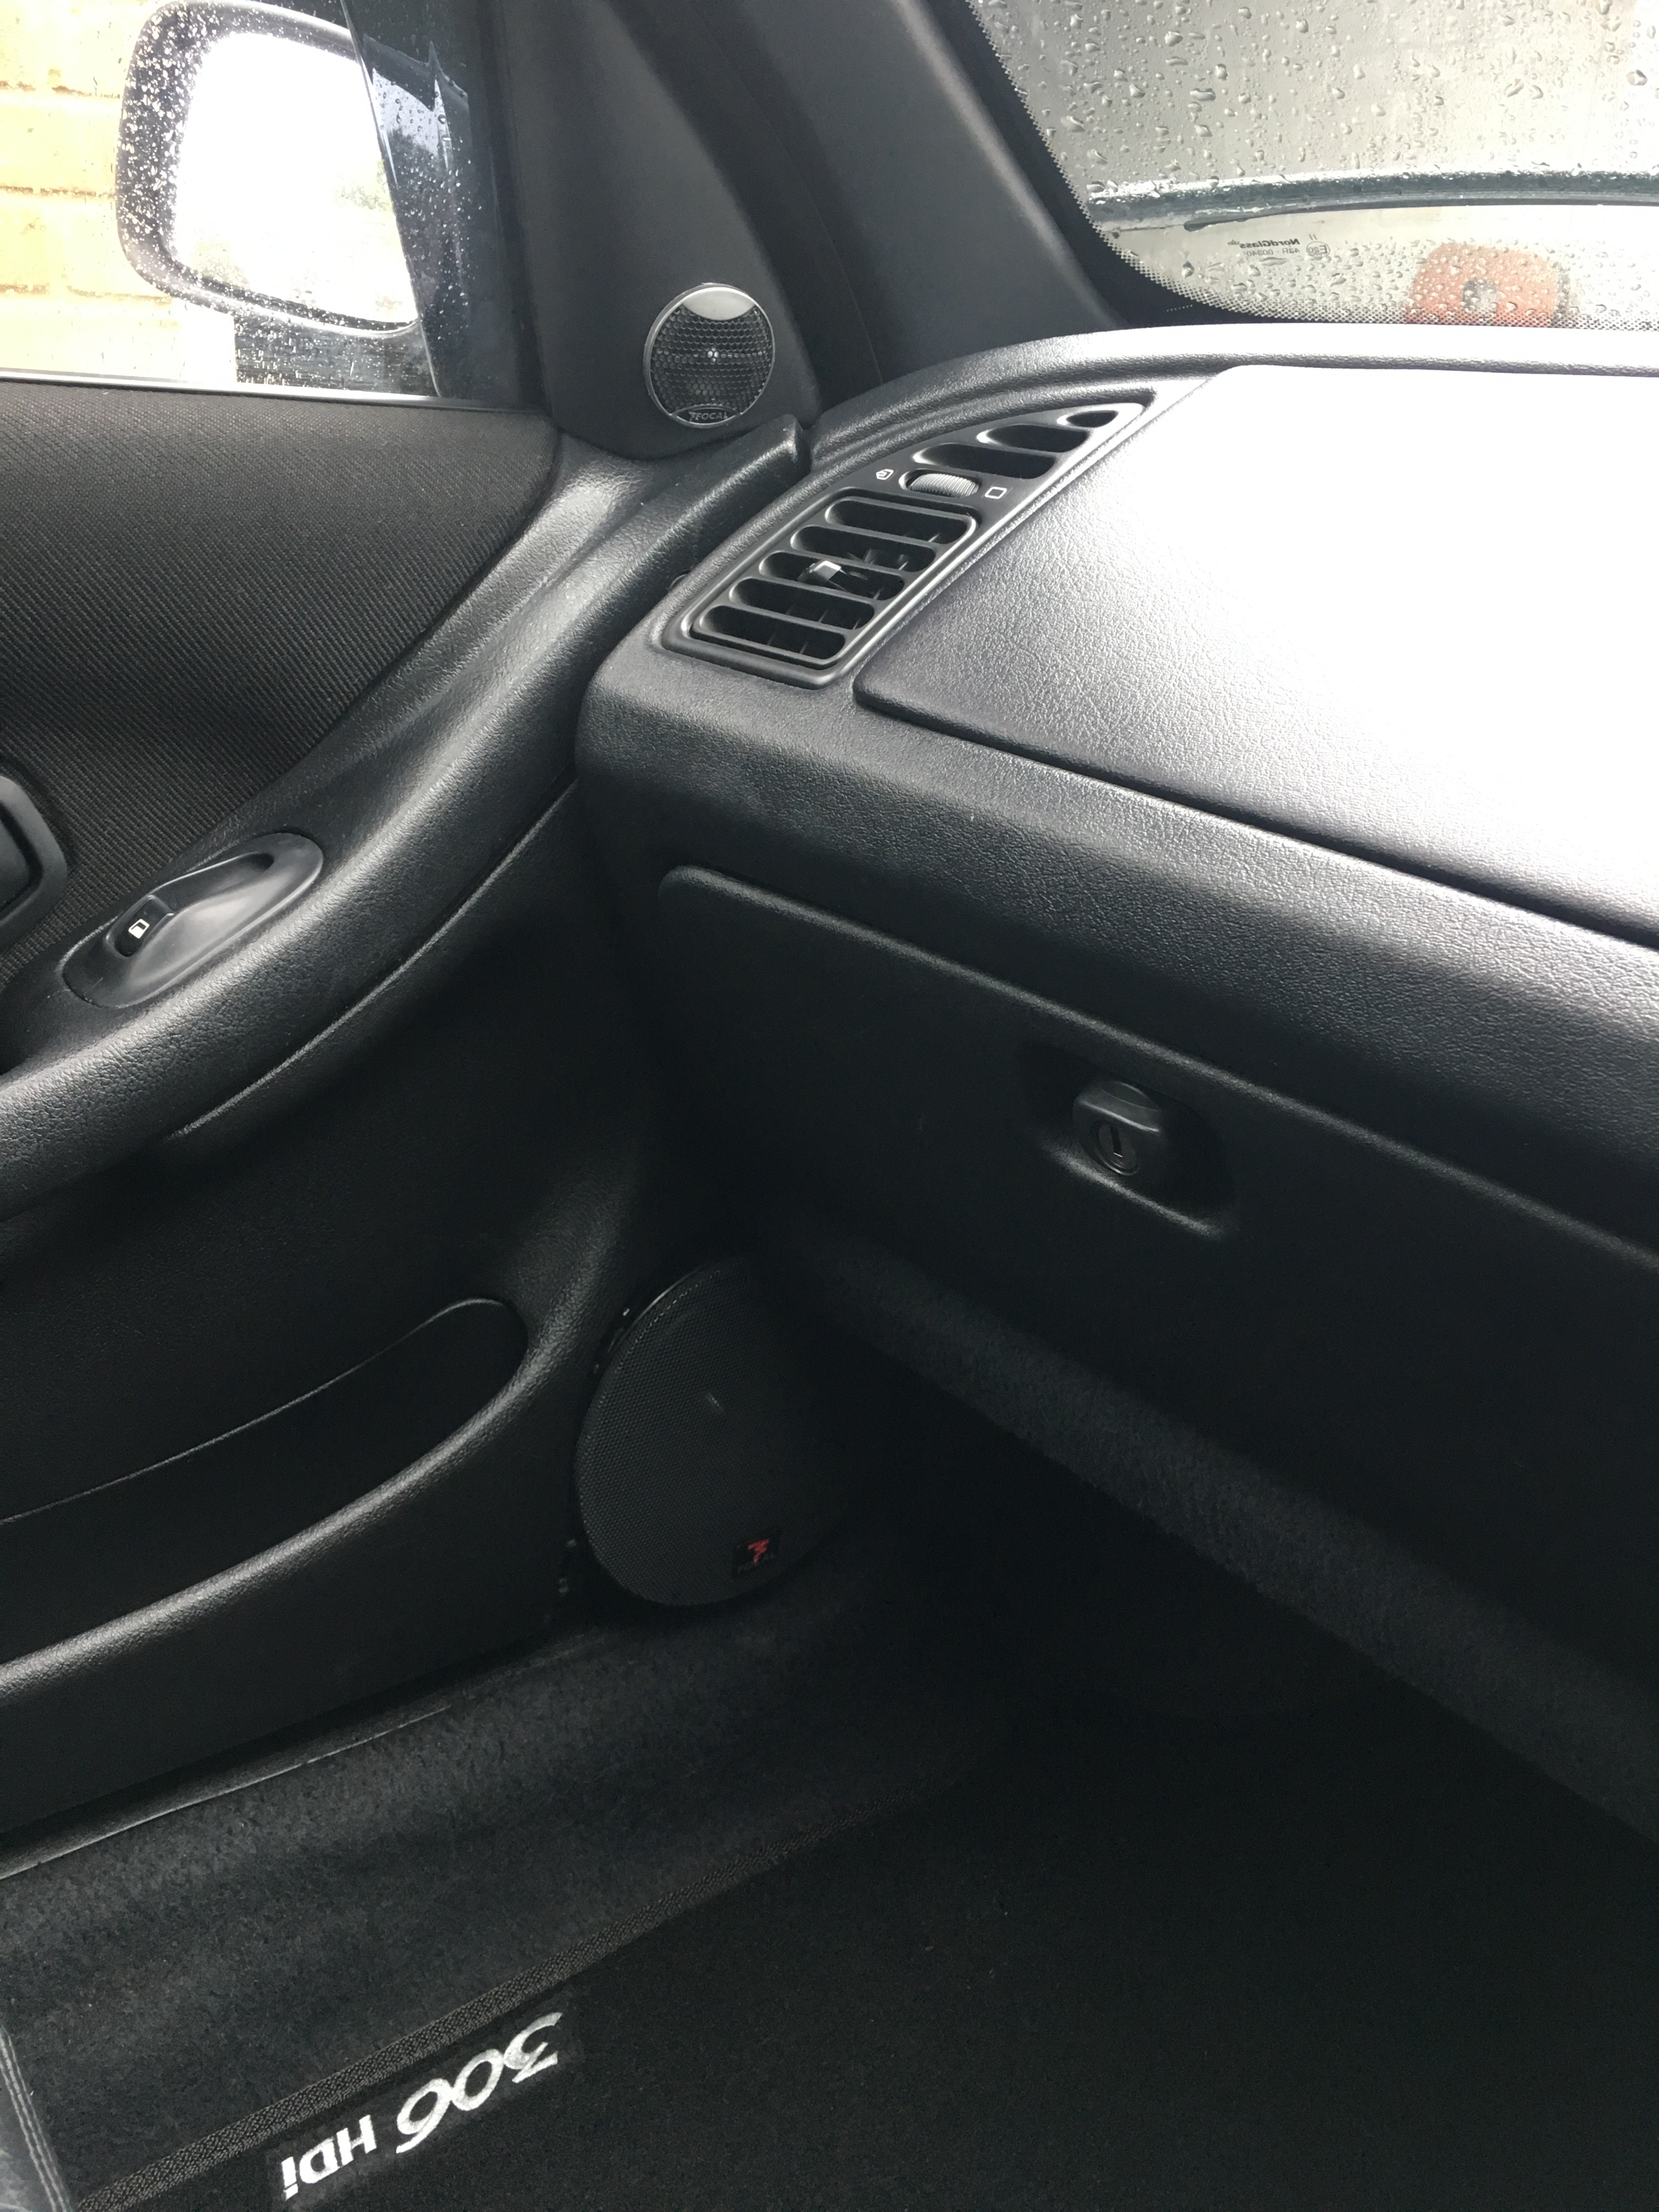
I now just need to polish the amp up and fit a second carpeted MDF floor on top of the one already in with a cutout so the amp can poke through which will hide the wires.
190k Moonstone 3dr HDI sold
..on the lookout for a 6/rallye
Posts: 13,881
Threads: 476
Joined: Dec 2011
Reputation:
81
Location: Ipswich
Car Model/Spec: 306 Rallye
Thanks: 4
Given 104 thank(s) in 102 post(s)
great work bish!  If I had a daily this is exactly what id be doing to it!
Posts: 141
Threads: 12
Joined: Mar 2017
Reputation:
0
Location: Surrey
Car Model/Spec: Golf6R, Ph1 172 (x2!)
Thanks: 2
Given 2 thank(s) in 2 post(s)
Cheer fella, any idea on how best to get at the back of the stereo to sort the wires out (from behind) and get the headunit to sit properly - do I need to take the passenger airbag out or can I get at it by taking the glovebox out?
190k Moonstone 3dr HDI sold
..on the lookout for a 6/rallye
Posts: 13,881
Threads: 476
Joined: Dec 2011
Reputation:
81
Location: Ipswich
Car Model/Spec: 306 Rallye
Thanks: 4
Given 104 thank(s) in 102 post(s)
(02-10-2017, 08:20 AM)partybish Wrote: Cheer fella, any idea on how best to get at the back of the stereo to sort the wires out (from behind) and get the headunit to sit properly - do I need to take the passenger airbag out or can I get at it by taking the glovebox out?
Why cant you just remove the headunit? For the headunit cage make sure you bend the prongs out... but dont do it until youre finished behind there! A small screw driver is what you need to do that.
Posts: 141
Threads: 12
Joined: Mar 2017
Reputation:
0
Location: Surrey
Car Model/Spec: Golf6R, Ph1 172 (x2!)
Thanks: 2
Given 2 thank(s) in 2 post(s)
02-10-2017, 01:40 PM
(This post was last modified: 02-10-2017, 01:41 PM by partybish.)
With the amp install I've got a LOT of cables now, two sets of thick speaker wire, three sets of RCA cables (i.e. 6 RCA connectors in the back of the h/u), an ISO harness to convert peugeot loom to pioneer, a chunky connects 2 harness plug to make the 306 remote stalk work, the radio aerial antennae adaptor, a remote wire (for amp turn on) and a wire for a microphone for handsfree.
Taking the headunit out enables me to flatten the wires down a bit but then I have to pull them all out again slightly to get them plugged back into the back of the h/u - I've tried that and it doesn't work - h/u is sticking out by about 1 cm.
If I could get a hand in behind the h/u with the h/u slid partway into the cage I reckon I'd stand a better chance of getting it all to fit properly as I could feed the wires down as I went so to speak. Looked at your airbag removal / top glovebox fitting guide and there doesn't look like there's much room to get a hand in behind the stereo.
I will try without the cage and see if that helps but I am now wondering if I could take the speedo out and get in from the right hand side?
190k Moonstone 3dr HDI sold
..on the lookout for a 6/rallye
Posts: 1,897
Threads: 162
Joined: May 2012
Reputation:
21
Location: Dunstable
Car Model/Spec: 306 HDI Dturbo, Estate & GTI6
Thanks: 0
Given 23 thank(s) in 23 post(s)
Speedo out every time, that's how I do it.
Sent from my ONEPLUS A3003 using Tapatalk
Posts: 141
Threads: 12
Joined: Mar 2017
Reputation:
0
Location: Surrey
Car Model/Spec: Golf6R, Ph1 172 (x2!)
Thanks: 2
Given 2 thank(s) in 2 post(s)
Thanks Dee, whipped out the speedo and had a good sort out. I also found an old thread that said the surround fits over the cage so I managed to put that in properly now and it looks much better.

190k Moonstone 3dr HDI sold
..on the lookout for a 6/rallye
Posts: 13,881
Threads: 476
Joined: Dec 2011
Reputation:
81
Location: Ipswich
Car Model/Spec: 306 Rallye
Thanks: 4
Given 104 thank(s) in 102 post(s)
I dont know how youve managed to use that standard surround. I use on of the aftermarket ones and it fits fine and takes the HU surround. I understand what youre doing now. I had the same setup in my 1.8. I didnt have issues but yes the speedo out is the best way to go
Posts: 141
Threads: 12
Joined: Mar 2017
Reputation:
0
Location: Surrey
Car Model/Spec: Golf6R, Ph1 172 (x2!)
Thanks: 2
Given 2 thank(s) in 2 post(s)
I had no idea the one I had was a standard surround, I think I found it in the glovebox as the car came with no head unit. To be fair it didn't fit perfectly, I had to use the tabs on the cage to get it to stay put properly but now the headunit is clicked into the cage it doesn't seem to be going anywhere and looks loads neater.
I'm actually thinking of getting a pioneer deh-80prs as the headunit I've got (MVH 8300) is more for media (album artwork, playing video) and the 80prs has a lot more options for tuning the audio system, that seems to come with it's own fascia which might be a better solution. Where did you get your aftermarket surround from?
190k Moonstone 3dr HDI sold
..on the lookout for a 6/rallye
Posts: 13,881
Threads: 476
Joined: Dec 2011
Reputation:
81
Location: Ipswich
Car Model/Spec: 306 Rallye
Thanks: 4
Given 104 thank(s) in 102 post(s)
just standard ebay stuff. Think they are like £8 posted.
Posts: 3,419
Threads: 120
Joined: Jan 2014
Reputation:
35
Location: Powys / Herefordshire
Car Model/Spec: Rallye/S16 & 175 megane


Thanks: 147
Given 40 thank(s) in 40 post(s)
Thats a nice neat bit of audio installation! and kudos on gaining the soldering skills, amazing how much you find is fixable when you can solder! 
![[Image: 17b33c2a-8471-4313-992e-0a4b324cf926_zps2e63812a.jpg]](http://i143.photobucket.com/albums/r143/matt-taylor/17b33c2a-8471-4313-992e-0a4b324cf926_zps2e63812a.jpg)
Team Cyril
Posts: 141
Threads: 12
Joined: Mar 2017
Reputation:
0
Location: Surrey
Car Model/Spec: Golf6R, Ph1 172 (x2!)
Thanks: 2
Given 2 thank(s) in 2 post(s)
Thanks Matt, soldering is quite enjoyable I find if you do everything in stages, all the stripping, twisting, placement of heatshrink and then it's just a case of cracking on. I didn't realise how much of a sh*t job of my rear wiper wires I did last time with electrical tape and chocolate blocks everywhere until I took the panels off and looked again - it wouldn't have lasted much longer without breaking again. With a bit of confidence from doing the door loom I've re-done all of the wiper wiring by properly heatshrinking bare wires, soldering joins neatly and then covering it all in tesa tape so it all sits nice and doesn't rattle around.
With the audio setup I've got a really good improvement over standard and a decent base to start working/upgrading from now. I'm going to be making a further carpeted false floor and starting to learn how to fabricate parts using fiberglass resin and filler so I can get the door pods to sit flush to the door cards (which should look OEM) and build trim around the boot to help dampen the noise and make the whole car look a look better in terms of finish.
I ended up getting an DEH-80PRS headunit which gives me a lot more options in terms of tuning the sounds like timings from each output and frequencies to get it sounding really good.
190k Moonstone 3dr HDI sold
..on the lookout for a 6/rallye
Posts: 1,897
Threads: 162
Joined: May 2012
Reputation:
21
Location: Dunstable
Car Model/Spec: 306 HDI Dturbo, Estate & GTI6
Thanks: 0
Given 23 thank(s) in 23 post(s)
That's looking awesome.
Great work on the install.
To get my speakers in I had to cut away a lot of the door card and some of the metal in the door skin. I also had to space the window rail out 10mm and the door card in that corner.
It was a pain in the arse but I thought worth it to get the original covers back on.
Now seeing yours with the speaker covers has made me think I should have done the same as it looks pretty good.
Have you got any photos with the open?
Sent from my ONEPLUS A3003 using Tapatalk
Posts: 141
Threads: 12
Joined: Mar 2017
Reputation:
0
Location: Surrey
Car Model/Spec: Golf6R, Ph1 172 (x2!)
Thanks: 2
Given 2 thank(s) in 2 post(s)
Photos with the covers off you mean Dee? I can grab some for you.
They look good enough but the speaker baffles are preventing the mid bass from working properly.
Have you got a thread of your work? I’m thinking I’m going to cut off the whole plastic corner of the door card and make separate covered pods around the mdf rings from filler and fibreglass resin that can be detached and which fit nicely over the top of the door card. I really don’t want to have to remove or move the window runner brace if I can help it but if it’s straightforward enough I will. I could get wider mdf rings but the speakers will end up hitting the dash when the door is closed.
190k Moonstone 3dr HDI sold
..on the lookout for a 6/rallye
Posts: 1,897
Threads: 162
Joined: May 2012
Reputation:
21
Location: Dunstable
Car Model/Spec: 306 HDI Dturbo, Estate & GTI6
Thanks: 0
Given 23 thank(s) in 23 post(s)
Photo just as it is please.
I don't think I have any threads but I might have some in a photobucket folder.
I was going to say the speakers might be a little "strangled" by not having enough air behind them.
Sent from my ONEPLUS A3003 using Tapatalk
Posts: 1,663
Threads: 62
Joined: Jul 2012
Reputation:
10
Location: Rugby, Warwickshire
Car Model/Spec: Golf 7 GTD : LBSC Rallye
Thanks: 0
Given 11 thank(s) in 11 post(s)
Nice read, great attention to detail. Makes me miss my 3 door hdi.
Don't forget to polish the headlights. I fitted halfords rally ones to mine as I drove a lot down dark country roads and they were a godsend.
Night Blue VW Golf 7 GTD : Bianca 306 Rallye : Mini Cooper D (The Mrs')
![[Image: wallye-gtd.JPG?raw=1]](https://www.dropbox.com/s/pcxk1pgpaucznvr/wallye-gtd.JPG?raw=1)
HDi Owner for 200k/9 years
Posts: 1,295
Threads: 186
Joined: May 2014
Reputation:
6
Location: UK
Car Model/Spec: Peugeot 306 2.0 HDI
Thanks: 29
Given 17 thank(s) in 17 post(s)
I have just read through all this as well and I am seriously impressed with the work  It looks fantastic! It has given me a new urge to get mine into as good shape as possible now  
Posts: 242
Threads: 25
Joined: Feb 2016
Reputation:
1
Location: Somerset
Car Model/Spec: 1999 Rallye || 1999 HDi
Thanks: 11
Given 3 thank(s) in 3 post(s)
Good work! Just a quick one did you ever sort out the carpet in the front if so how did you sort it? My rallye has the same.
1999 - Black Rallye A/C
2002 - Silver 206 1.4 HDi LX
Posts: 1,484
Threads: 101
Joined: Jun 2015
Reputation:
2
Location: Oxfordshire
Car Model/Spec: 306HDi 90 LX
Thanks: 13
Given 28 thank(s) in 28 post(s)
Afterwards they were much tidier but I'm still having a problem getting them to fit in behind the headunit because of the harness adaptor for the stereo and the stalk adaptor - if anyone has any tips on how to do this - I was wondering if I could remove the glove box and reach in behind to get the cables to sit right?
I managed to tuck my wires downwards towards the heater controls
It goes, it stops (as reqd). 
Hate Housework!
Posts: 141
Threads: 12
Joined: Mar 2017
Reputation:
0
Location: Surrey
Car Model/Spec: Golf6R, Ph1 172 (x2!)
Thanks: 2
Given 2 thank(s) in 2 post(s)
(10-10-2017, 08:08 PM)DeeTurbo Wrote: Photo just as it is please.
I don't think I have any threads but I might have some in a photobucket folder.
I was going to say the speakers might be a little "strangled" by not having enough air behind them.
Sent from my ONEPLUS A3003 using Tapatalk
Hey Dee, realise it's been an age since you asked for a pic and the HDI is now sold but here they are in case they are of use to you. I ended up buying a Pioneer 80PRS headunit as it is way more tuneable (the previous one was good for media but not much else) and once it was all wired up and properly setup on the headunit the soundstage was awesome - having the remote stalk was a nice touch too.
You're right about the fact the speaker would be strangled - if I was keeping the car I would have got busy with the dremel and cut away the excess plastic and possibly some of the metal door skin to allow the speaker to "breathe" fully into the door. They didn't look bad at all once fitted and with the doors shut you didn't even notice the fact they weren't finished off/blended in around the edges.
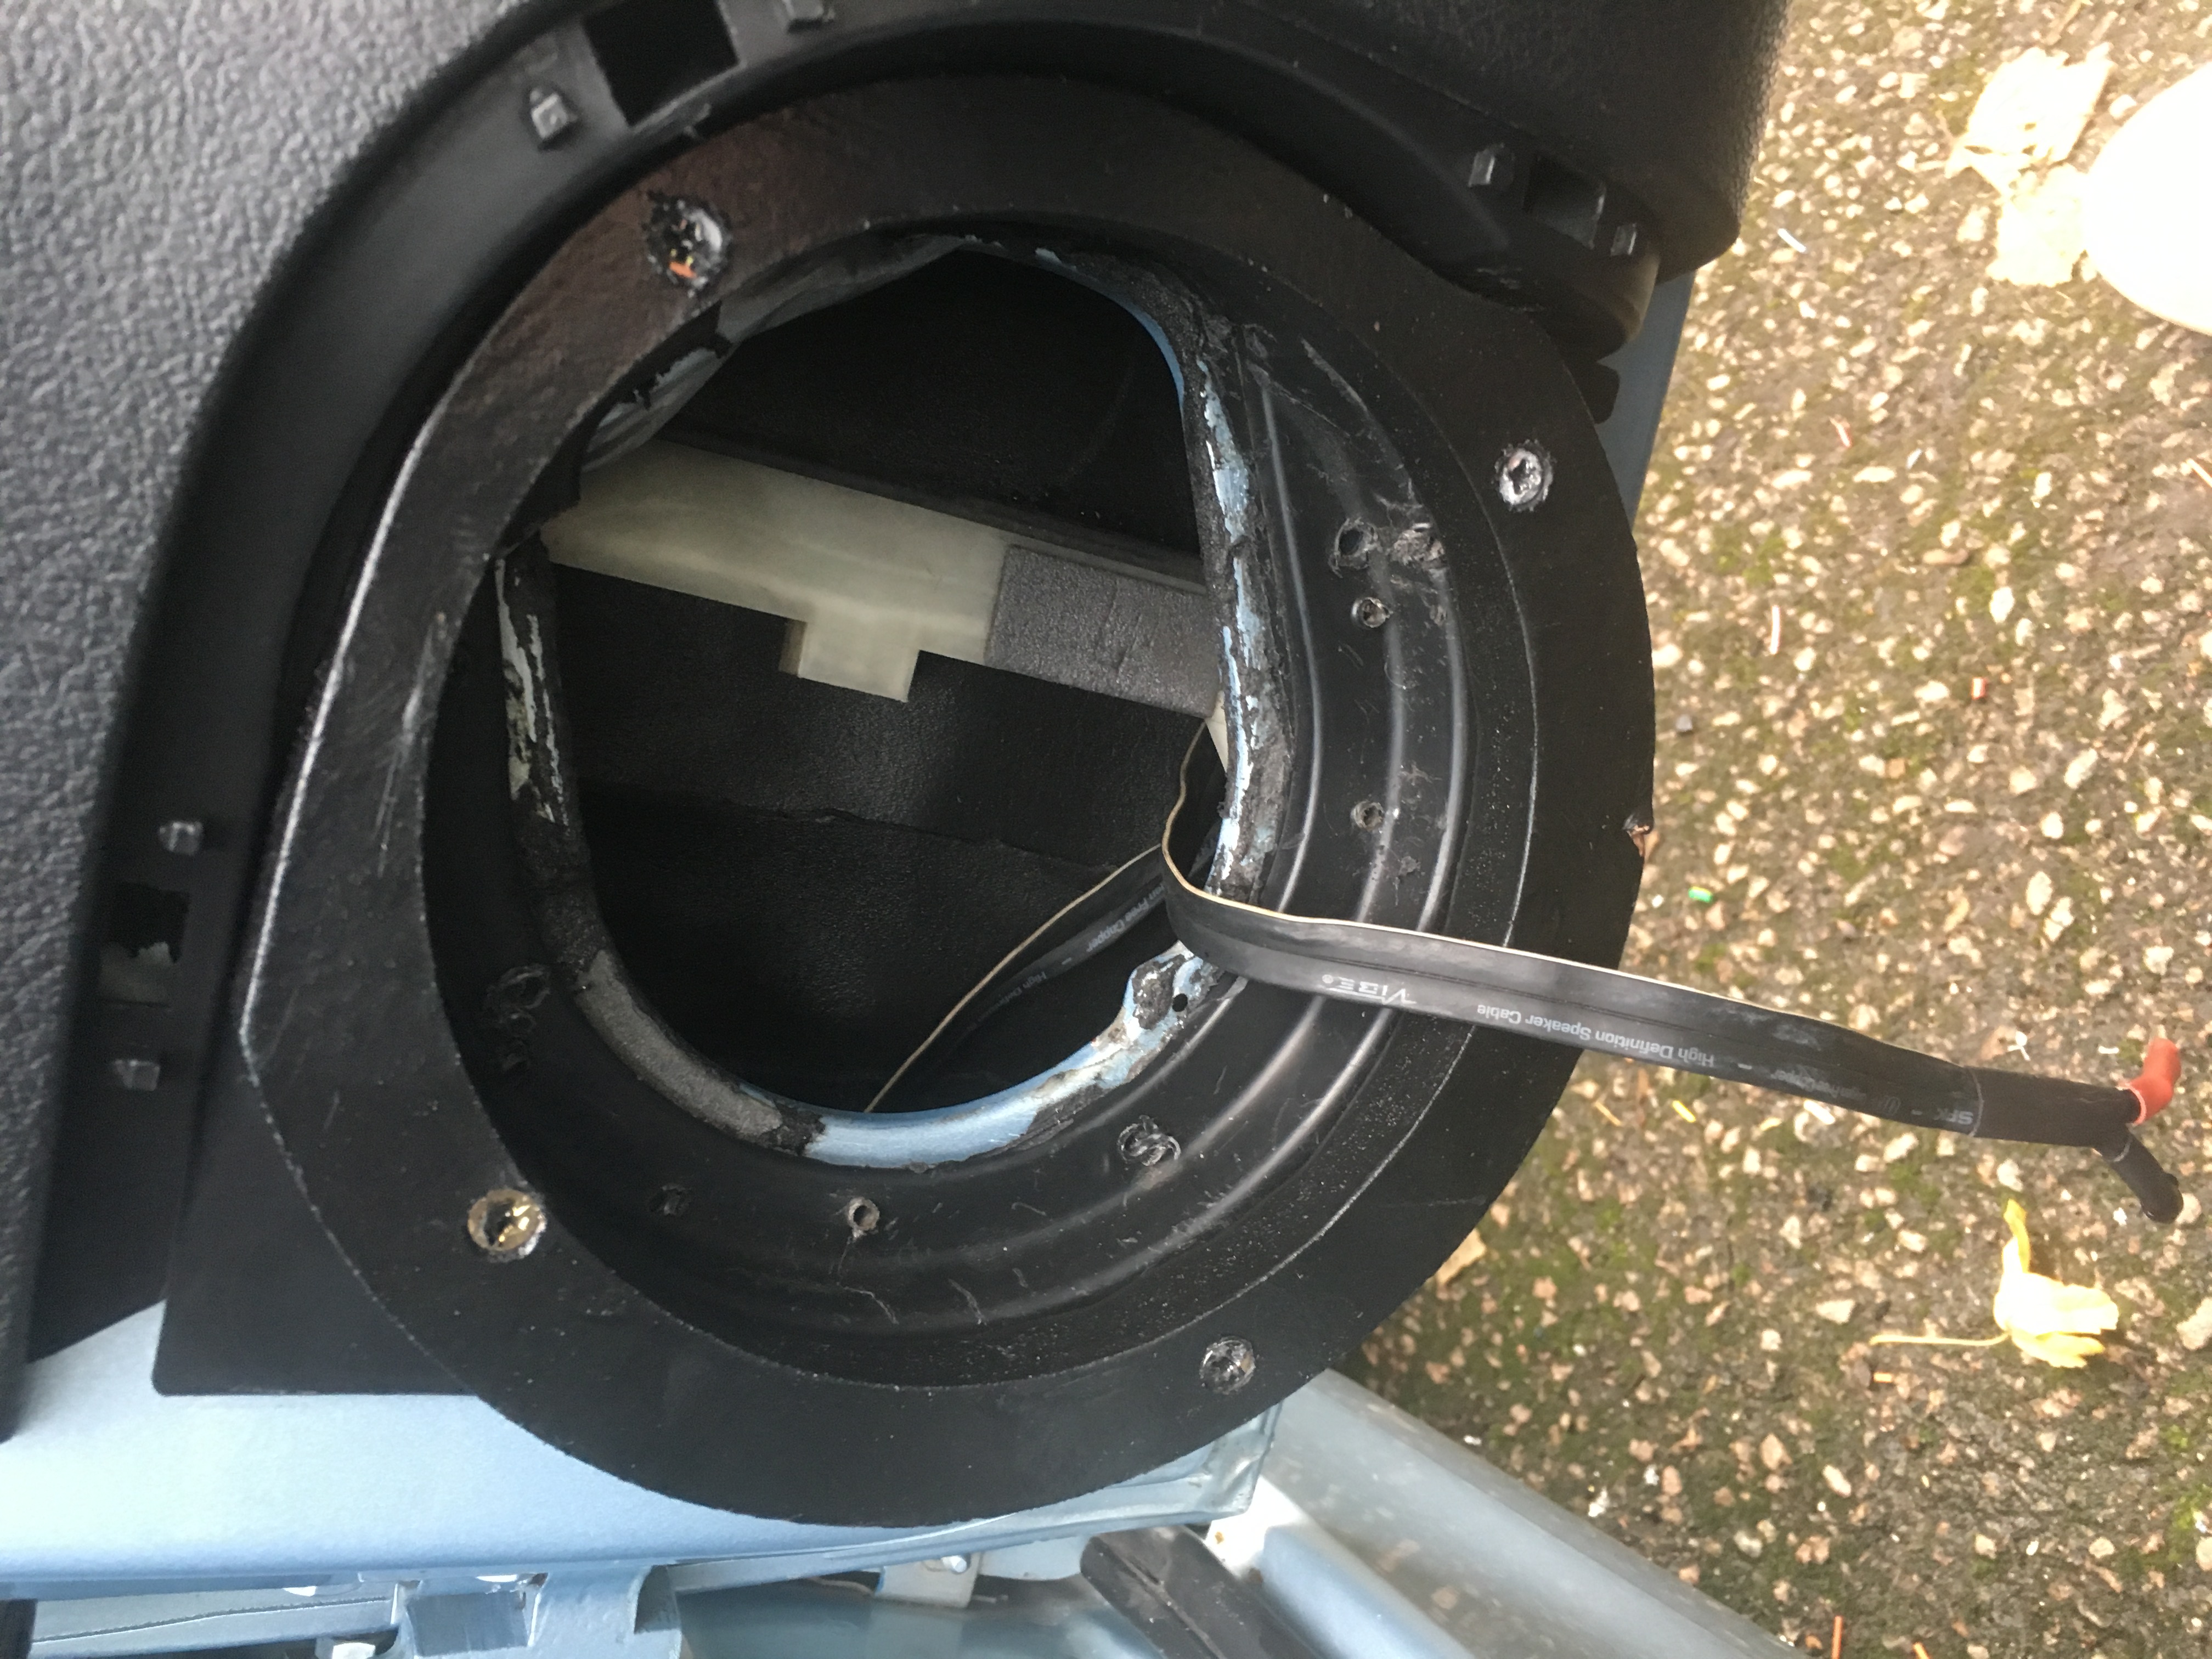


Car scrubbed up well for the sale shots, hope the new owner enjoys it as much as I did, I actually rather miss it so I'm on the hunt for a nice 6 now, these things kinda get under your skin!

190k Moonstone 3dr HDI sold
..on the lookout for a 6/rallye
Posts: 75
Threads: 8
Joined: Feb 2014
Location: Woking, Surrey
Car Model/Spec: Ph1 DT and Ph1 XSI
Thanks: 3
Given 0 thank(s) in 0 post(s)
Hi bish, I cant use pm's yet as im not on 100 posts lol
add me on facebook or pm me your number ill give you a text, search Lee Powell on the 306oc facebook page you should find me.
cheers
|


 If I had a daily this is exactly what id be doing to it!
![[Image: 17b33c2a-8471-4313-992e-0a4b324cf926_zps2e63812a.jpg]](http://i143.photobucket.com/albums/r143/matt-taylor/17b33c2a-8471-4313-992e-0a4b324cf926_zps2e63812a.jpg)
