

06-12-2011, 02:18 PM
OK guys been hoping to start this for a while so here goes.
I bought this car as I need a diesel for work, heard from a guy that these were good cars so went ou looking.
In the end i ended up with this only 93,000 on the clock two years ago, with no mods but the neons and sub in the boot and 205 gti wheels.
![[Image: a116.jpg]](http://i674.photobucket.com/albums/vv103/pompey306mark/a116.jpg)
![[Image: a117.jpg]](http://i674.photobucket.com/albums/vv103/pompey306mark/a117.jpg)
![[Image: a118.jpg]](http://i674.photobucket.com/albums/vv103/pompey306mark/a118.jpg)
Over a period of time, i started to look at getting the car looking different.
Ended up purchasing some lexus rear lights, and angel eyes.
Then i went about, painting the trim and fitting a laguna front splitter and rear diffuser, along with a spoiler and front grill and side skirts
![[Image: a11.jpg]](http://i674.photobucket.com/albums/vv103/pompey306mark/a11.jpg)
![[Image: a110.jpg]](http://i674.photobucket.com/albums/vv103/pompey306mark/a110.jpg)
![[Image: a111.jpg]](http://i674.photobucket.com/albums/vv103/pompey306mark/a111.jpg)
![[Image: a13.jpg]](http://i674.photobucket.com/albums/vv103/pompey306mark/a13.jpg)
![[Image: a15.jpg]](http://i674.photobucket.com/albums/vv103/pompey306mark/a15.jpg)
![[Image: a1.jpg]](http://i674.photobucket.com/albums/vv103/pompey306mark/a1.jpg)
![[Image: n528250014_4725650_8005.jpg]](http://i674.photobucket.com/albums/vv103/pompey306mark/n528250014_4725650_8005.jpg)
Also fitted a strut brace too.
After a few months I decided i want to go abit further and spray the car, (was feeling bored and had alot of spare time lol), I also decided that i wanted to get even more different some went on the hunt for some aggressive bumpers. After much searching i came up with the following paint scheme and body kit.
![[Image: a115.jpg]](http://i674.photobucket.com/albums/vv103/pompey306mark/a115.jpg)
![[Image: n528250014_4725668_4035.jpg]](http://i674.photobucket.com/albums/vv103/pompey306mark/n528250014_4725668_4035.jpg)
![[Image: Photo0340.gif]](http://i674.photobucket.com/albums/vv103/pompey306mark/Photo0340.gif)
Now i know alot of the guys on the forum think bodykits are chavvy and looks shit, but i like to be different.
Even you old school 306 lovers must admit its a pretty aggressive front bumper, and the rear bumper i modified to fit my twin exit exhaust.
Up until this point i had not even thought about doing work to the engine bay and then i meet Kris.
I started loooking around at prices and parts and decided it was not for me, then i got a promotion and the rest they say is history lol.
My first visit too kris was about 20th Feb. I travelled up to get a bosch conversion and tune, fitting a new rear axle with disc brakes, lowering of the rear axle, fitting of bigger front brakes.
The day was going well we fitted the rear beam and lowered the rear, and cracked on with a few other smaller jobs then started with the tune. The day was turning into night but still kris cracked on, once we had the pump fitted we started her up and then there was a problem. The guy i bought the pump off had taken it apart and not put it together correctly. So we retired for the evening... while i relaxed on the sofa Kris did some serious research into the 306 pumps. Next day was great, car was running great tuned up and running a dream.
Even though we did not get the front brakes done I thought it was a weekend well spent, we also managed to mess up the rear brake compensator so i was driving without one for the time being.
My next visit to Kris's would be just as interesting, after sourcing a front mounted intercooler and ordering the replacement brake pipes from his local Pug dealership. I headed up to Kris to get it all fitted, after finding out Pug had messed up, me Kris and Pete spent the morning driving around looking for brake pipes. We had one made up for us, and headed back to his garage. We spent the rest of the day fitting the 266mm front brakes replacing the rear compensator brake pipe, only to find out there was another pipe that had become damaged while i was driving. We also fitted 3 of 4 Braided Brake cables as one of the original brake lines had seized.
We also worked out that the front mounted intercooler was for a phase 2 car lol, so we did fit it in the end.
![[Image: Photo0342.jpg]](http://i674.photobucket.com/albums/vv103/pompey306mark/Photo0342.jpg)
![[Image: Photo0341.gif]](http://i674.photobucket.com/albums/vv103/pompey306mark/Photo0341.gif)
![[Image: Photo0339.gif]](http://i674.photobucket.com/albums/vv103/pompey306mark/Photo0339.gif)
![[Image: Photo0338.gif]](http://i674.photobucket.com/albums/vv103/pompey306mark/Photo0338.gif)
http://s674.photobucket.com/albums/vv103...to0337.gif
http://s674.photobucket.com/albums/vv103...to0324.gif
http://s674.photobucket.com/albums/vv103...to0321.gif
So i travelled up to Kris's for another tempted at getting things done, this time Pug let us down again lol so we had one brake pipe but not the rear one we had been waiting for, so we drove off and found a brake building kit, after building loads of replacement pipes we fitted the other braided brake line and the whole rear brake compensator with all new pipes.
![[Image: Photo0318.gif]](http://i674.photobucket.com/albums/vv103/pompey306mark/Photo0318.gif)
![[Image: Photo0320.gif]](http://i674.photobucket.com/albums/vv103/pompey306mark/Photo0320.gif)
Next was the new Front Mounted Intercooler. After a little bit of fun and games we got it all sorted and fitted up to the car.
![[Image: Photo0305.gif]](http://i674.photobucket.com/albums/vv103/pompey306mark/Photo0305.gif)
![[Image: Photo0307.gif]](http://i674.photobucket.com/albums/vv103/pompey306mark/Photo0307.gif)
![[Image: Photo0309.gif]](http://i674.photobucket.com/albums/vv103/pompey306mark/Photo0309.gif)
![[Image: Photo0310.gif]](http://i674.photobucket.com/albums/vv103/pompey306mark/Photo0310.gif)
![[Image: Photo0311.gif]](http://i674.photobucket.com/albums/vv103/pompey306mark/Photo0311.gif)
So we have pretty much sorted the car, I have fitted a Phase 2 Front bumper, fitted Fmic, bigger brakes, new rear axle, braided brake lines, and a twin exist exhaust, and de cat. You may also notice i have changed the lexus and angel eyes for black versions.
Coming up i have a new opal mantra exhaust, de middled box, a new rear bumper, 150bhp rated injectors, and a brand spanking new T2 turbo.
Heres some pics of the nightmares bay too.
![[Image: DSC01397.jpg]](http://i145.photobucket.com/albums/r201/kris306dt/Marks%20car/DSC01397.jpg)
![[Image: DSC01398.jpg]](http://i145.photobucket.com/albums/r201/kris306dt/Marks%20car/DSC01398.jpg)
![[Image: DSC01399.jpg]](http://i145.photobucket.com/albums/r201/kris306dt/Marks%20car/DSC01399.jpg)
Next up be new turbo, injectors, more tuning...
My interior too forgot about these.
![[Image: n528250014_4725653_46.jpg]](http://i674.photobucket.com/albums/vv103/pompey306mark/n528250014_4725653_46.jpg)
![[Image: n528250014_4725654_720.jpg]](http://i674.photobucket.com/albums/vv103/pompey306mark/n528250014_4725654_720.jpg)
![[Image: NewImage.gif]](http://i674.photobucket.com/albums/vv103/pompey306mark/NewImage.gif)
![[Image: Photo0343.gif]](http://i674.photobucket.com/albums/vv103/pompey306mark/Photo0343.gif)
Hello guys quick update before i go to kris's on friday for my hdi gear box, bought these £100 going to fit them soon, 16" OZ superturismo's
![[Image: Photo0358.jpg]](http://i674.photobucket.com/albums/vv103/pompey306mark/Photo0358.jpg)
![[Image: Photo0359.jpg]](http://i674.photobucket.com/albums/vv103/pompey306mark/Photo0359.jpg)
This Friday i travelled up to Kris's to start work on my Hdi Gearbox conversion,
![[Image: Photo0360.jpg]](http://i674.photobucket.com/albums/vv103/pompey306mark/Photo0360.jpg)
Cool view over the downs early in the morning.
Well before we started on the gearbox i thought it would be a good chance to change out my rear bumper, for this one..
![[Image: Photo0368.jpg]](http://i674.photobucket.com/albums/vv103/pompey306mark/Photo0368.jpg)
![[Image: Photo0369.jpg]](http://i674.photobucket.com/albums/vv103/pompey306mark/Photo0369.jpg)
![[Image: Photo0370.jpg]](http://i674.photobucket.com/albums/vv103/pompey306mark/Photo0370.jpg)
As you can also see I have changed my rear box, for a opel mantra de restricted box.
After this we attacked the gearbox, once the old one was removed we decided that we weren't just going to change the gearbox, but also the flywheel and clutch too.
So we decided to order a new clutch... while we were waiting I decided to paint up my front calipers.
![[Image: Photo0365.jpg]](http://i674.photobucket.com/albums/vv103/pompey306mark/Photo0365.jpg)
![[Image: Photo0366.jpg]](http://i674.photobucket.com/albums/vv103/pompey306mark/Photo0366.jpg)
![[Image: Photo0371.jpg]](http://i674.photobucket.com/albums/vv103/pompey306mark/Photo0371.jpg)
![[Image: Photo0372.jpg]](http://i674.photobucket.com/albums/vv103/pompey306mark/Photo0372.jpg)
Once the new clutch arrived, we fitted it and then fitted the new gearbox.
![[Image: Photo0367.jpg]](http://i674.photobucket.com/albums/vv103/pompey306mark/Photo0367.jpg)
![[Image: Photo0364.jpg]](http://i674.photobucket.com/albums/vv103/pompey306mark/Photo0364.jpg)
![[Image: Photo0363.jpg]](http://i674.photobucket.com/albums/vv103/pompey306mark/Photo0363.jpg)
The drive is amazing now and anyone thinking of doing the upgrade should get it done.
Next up uprated injectors, new turbo and Meth injection.
New alloys are now on, let me know what you think as always.
![[Image: Photo0379.jpg]](http://i674.photobucket.com/albums/vv103/pompey306mark/Photo0379.jpg)
Alright guys, thanks for all the comments, suggestions and critism so far lol. Just a quick update, got home from work and i thought i would quickly attach my front splitter before it rained.
Also guys if you could have a look at my photoshop thread and give me idea on paint schemes would be very helpful, or do some photo shopping yourself. (Kris thanks for all the help so far)
http://www.theywhoshallnotbenamed/forum/...hp?t=74651
![[Image: Photo0382.jpg]](http://i674.photobucket.com/albums/vv103/pompey306mark/Photo0382.jpg)
![[Image: Photo0383.jpg]](http://i674.photobucket.com/albums/vv103/pompey306mark/Photo0383.jpg)
![[Image: Photo0384.jpg]](http://i674.photobucket.com/albums/vv103/pompey306mark/Photo0384.jpg)
![[Image: Photo0385.jpg]](http://i674.photobucket.com/albums/vv103/pompey306mark/Photo0385.jpg)
![[Image: Photo0381.jpg]](http://i674.photobucket.com/albums/vv103/pompey306mark/Photo0381.jpg)
cool, arrived back from New York to find all my bits had arrived. Now I know there are still going to be comments about the paint, just remember its a project, meaning its not finished.
Will be filling phase 2/3 bonnet and grill this weekend i hope, then changing the front end when i get chance. But here are the changes so far today......
![[Image: Photo0489.jpg]](http://i674.photobucket.com/albums/vv103/pompey306mark/Photo0489.jpg)
![[Image: Photo0491.jpg]](http://i674.photobucket.com/albums/vv103/pompey306mark/Photo0491.jpg)
![[Image: Photo0492.jpg]](http://i674.photobucket.com/albums/vv103/pompey306mark/Photo0492.jpg)
Not a bad attempt for someone with no patience lol
![[Image: Photo0498.jpg]](http://i674.photobucket.com/albums/vv103/pompey306mark/Photo0498.jpg)
and starting on the front bumer
![[Image: Photo0499.jpg]](http://i674.photobucket.com/albums/vv103/pompey306mark/Photo0499.jpg)
yea new exhaust and my new air filter........
![[Image: Photo0501.jpg]](http://i674.photobucket.com/albums/vv103/pompey306mark/Photo0501.jpg)
![[Image: Photo0502.jpg]](http://i674.photobucket.com/albums/vv103/pompey306mark/Photo0502.jpg)
Tomorrow my new intercooler and door poopers will arrive
OK so i promised a few guys on here i would try and finish smoothing my new Ph3 front bumper, this weekend, well here is the almost finished version.
HOPE you all had a good time at FCS, wish i could of come next year maybe!!!
![[Image: Photo0503.jpg]](http://i674.photobucket.com/albums/vv103/pompey306mark/Photo0503.jpg)
![[Image: Photo0504.jpg]](http://i674.photobucket.com/albums/vv103/pompey306mark/Photo0504.jpg)
![[Image: Photo0505.jpg]](http://i674.photobucket.com/albums/vv103/pompey306mark/Photo0505.jpg)
Next up some colour and then smoothing finish the bonnet and the start on the sides and tailgate.
Ok so i rollered my bonnet today, but i am not to sure of the finish....
What do you guys think of the colour and finish.
![[Image: Photo0522.jpg]](http://i674.photobucket.com/albums/vv103/pompey306mark/Photo0522.jpg)
![[Image: Photo0523.jpg]](http://i674.photobucket.com/albums/vv103/pompey306mark/Photo0523.jpg)
Ok so after the comments yesterday, i decide to attempt making the bonnet better, so i took my new electric sander to it and sanded off most of the rough bits then tried smoothing it out a bit better, it still not prefect i think but it looks like its about to rain so had to primer up the bits that i had touched up.
![[Image: Photo0524.jpg]](http://i674.photobucket.com/albums/vv103/pompey306mark/Photo0524.jpg)
let me know what you think i just cant seem to get it right.
The cyclones have arrived!!!
![[Image: Photo0525.jpg]](http://i674.photobucket.com/albums/vv103/pompey306mark/Photo0525.jpg)
![[Image: Photo0526.jpg]](http://i674.photobucket.com/albums/vv103/pompey306mark/Photo0526.jpg)
![[Image: Photo0527.jpg]](http://i674.photobucket.com/albums/vv103/pompey306mark/Photo0527.jpg)
![[Image: Photo0528.jpg]](http://i674.photobucket.com/albums/vv103/pompey306mark/Photo0528.jpg)
![[Image: Photo0529.jpg]](http://i674.photobucket.com/albums/vv103/pompey306mark/Photo0529.jpg)
Only cost me £102.
Just a quick pic, shouldnt of changed them really, cos i am ill and on aload of medicine but who cares.
![[Image: Photo0532.jpg]](http://i674.photobucket.com/albums/vv103/pompey306mark/Photo0532.jpg)
And after a quick drive around the road it feels much nicer too....happy days
My lastest attempt at the bonnet
![[Image: Photo0533.jpg]](http://i674.photobucket.com/albums/vv103/pompey306mark/Photo0533.jpg)
So after the good finish on the bonnet with my new paint i decided I would give my smoothed front bumper a good going over.
also picked up my new smoothed tailgate this morning so if i get time tomorrow i might try and paint that too.
Now just need to figure out how to get crystals wired up to a phase1 then i can change the front end.... anyone know?
![[Image: Photo0535.jpg]](http://i674.photobucket.com/albums/vv103/pompey306mark/Photo0535.jpg)
So i went to go collect this off springs on the weekend, (thank you) I now have a spare phase 3 boot de wipered in green in the garage and a spare phase 1 spoiler. Now just need cleaning up.
![[Image: Photo0542.jpg]](http://i674.photobucket.com/albums/vv103/pompey306mark/Photo0542.jpg)
Also got some new plates today, I know the front will be illegal but i will have the normal one in the window for day to day use.
![[Image: Photo0543.jpg]](http://i674.photobucket.com/albums/vv103/pompey306mark/Photo0543.jpg)
And i tried to turn the image around but photobucket playing up.
Last bit of my front end done.
![[Image: Photo0545-1.jpg]](http://i674.photobucket.com/albums/vv103/pompey306mark/Photo0545-1.jpg)
Just need to sort out how to wire up my crystals to Phase 1 wiring, and then fit it all.
Right so went to Kris's new unit today, really nice place.
Aim of the day complete phase 1 to phase 3 change over + new Rad and Intercooler.
First taking everything off.
![[Image: Picture001.jpg]](http://i674.photobucket.com/albums/vv103/pompey306mark/Picture001.jpg)
Then putting in the new rad which would have been simple but i bought the wrong one, so ordered a new one then fitted it (anyone want a phase 2 nissen rad £80inc delivery.)
![[Image: Picture003.jpg]](http://i674.photobucket.com/albums/vv103/pompey306mark/Picture003.jpg)
Then the new intercooler.
![[Image: Picture005.jpg]](http://i674.photobucket.com/albums/vv103/pompey306mark/Picture005.jpg)
![[Image: Picture006.jpg]](http://i674.photobucket.com/albums/vv103/pompey306mark/Picture006.jpg)
Next up the wiring of the crystal headlights, easier than i thought it was going to be, (well done kris) and the grill.
![[Image: Picture011.jpg]](http://i674.photobucket.com/albums/vv103/pompey306mark/Picture011.jpg)
![[Image: Picture013.jpg]](http://i674.photobucket.com/albums/vv103/pompey306mark/Picture013.jpg)
Then the bonnet.
![[Image: Picture014.jpg]](http://i674.photobucket.com/albums/vv103/pompey306mark/Picture014.jpg)
![[Image: Picture015.jpg]](http://i674.photobucket.com/albums/vv103/pompey306mark/Picture015.jpg)
![[Image: Picture016.jpg]](http://i674.photobucket.com/albums/vv103/pompey306mark/Picture016.jpg)
![[Image: Picture017.jpg]](http://i674.photobucket.com/albums/vv103/pompey306mark/Picture017.jpg)
Just playing with camera filter lenses.
![[Image: Picture007.jpg]](http://i674.photobucket.com/albums/vv103/pompey306mark/Picture007.jpg)
![[Image: Picture012.jpg]](http://i674.photobucket.com/albums/vv103/pompey306mark/Picture012.jpg)
![[Image: Picture013-1.jpg]](http://i674.photobucket.com/albums/vv103/pompey306mark/Picture013-1.jpg)
![[Image: Picture017-1.jpg]](http://i674.photobucket.com/albums/vv103/pompey306mark/Picture017-1.jpg)
![[Image: Picture026.jpg]](http://i674.photobucket.com/albums/vv103/pompey306mark/Picture026.jpg)
![[Image: Picture027.jpg]](http://i674.photobucket.com/albums/vv103/pompey306mark/Picture027.jpg)
![[Image: Picture030.jpg]](http://i674.photobucket.com/albums/vv103/pompey306mark/Picture030.jpg)
![[Image: Picture035.jpg]](http://i674.photobucket.com/albums/vv103/pompey306mark/Picture035.jpg)
![[Image: Picture037.jpg]](http://i674.photobucket.com/albums/vv103/pompey306mark/Picture037.jpg)
So dan did these in the photoshop section so i though i would repost in here, what do guys think.
![[Image: mattblueotherweird.jpg]](http://i674.photobucket.com/albums/vv103/pompey306mark/mattblueotherweird.jpg)
![[Image: mattbluewhite.jpg]](http://i674.photobucket.com/albums/vv103/pompey306mark/mattbluewhite.jpg)
![[Image: mattblueweird.jpg]](http://i674.photobucket.com/albums/vv103/pompey306mark/mattblueweird.jpg)
![[Image: mattblueanthra.jpg]](http://i674.photobucket.com/albums/vv103/pompey306mark/mattblueanthra.jpg)
![[Image: matblueblack.jpg]](http://i674.photobucket.com/albums/vv103/pompey306mark/matblueblack.jpg)
Next little update got these off ben, fitted them today and very happy with them pity you cant get the same thing for the rears.
![[Image: Photo0578.jpg]](http://i674.photobucket.com/albums/vv103/pompey306mark/Photo0578.jpg)
![[Image: Photo0577.jpg]](http://i674.photobucket.com/albums/vv103/pompey306mark/Photo0577.jpg)
SO got up this morning and the weather was ok so thought i would start on the splitter.
![[Image: Photo0589.jpg]](http://i674.photobucket.com/albums/vv103/pompey306mark/Photo0589.jpg)
![[Image: Photo0587.jpg]](http://i674.photobucket.com/albums/vv103/pompey306mark/Photo0587.jpg)
![[Image: Photo0590.jpg]](http://i674.photobucket.com/albums/vv103/pompey306mark/Photo0590.jpg)
So as promised, here are some pics of my supercharger.
![[Image: Photo0591.jpg]](http://i674.photobucket.com/albums/vv103/pompey306mark/Photo0591.jpg)
![[Image: Photo0592.jpg]](http://i674.photobucket.com/albums/vv103/pompey306mark/Photo0592.jpg)
![[Image: Photo0593.jpg]](http://i674.photobucket.com/albums/vv103/pompey306mark/Photo0593.jpg)
Its about the same size as a headlight unit.
ok so, i am at work just going some reading up and found this, not sure if it will help.
A twincharging system combines a supercharger and turbocharger in a complementary arrangement, with the intent of one component's advantage compensating for the other component's disadvantage. There are several different twincharging configurations. The two most common are series, and parallel.
Series systems, the more common of the two, are plumbed such that one compressor's output feeds the inlet of another. It is a sequentially-organized Roots type supercharger, connected to a medium- to large-sized turbocharger.[citation needed] The supercharger provides near-instant manifold pressure, when the turbocharger is otherwise not at its operating speed. Once the turbocharger has reached operating speed, the supercharger can either continue contributing air to the intake (yielding elevated intake pressures), or it can be bypassed and mechanically decoupled from the drivetrain via an electromagnetic clutch (increasing efficiency of the induction system).
Other series configurations exist where no bypass system is employed and both compressors are in continuous duty. As a result, compounded boost is always produced as the pressure ratios of the two compressors combine. This form of series twincharging allows for the production of boost pressures that would otherwise be unachieveable with other compressor arrangements. A significant advantage of this method is the reduction in charge temperature for a given pressure output versus that of a single compressor producing the same output.
Parallel systems typically always require the use of a bypass or diverter valve to "select" which compressor is feeding the engine. Parallel systems are not compounded by design, and maximum manifold pressure will be equal to the maximum output of the compressors, whichever is greatest. Parallel systems often employ complex electronics to control bypass valves selecting which compressor is utilized depending on several engine parameters, driver inputs, and environmental factors. Mechanically-controlled parallel twincharged systems typically cannot provide a transparent and seamless switch between compressors. As a result, power delivery can have abrubt spikes.
Right no news on the supercharger the weather was amazing today, so thought i would attack the side of the car. I started by removing the side strips on one side, so i have my side strips for sale in black with all the clips.
I thought i would beable to hammer the holes in a bit to give the filler something to hold to but it did not work, so i just used flexi-filler of ebay and covered the holes, and the rear handle.
Must easy with the help of my new sander, I sanded down the whole side of the car.
It needs cleaning, these pics are just to show people what it looks like.
![[Image: Photo0602.jpg]](http://i674.photobucket.com/albums/vv103/pompey306mark/Photo0602.jpg)
![[Image: Photo0601.jpg]](http://i674.photobucket.com/albums/vv103/pompey306mark/Photo0601.jpg)
![[Image: Photo0600.jpg]](http://i674.photobucket.com/albums/vv103/pompey306mark/Photo0600.jpg)
![[Image: Photo0606.jpg]](http://i674.photobucket.com/albums/vv103/pompey306mark/Photo0606.jpg)
![[Image: Photo0607.jpg]](http://i674.photobucket.com/albums/vv103/pompey306mark/Photo0607.jpg)
![[Image: Photo0605.jpg]](http://i674.photobucket.com/albums/vv103/pompey306mark/Photo0605.jpg)
![[Image: Photo0603.jpg]](http://i674.photobucket.com/albums/vv103/pompey306mark/Photo0603.jpg)
So the side from yesterday looks a little bit now, and this is the other side too.
Well if you look back throught the thread there are some pics, with different colours, i was going to going blue and anthracite grey as it looks pretty good, but not sure yet.
Also picked up these nice door cards and this grill, which is not filled, so hopefully no cracking.
![[Image: Mark5.jpg]](http://i674.photobucket.com/albums/vv103/pompey306mark/Mark5.jpg)
![[Image: Mark4.jpg]](http://i674.photobucket.com/albums/vv103/pompey306mark/Mark4.jpg)
![[Image: Mark3.jpg]](http://i674.photobucket.com/albums/vv103/pompey306mark/Mark3.jpg)
![[Image: Mark2.jpg]](http://i674.photobucket.com/albums/vv103/pompey306mark/Mark2.jpg)
![[Image: Mark1.jpg]](http://i674.photobucket.com/albums/vv103/pompey306mark/Mark1.jpg)
Nice me thinks
Right guys, what colour should i paint my cyclones. White, some random bright colour, black????? need some ideas.
Some ideas from before are below
Here you go mate
![[Image: Untitled-10.png]](http://i761.photobucket.com/albums/xx254/Drew_306/Untitled-10.png)
![[Image: Untitled-11.png]](http://i761.photobucket.com/albums/xx254/Drew_306/Untitled-11.png)
![[Image: Untitled-12.png]](http://i761.photobucket.com/albums/xx254/Drew_306/Untitled-12.png)
![[Image: Untitled-13.png]](http://i761.photobucket.com/albums/xx254/Drew_306/Untitled-13.png)
![[Image: Untitled-7.png]](http://i761.photobucket.com/albums/xx254/Drew_306/Untitled-7.png)
![[Image: Untitled-8.png]](http://i761.photobucket.com/albums/xx254/Drew_306/Untitled-8.png)
![[Image: Untitled-9.png]](http://i761.photobucket.com/albums/xx254/Drew_306/Untitled-9.png)
i think the orange looks good
![[Image: Photo0617.jpg]](http://i674.photobucket.com/albums/vv103/pompey306mark/Photo0617.jpg)
![[Image: Photo0618.jpg]](http://i674.photobucket.com/albums/vv103/pompey306mark/Photo0618.jpg)
Only done one as it looks like the weather is starting to get worse hopeing tomorrow will be better.
![[Image: Photo0648.jpg]](http://i674.photobucket.com/albums/vv103/pompey306mark/Photo0648.jpg)
![[Image: Photo0660.jpg]](http://i674.photobucket.com/albums/vv103/pompey306mark/Photo0660.jpg)
Some pics from the pompey meet.
![[Image: Picture037-1.jpg]](http://i674.photobucket.com/albums/vv103/pompey306mark/Picture037-1.jpg)
![[Image: Picture032-1.jpg]](http://i674.photobucket.com/albums/vv103/pompey306mark/Picture032-1.jpg)
![[Image: Picture036-1.jpg]](http://i674.photobucket.com/albums/vv103/pompey306mark/Picture036-1.jpg)
![[Image: Picture035-1.jpg]](http://i674.photobucket.com/albums/vv103/pompey306mark/Picture035-1.jpg)
So went to Kris on Friday and this is what we got done.
Sun strip.
![[Image: Photo0662.jpg]](http://i674.photobucket.com/albums/vv103/pompey306mark/Photo0662.jpg)
Rear door poppers and cards.
![[Image: Photo0664.jpg]](http://i674.photobucket.com/albums/vv103/pompey306mark/Photo0664.jpg)
![[Image: Photo0665.jpg]](http://i674.photobucket.com/albums/vv103/pompey306mark/Photo0665.jpg)
![[Image: Photo0667.jpg]](http://i674.photobucket.com/albums/vv103/pompey306mark/Photo0667.jpg)
Front door cards.
![[Image: Photo0666.jpg]](http://i674.photobucket.com/albums/vv103/pompey306mark/Photo0666.jpg)
![[Image: Photo0668.jpg]](http://i674.photobucket.com/albums/vv103/pompey306mark/Photo0668.jpg)
![[Image: Photo0663.jpg]](http://i674.photobucket.com/albums/vv103/pompey306mark/Photo0663.jpg)
Now i know theres a few bits missing but I will be finding them shortly.
So today i have been to Kris, to get a bit more work done. We aimed to get my gti brakes fitted along with an oil cooler. However I need to get new discs and the clamps on the cooler werent great, so we ddi all the little things first.
Pug wing mirrors.
Lower Front Strut brace.
Mask Head Lights.
Finish off door cards and poppers.
Along with a few other things.
Now I know this wont be to everyones liking but its my car, and I am use to upsetting you lot now lol.
![[Image: Photo0681.jpg]](http://i674.photobucket.com/albums/vv103/pompey306mark/Photo0681.jpg)
If you have not got a lower strut brace you need one in your life by the way, and more pics tomorrow.
]![[Image: photo1.jpg]](http://i674.photobucket.com/albums/vv103/pompey306mark/photo1.jpg)
![[Image: photo2.jpg]](http://i674.photobucket.com/albums/vv103/pompey306mark/photo2.jpg)
New parcel self.
![[Image: rear.jpg]](http://i674.photobucket.com/albums/vv103/pompey306mark/rear.jpg)
New Mats all round
![[Image: boot.jpg]](http://i674.photobucket.com/albums/vv103/pompey306mark/boot.jpg)
![[Image: dturbo.jpg]](http://i674.photobucket.com/albums/vv103/pompey306mark/dturbo.jpg)
![[Image: front.jpg]](http://i674.photobucket.com/albums/vv103/pompey306mark/front.jpg)
![[Image: back.jpg]](http://i674.photobucket.com/albums/vv103/pompey306mark/back.jpg)
Just thought i would post some pics of the exhaust.
Hopefully all going on, on Monday.
![[Image: Picture003-3.jpg]](http://i674.photobucket.com/albums/vv103/pompey306mark/Picture003-3.jpg)
![[Image: Picture004-2.jpg]](http://i674.photobucket.com/albums/vv103/pompey306mark/Picture004-2.jpg)
![[Image: Picture005-2.jpg]](http://i674.photobucket.com/albums/vv103/pompey306mark/Picture005-2.jpg)
Hello guys so here is my update, after spending two days wih kris, have not got many pics of the car, but might take some more later.
![[Image: Picture007-1.jpg]](http://i674.photobucket.com/albums/vv103/pompey306mark/Picture007-1.jpg)
So day one, arrive at Kris, and get to work first fitting the exhaust, we could not do the turbo first as we were waiting for parts.
So we put the car up on the ramp and got to work.
![[Image: Picture009-3.jpg]](http://i674.photobucket.com/albums/vv103/pompey306mark/Picture009-3.jpg)
![[Image: Picture010-2.jpg]](http://i674.photobucket.com/albums/vv103/pompey306mark/Picture010-2.jpg)
I have just realised i dont have a pic of the exhausted fitted was having to much fun working
Next up we started on the brakes, rear ones first.
![[Image: Picture011-3.jpg]](http://i674.photobucket.com/albums/vv103/pompey306mark/Picture011-3.jpg)
The changed over the fronts from 266mm to Gti6 283mm, we had to wait for a small few things to turn up from the parts company which slowed us down, but by the end of the day, everything was working very well.
![[Image: Picture013-3.jpg]](http://i674.photobucket.com/albums/vv103/pompey306mark/Picture013-3.jpg)
DJ_Xenobot turn up with his missus and decided to clean one of my cyclones lol thank you.
![[Image: Picture014-3.jpg]](http://i674.photobucket.com/albums/vv103/pompey306mark/Picture014-3.jpg)
and now for a dirty ones lol.
![[Image: Picture015-3.jpg]](http://i674.photobucket.com/albums/vv103/pompey306mark/Picture015-3.jpg)
Day two we attached the turbo, but we got delayed local PUG garage had no power in the morning so had to wait for the parts to turn up at one, then had to wait for the gasket to arrive, which did not turn up til 3 even though we ordered it first thing, oh and today was bloody cold, could thing Kris got is super heater work, but still have numb toes lol
![[Image: Picture019-2.jpg]](http://i674.photobucket.com/albums/vv103/pompey306mark/Picture019-2.jpg)
![[Image: Picture020-2.jpg]](http://i674.photobucket.com/albums/vv103/pompey306mark/Picture020-2.jpg)
![[Image: Picture022-1.jpg]](http://i674.photobucket.com/albums/vv103/pompey306mark/Picture022-1.jpg)
So we started by removing all the parts and getting the turbo off, cleaned a few bits here and there.
Once the parts turned up, we refitted the turbo, but noticed the turbo exit was not pointing in the right direction so we removed the turbo and rotated the exit port and refitted the turbo, then went to work putting it all back together.
The drive home was good, seems to pull alot better with exhaust and turbo on. Have not turned the boost up as i want to let the turbo and brakes bed in. Then when my pump comes back, i will turn things up and see where we lie. I am really tired so might have forgot a few things lol.
Shower is calling as i am still pretty dirty lol.
My new alpine head unit
![[Image: 3173d0a0.jpg]](http://i674.photobucket.com/albums/vv103/pompey306mark/3173d0a0.jpg)
My car in the snow, this is only 2hrs of snow, and it was wet when it first rained.
![[Image: Picture001-4.jpg]](http://i674.photobucket.com/albums/vv103/pompey306mark/Picture001-4.jpg)
![[Image: Picture002-4.jpg]](http://i674.photobucket.com/albums/vv103/pompey306mark/Picture002-4.jpg)
]![[Image: e3d1c1ee.jpg]](http://i674.photobucket.com/albums/vv103/pompey306mark/e3d1c1ee.jpg)
![[Image: 4368cbd9.jpg]](http://i674.photobucket.com/albums/vv103/pompey306mark/4368cbd9.jpg)
My new gear knob for my new interior.
![[Image: 7ed17b20.jpg]](http://i674.photobucket.com/albums/vv103/pompey306mark/7ed17b20.jpg)
New Console and Head Unit.
![[Image: 8bfa1ab3.jpg]](http://i674.photobucket.com/albums/vv103/pompey306mark/8bfa1ab3.jpg)
![[Image: dc3309bd.jpg]](http://i674.photobucket.com/albums/vv103/pompey306mark/dc3309bd.jpg)
![[Image: faa77238.jpg]](http://i674.photobucket.com/albums/vv103/pompey306mark/faa77238.jpg)
![[Image: 7de15a5c.jpg]](http://i674.photobucket.com/albums/vv103/pompey306mark/7de15a5c.jpg)
Right seats are in, rear door cards are in, just need to sort out the speakers now, and the passenger side air vent.
![[Image: d27f8b5b.jpg]](http://i674.photobucket.com/albums/vv103/pompey306mark/d27f8b5b.jpg)
![[Image: 42042a59.jpg]](http://i674.photobucket.com/albums/vv103/pompey306mark/42042a59.jpg)
![[Image: fa4a7b68.jpg]](http://i674.photobucket.com/albums/vv103/pompey306mark/fa4a7b68.jpg)
![[Image: 991bc6f7.jpg]](http://i674.photobucket.com/albums/vv103/pompey306mark/991bc6f7.jpg)
![[Image: 21e851f8.jpg]](http://i674.photobucket.com/albums/vv103/pompey306mark/21e851f8.jpg)
![[Image: dcb9a55b.jpg]](http://i674.photobucket.com/albums/vv103/pompey306mark/dcb9a55b.jpg)
Crappy Iphone pics but you get the idea.
![[Image: 02379679.jpg]](http://i674.photobucket.com/albums/vv103/pompey306mark/02379679.jpg)
![[Image: 27692324.jpg]](http://i674.photobucket.com/albums/vv103/pompey306mark/27692324.jpg)
![[Image: 38f0612e.jpg]](http://i674.photobucket.com/albums/vv103/pompey306mark/38f0612e.jpg)
Hmmm my reconned injectors.
![[Image: b61d095c.jpg]](http://i674.photobucket.com/albums/vv103/pompey306mark/b61d095c.jpg)
Just a update, finished my interior apart from maybe uprating the rear speaker, but they seem pretty good all ready.
So here are the finished front door cards, now I know the colour coded door speaker covers wont be to everyones liking but I like blue and so does my car.
![[Image: 1132e018.jpg]](http://i674.photobucket.com/albums/vv103/pompey306mark/1132e018.jpg)
![[Image: c28d69f6.jpg]](http://i674.photobucket.com/albums/vv103/pompey306mark/c28d69f6.jpg)
Next up a nice interior cleaning.
![[Image: IMG_3699.jpg]](http://i674.photobucket.com/albums/vv103/pompey306mark/IMG_3699.jpg)
![[Image: IMG_3689.jpg]](http://i674.photobucket.com/albums/vv103/pompey306mark/IMG_3689.jpg)
![[Image: IMG_3696.jpg]](http://i674.photobucket.com/albums/vv103/pompey306mark/IMG_3696.jpg)
What a day, dropped my car off at the garage this morning, thank you Phil for the lift to and from.
Was expecting them to take three days as they had other jobs on, but get a call around 3 to say they had finished. Luckily I checked to see if they had done everything, forgot the bonnet, but did it while I was on my way over. Waited a little while for them to finish and here are the results.
![[Image: 27d26b43.jpg]](http://i674.photobucket.com/albums/vv103/pompey306mark/27d26b43.jpg)
![[Image: ce6e468b.jpg]](http://i674.photobucket.com/albums/vv103/pompey306mark/ce6e468b.jpg)
So now i can put the door cards back on and clean the outside after giving it a little bit more of a sand down. Then primer and paint.
Spacers turned up today, but wrong size and not enough, only got two but ordered four. No doubt the comapny will be very helpful as they have been already.
I even got a lolly pop in one of the packs from them earlier, hopefully some more will turn up to say sorry for the mistake.
These arrived today.
![[Image: a68540ae.jpg]](http://i674.photobucket.com/albums/vv103/pompey306mark/a68540ae.jpg)
Bought these, hoping they will closely match the paint work once its done to give it more of a smoothed/blended finish.
![[Image: a99ffc0e.jpg]](http://i674.photobucket.com/albums/vv103/pompey306mark/a99ffc0e.jpg)
Drop links should be here early next week.
Rear with spacer.
![[Image: 4f1a6a39.jpg]](http://i674.photobucket.com/albums/vv103/pompey306mark/4f1a6a39.jpg)
Front with spacer.
![[Image: 8f616131.jpg]](http://i674.photobucket.com/albums/vv103/pompey306mark/8f616131.jpg)
Got bored so came up with some ideas, though not sure if the wheel company could do them.
![[Image: clone6.png]](http://i674.photobucket.com/albums/vv103/pompey306mark/clone6.png)
![[Image: clone8.png]](http://i674.photobucket.com/albums/vv103/pompey306mark/clone8.png)
![[Image: clone5.png]](http://i674.photobucket.com/albums/vv103/pompey306mark/clone5.png)
![[Image: clone4.png]](http://i674.photobucket.com/albums/vv103/pompey306mark/clone4.png)
![[Image: clone3.png]](http://i674.photobucket.com/albums/vv103/pompey306mark/clone3.png)
![[Image: clone2.png]](http://i674.photobucket.com/albums/vv103/pompey306mark/clone2.png)
![[Image: clone1.png]](http://i674.photobucket.com/albums/vv103/pompey306mark/clone1.png)
IMG]http://i266.photobucket.com/albums/ii245/DJCJ69/306/pompey4.png[/IMG]
![[Image: pompey3.png]](http://i266.photobucket.com/albums/ii245/DJCJ69/306/pompey3.png)
![[Image: pompey2.png]](http://i266.photobucket.com/albums/ii245/DJCJ69/306/pompey2.png)
![[Image: pompey1.png]](http://i266.photobucket.com/albums/ii245/DJCJ69/306/pompey1.png)
Hope that's useful fella'
Few more colours
![[Image: pompey6.png]](http://i266.photobucket.com/albums/ii245/DJCJ69/306/pompey6.png)
![[Image: pompey5.png]](http://i266.photobucket.com/albums/ii245/DJCJ69/306/pompey5.png)
![[Image: pompey7.png]](http://i266.photobucket.com/albums/ii245/DJCJ69/306/pompey7.png)
Right spent the day smoothing another Phase 3 Front bumper, no pics, maybe when I am done.
Watched Utd beat Chelsea 3-1.
Then got bored and wanted to get some more pics of car. Just to see what needs doing.
Changed the Orange masks back to Crystals, they had to come off for when it gets painted, so thought I would remove them.
They came off with ease and no damage so they might still go back on, or I might change the colour to the same as the body.
![[Image: Picture020-5.jpg]](http://i674.photobucket.com/albums/vv103/pompey306mark/Picture020-5.jpg)
![[Image: Picture019-5.jpg]](http://i674.photobucket.com/albums/vv103/pompey306mark/Picture019-5.jpg)
![[Image: Picture018-5.jpg]](http://i674.photobucket.com/albums/vv103/pompey306mark/Picture018-5.jpg)
![[Image: Picture017-5.jpg]](http://i674.photobucket.com/albums/vv103/pompey306mark/Picture017-5.jpg)
![[Image: Picture015-6.jpg]](http://i674.photobucket.com/albums/vv103/pompey306mark/Picture015-6.jpg)
![[Image: Picture013-4.jpg]](http://i674.photobucket.com/albums/vv103/pompey306mark/Picture013-4.jpg)
![[Image: Picture012-3.jpg]](http://i674.photobucket.com/albums/vv103/pompey306mark/Picture012-3.jpg)
![[Image: Picture011-4.jpg]](http://i674.photobucket.com/albums/vv103/pompey306mark/Picture011-4.jpg)
Bumper needs to be raised up for sure, but I will most likely be changing that anyway. You will see I have moved the air filter, its a test, seems to work as the air flow over the grill while moving seems to work well. Only problem is heat from Rad, Rad Pipe, and Intercooler hoses.
]![[Image: 64a85e4b.jpg]](http://i674.photobucket.com/albums/vv103/pompey306mark/64a85e4b.jpg)
![[Image: 69867c7a.jpg]](http://i674.photobucket.com/albums/vv103/pompey306mark/69867c7a.jpg)
New window tints.
![[Image: 6186caf8.jpg]](http://i674.photobucket.com/albums/vv103/pompey306mark/6186caf8.jpg)
![[Image: 68723ebf.jpg]](http://i674.photobucket.com/albums/vv103/pompey306mark/68723ebf.jpg)
And looked what happened on the way over, you might guess I am a bit pissed at the moment.
![[Image: 400de92b.jpg]](http://i674.photobucket.com/albums/vv103/pompey306mark/400de92b.jpg)
Not sure what happened I think someone last night removed two bolts, but no way of knowing for sure. Did not feel any problems til I was about 100 metres from the tinting place, felt and heard some strange noises going around a roundabout. So thought I would pull in and see what was up, as I slowly turned down a road wheel came off brakes hit the floor. Wheel went straight up into the arch.
So jacked it up found what was left of the spacer and attached the wheel with two bolts and drove to the tint place, I could not get a third bolt to fit but will try again once this is finished.
Right here are a few images of the car first one is just after the prep phase all sanded back.
![[Image: 6c00c3c5.jpg]](http://i674.photobucket.com/albums/vv103/pompey306mark/6c00c3c5.jpg)
Did not really get any pics of the working, as I left the camera in the car glove, and we masked everything up so could not get it out.
First day was prep day loads of sanding, and stripping of the glass and other bits.
Second day we masked everything up, and primered the car, we had to wait for the wing as that needed welding up so we lost time there, then loads more sanding.
Third day we were rained out because of a leaky roof so we fixed that and finished off the prep work, then off to the spray booth to start on the paint.
So here are a few of the car after the lacquer, now needs rubbing down and polishing then putting back together.
![[Image: IMG_0039.jpg]](http://i674.photobucket.com/albums/vv103/pompey306mark/IMG_0039.jpg)
![[Image: IMG_0040.jpg]](http://i674.photobucket.com/albums/vv103/pompey306mark/IMG_0040.jpg)
![[Image: IMG_0041.jpg]](http://i674.photobucket.com/albums/vv103/pompey306mark/IMG_0041.jpg)
![[Image: IMG_0036.jpg]](http://i674.photobucket.com/albums/vv103/pompey306mark/IMG_0036.jpg)
![[Image: IMG_0037.jpg]](http://i674.photobucket.com/albums/vv103/pompey306mark/IMG_0037.jpg)
![[Image: IMG_0038.jpg]](http://i674.photobucket.com/albums/vv103/pompey306mark/IMG_0038.jpg)
Will look very good once its done, will be taking my alloys to K&N this week/next week.
mwahahahaha
![[Image: IMG00097-20100829-1949.jpg]](http://i568.photobucket.com/albums/ss125/kris306dt2009/Work/IMG00097-20100829-1949.jpg)
![[Image: IMG00098-20100829-1950.jpg]](http://i568.photobucket.com/albums/ss125/kris306dt2009/Work/IMG00098-20100829-1950.jpg)
![[Image: IMG00099-20100829-1950.jpg]](http://i568.photobucket.com/albums/ss125/kris306dt2009/Work/IMG00099-20100829-1950.jpg)
![[Image: IMG00095-20100829-1949.jpg]](http://i568.photobucket.com/albums/ss125/kris306dt2009/Work/IMG00095-20100829-1949.jpg)
Much better, still needs a flat off and polish to get rid of a few minor defects, bootlid needs respraying or a good rub down 'might' sort it out.
Only problem is I will have two sets of cyclones to get rid of.
Right here are some pics, I know wheels need cleaning, but I needed to get home to get ready for Paris.
Car still needs flatten back and then given a good polish but I think it looks good.
![[Image: 90872815.jpg]](http://i674.photobucket.com/albums/vv103/pompey306mark/90872815.jpg)
![[Image: Picture024-3.jpg]](http://i674.photobucket.com/albums/vv103/pompey306mark/Picture024-3.jpg)
![[Image: Picture023-2.jpg]](http://i674.photobucket.com/albums/vv103/pompey306mark/Picture023-2.jpg)
![[Image: Picture022-4.jpg]](http://i674.photobucket.com/albums/vv103/pompey306mark/Picture022-4.jpg)
![[Image: Picture031-3.jpg]](http://i674.photobucket.com/albums/vv103/pompey306mark/Picture031-3.jpg)
![[Image: Picture030-3.jpg]](http://i674.photobucket.com/albums/vv103/pompey306mark/Picture030-3.jpg)
![[Image: Picture029-3.jpg]](http://i674.photobucket.com/albums/vv103/pompey306mark/Picture029-3.jpg)
![[Image: Picture028-3.jpg]](http://i674.photobucket.com/albums/vv103/pompey306mark/Picture028-3.jpg)
![[Image: Picture027-2.jpg]](http://i674.photobucket.com/albums/vv103/pompey306mark/Picture027-2.jpg)
![[Image: Picture026-3.jpg]](http://i674.photobucket.com/albums/vv103/pompey306mark/Picture026-3.jpg)
![[Image: Picture025-3.jpg]](http://i674.photobucket.com/albums/vv103/pompey306mark/Picture025-3.jpg)
And this is the 6 Kris is breaking..... I got to drive it for a week, nice sound, good car to pity to see it broken.
![[Image: e63da382.jpg]](http://i674.photobucket.com/albums/vv103/pompey306mark/e63da382.jpg)
KrisB painted it, I love it, now just needing my new cyclones.
More pics with my big gun lol.
![[Image: Picture035-4.jpg]](http://i674.photobucket.com/albums/vv103/pompey306mark/Picture035-4.jpg)
![[Image: Picture034-3.jpg]](http://i674.photobucket.com/albums/vv103/pompey306mark/Picture034-3.jpg)
![[Image: Picture033-3.jpg]](http://i674.photobucket.com/albums/vv103/pompey306mark/Picture033-3.jpg)
![[Image: Picture032-3.jpg]](http://i674.photobucket.com/albums/vv103/pompey306mark/Picture032-3.jpg)
More shiny bits to sit along side my lovely gaz coilovers.
![[Image: 80fab62a.jpg]](http://i674.photobucket.com/albums/vv103/pompey306mark/80fab62a.jpg)
![[Image: Picture077-2.jpg]](http://i674.photobucket.com/albums/vv103/pompey306mark/Picture077-2.jpg)
![[Image: Picture076-2.jpg]](http://i674.photobucket.com/albums/vv103/pompey306mark/Picture076-2.jpg)
![[Image: Picture073-2.jpg]](http://i674.photobucket.com/albums/vv103/pompey306mark/Picture073-2.jpg)
![[Image: Picture072-1.jpg]](http://i674.photobucket.com/albums/vv103/pompey306mark/Picture072-1.jpg)
![[Image: Picture078-2.jpg]](http://i674.photobucket.com/albums/vv103/pompey306mark/Picture078-2.jpg)
So this weekend I have had two project the rear garden and the car.
Wanted to finished the digging in the rear garden which I did. Now just need to buy another two tonne of stones. Then will be close to finishing bar buying some plants but that can wait til the summer now.
Next was to fix the drivers door, and lower the car.
lowering the car was easy, might need to go down a bit more but its good for now.
Drivers side door is being a bitch, basically you cant open it from the out side, the little bar on the inside of the door keeps falling out of the rear of the door handle.
I tried an easy fix, went for a drive came back and the thing is broke again, need to find the little white clip thats keeps the bar in place.
Just some quick pics of the shiney bits from Ripp which he asked for.
![[Image: be0e9b05.jpg]](http://i674.photobucket.com/albums/vv103/pompey306mark/be0e9b05.jpg)
![[Image: c4800682.jpg]](http://i674.photobucket.com/albums/vv103/pompey306mark/c4800682.jpg)
![[Image: 15e57f12.jpg]](http://i674.photobucket.com/albums/vv103/pompey306mark/15e57f12.jpg)
![[Image: 7068f5f0.jpg]](http://i674.photobucket.com/albums/vv103/pompey306mark/7068f5f0.jpg)
Hoping to get some new front brakes fitted next weekend as I believe one side is warped or slightly bent from when the wheel fell off as there is vibration under brakingRight went to Kris on Saturday, we changed the front disc and pads, as there was some vibration under braking. Car feels much better now.
Had some good fun driving down a few country roads car handles really well, might need the rear stiffening up a bit more.
Thinking of getting either, rear beam mounts or stiffer ARB.
Also I dont want to worry anyone, I am not dying but I cleaned my car tonight.
![[Image: b8ba8385.jpg]](http://i674.photobucket.com/albums/vv103/pompey306mark/b8ba8385.jpg)
![[Image: 3e683974.jpg]](http://i674.photobucket.com/albums/vv103/pompey306mark/3e683974.jpg)
![[Image: 8896fce7.jpg]](http://i674.photobucket.com/albums/vv103/pompey306mark/8896fce7.jpg)
![[Image: bf634e27.jpg]](http://i674.photobucket.com/albums/vv103/pompey306mark/bf634e27.jpg)
Dont get confused with others who detail their car this was just a quick clean at 5.30 after work. Think this might be the first time I have actually cleaned my car.
Parked the car up with morning, while waiting for the money from the scrap metal guy, got bored so took a few pics while I was waiting.
![[Image: d5c806aa.jpg]](http://i674.photobucket.com/albums/vv103/pompey306mark/d5c806aa.jpg)
![[Image: cda30f9f.jpg]](http://i674.photobucket.com/albums/vv103/pompey306mark/cda30f9f.jpg)
![[Image: 3dd9fb53.jpg]](http://i674.photobucket.com/albums/vv103/pompey306mark/3dd9fb53.jpg)
Right went to see Kris on Saturday, basically wiring up my poppers again so they stop blowing relays.
We turned up the fueling as I noticed my boost dropping at top end, which it no longer does, car feels much better now, as always the drive home was enjoyable.
So with the large amounts of front suspension mods I have been doing I am thinking I should really try and improve the dodgy rear end of the 306.
If you think I have gaz coilvers, Ripp drop links, Meyle lower arms. On the rear its just standard gti beam with gaz shocks.
Have been looking into the rear, solid axle mounts, thicker arb and thicker torsion bars. A lot of the 6 guys have these on their car and say they greatly improve the turn into a corner, and reduce the risk of lift off over steer. Its pretty expensive but I always look at suspension as something that if I do decide to change to a newer hdi or 6 in the future I can just swap it all over, so should get a lot of use out of it.
Right been looking into this a bit more.
Solid mounts £100 birk or davey. Was waiting to hear from davey in southampton as he was going to look at my top mounts as i think they need some slights mods to fit well with the strut brace.
Rear ARB we have two choices: hybrid ARB which is 28mm slightly smaller on one end due to the trailing arms. Or 30mm ARB but then I would have to get bigger trailing arms which is another £100.
Then you have the Torsion bars, of which there are two. Here again we have two choices: 21mm bars are around £150 for two, or 23mm bars are closer to £330.
People say the 21mm torsion bars are better for road use, and the 23mm ones are good for the track.
Hmmm decisions decisions. Either way its going to make for a fun handling car.
Solid rear beam mounts paid for.
Hybrid ARB reserved, just wanting for my new card so I can pay for it.
Rear torsions bars, just waiting to hear back from another guy on the 6 forum.
Then need to try and book it in with kris, along with getting the whole thing through an MOT test.
Right that's all my parts here.
Solid rear beam mounts.
![[Image: ede20c80.jpg]](http://i674.photobucket.com/albums/vv103/pompey306mark/ede20c80.jpg)
Torsion bars and hybrid ARB in the boot. Along with gti6 front ARB.
Just got £300 from the scrap man for all the metal we took out the warehouse next door. So that's the work to get them done covered along with new engine mounts. All in all a good start to December, done most of my Xmas shopping too, and still have money left over for the Xmas meet.
Yea it's snowing in portsmouth.
Drove to work today that was fun.
![[Image: 08d8965e.jpg]](http://i674.photobucket.com/albums/vv103/pompey306mark/08d8965e.jpg)
![[Image: 2f72d86c.jpg]](http://i674.photobucket.com/albums/vv103/pompey306mark/2f72d86c.jpg)
![[Image: 90eb0b1e.jpg]](http://i674.photobucket.com/albums/vv103/pompey306mark/90eb0b1e.jpg)
![[Image: 949bbf5e.jpg]](http://i674.photobucket.com/albums/vv103/pompey306mark/949bbf5e.jpg)
![[Image: e6d94a8b.jpg]](http://i674.photobucket.com/albums/vv103/pompey306mark/e6d94a8b.jpg)
![[Image: f205b2c4.jpg]](http://i674.photobucket.com/albums/vv103/pompey306mark/f205b2c4.jpg)
![[Image: 7eac9dce.jpg]](http://i674.photobucket.com/albums/vv103/pompey306mark/7eac9dce.jpg)
![[Image: bab47609.jpg]](http://i674.photobucket.com/albums/vv103/pompey306mark/bab47609.jpg)
Parts that were fitted.
![[Image: 2e7f2317.jpg]](http://i674.photobucket.com/albums/vv103/pompey306mark/2e7f2317.jpg)
One clean one dirty.
![[Image: bb6c08df.jpg]](http://i674.photobucket.com/albums/vv103/pompey306mark/bb6c08df.jpg)
Wall of rubbish.
![[Image: a2432789.jpg]](http://i674.photobucket.com/albums/vv103/pompey306mark/a2432789.jpg)
Pre Xmas meet clean inside and out. Only took pics of the outside though.
![[Image: 09726f51.jpg]](http://i674.photobucket.com/albums/vv103/pompey306mark/09726f51.jpg)
![[Image: b56466a1.jpg]](http://i674.photobucket.com/albums/vv103/pompey306mark/b56466a1.jpg)
![[Image: 4787da74.jpg]](http://i674.photobucket.com/albums/vv103/pompey306mark/4787da74.jpg)
Right, car is great. Had a laugh with fooby in his 6 and jimmy in his rallye on the way back from the xmas meet.
The boost gauge lights are now blinking when I touch the brake, hit the wiper stalk or the indicator stalk. Its funny to watch at night while indicating.
I have been thinking about the next step of this project. Most people who have seen it like the car and it goes like stink as Fooby, Maria, Kyle and a few others will admit to.
I have noticed some damage to the paint work from the ice and crap weather. Which I knew would happen but was hoping it would not be so quick lol.
I would ideally like to get the power higher, but its just deciding how to go about it.
Right went to KrisB on Friday. stayed Friday and went to his garage on Saturday. Its a 30 mile journey which normally takes 45mins ish. On saturday it took over 3 and a half hours.
The idea was to change over the hand brake cables and sort out the electrical problem. Mine was a fit in job as Kris had a load of stuff to do for lanky. But because of the weather and the time it took we spent ages working on Lankys car and did not get chance to MOT and fit the hand brake cables.
But with regards to the electrical problem, I checked the front plug in the bumper its fine, even added another earth to it. I checked the drainage under the wiper unblocked a little wet but I doubt thats the problem, I cleaned both and sprayed with gt85. Next I went checking the boot earths but there are none. So that was a waste of time, did not get chance to check the one by the drivers seat.
ANyway while the front bumper engine loom plug was unplugged I re attached the battery, and the lights were still on. Its not the ignition barrel we checked that. The lights at light up are the battery, handbrake, stop light, plus the little red LED by the temp and the fuel gauge reads a level rather than going dead.
Tomorrow I am giving it to PUG as I really need it sorted, plus get them to do the MOT.
So car failed the MOT, no postcode on plates. To smokey even though I turned it down. Springs on coilovers are loose apparently. But they are not when it's on the ground. Handbrake cable which I told them to change. Headlights not aimed right.
They did not bother to look into the electrical problem but they did disconnect the battery so the alarm does not go off but it's sat on the forecourt with the dashlights still on. Also the car won't start as the immobiliser is armed. Not a happy person.
Right after the crap service from Pug, I went to see kris last night after work. Crashed at his and got up today, and started working on the car.
While Kris was attacking the handbrake cables, I attacked the drivers door. Refitted the door handle move the door pin so it does not catch on the door card, stopping me from opening the door.
Got some new plates made up, nothing special but at least it cant fail an MOT. It turned at the drivers rear caliper was seized so that had to be changed, Then we had a look at the springs, they were not really loose but we tighten them up anyway.
Then it was off to the MOT centre. Our MOT tester was from portsmouth which was a good start, then 45min later I had a MOT. Only thing it failed on was the aiming of the lights which he corrected.
Then it was back to the garage for a quick retune and a fun drive home.
Oh also the electrical fault was the standard alarm system in the car we removed the blown fuses, but did not replace them and all is now well.
I have been thinking about bits. Bigger turbo. Maybe carbon fibre bits. But I dont I will.
Its pretty quick as it is, and after todays tune it should be faster than it was at the xmas meet. T25 or hybrid will take power up to 180bhp ish. Then after that its down the darren route of rebuilt engine.
Dont you just love the Christmas cheer in my thread lol.
Going to see if the local rolling road is open tomorrow, likelihood is it isnt but I will go and see.
Today I have been looking around for bigger turbos, dont really want to have to do a load of fabrication so the hybrid ones might be the way to go. But they are unproven as yet.
Also went for a little drive, we have had snow here like everywhere else but now the weather is slighty different so here are some lovely shots of the portsmouth skyline from the top of the hill.
![[Image: 330a11a4.jpg]](http://i674.photobucket.com/albums/vv103/pompey306mark/330a11a4.jpg)
![[Image: 188c8054.jpg]](http://i674.photobucket.com/albums/vv103/pompey306mark/188c8054.jpg)
![[Image: f54e173a.jpg]](http://i674.photobucket.com/albums/vv103/pompey306mark/f54e173a.jpg)
![[Image: 49874c0c.jpg]](http://i674.photobucket.com/albums/vv103/pompey306mark/49874c0c.jpg)
![[Image: 58d9e6d8.jpg]](http://i674.photobucket.com/albums/vv103/pompey306mark/58d9e6d8.jpg)
New wind deflectors.
![[Image: f8a50437.jpg]](http://i674.photobucket.com/albums/vv103/pompey306mark/f8a50437.jpg)
![[Image: 6668af88.jpg]](http://i674.photobucket.com/albums/vv103/pompey306mark/6668af88.jpg)
Hoping to pick up thses in the next few days.
![[Image: DSC00658.jpg]](http://i940.photobucket.com/albums/ad248/pugracing/DSC00658.jpg)
Then should be getting a set of 4 pot brakes. Meaning I will have a full set of Gti6 Calipers, discs and pads for sale.
Might be going for the compbrake 4 pot setup.
![[Image: Picture006-8.jpg]](http://i674.photobucket.com/albums/vv103/pompey306mark/Picture006-8.jpg)
![[Image: Picture001-6.jpg]](http://i674.photobucket.com/albums/vv103/pompey306mark/Picture001-6.jpg)
![[Image: Picture004-8.jpg]](http://i674.photobucket.com/albums/vv103/pompey306mark/Picture004-8.jpg)
![[Image: Picture003-8.jpg]](http://i674.photobucket.com/albums/vv103/pompey306mark/Picture003-8.jpg)
![[Image: Picture007-10.jpg]](http://i674.photobucket.com/albums/vv103/pompey306mark/Picture007-10.jpg)
![[Image: Picture011-9.jpg]](http://i674.photobucket.com/albums/vv103/pompey306mark/Picture011-9.jpg)
![[Image: Picture008-11.jpg]](http://i674.photobucket.com/albums/vv103/pompey306mark/Picture008-11.jpg)
![[Image: Picture009-10.jpg]](http://i674.photobucket.com/albums/vv103/pompey306mark/Picture009-10.jpg)
![[Image: Picture010-7.jpg]](http://i674.photobucket.com/albums/vv103/pompey306mark/Picture010-7.jpg)
Just a few pics to show my car can be kinda clean sometimes.
![[Image: f132cc5d.jpg]](http://i674.photobucket.com/albums/vv103/pompey306mark/f132cc5d.jpg)
![[Image: 8e56ca28.jpg]](http://i674.photobucket.com/albums/vv103/pompey306mark/8e56ca28.jpg)
![[Image: 19f9561b.jpg]](http://i674.photobucket.com/albums/vv103/pompey306mark/19f9561b.jpg)
Future plans:
Arianes in the garage awaiting powder coating in white.
Wrapped in Pereilli P Zero Nero 195/45/16 tyres.
Maybe 4 pots, still looking into this.
Alloy top mounts.
Followed by lower mileage engine, Xanita manifold, Saab T25(relocate).
Calipers have arrived. Need a good clean and a bit of touching up.
![[Image: 75c7ef15.jpg]](http://i674.photobucket.com/albums/vv103/pompey306mark/75c7ef15.jpg)
Arianes should be ready tomorrow, so hoping to get the tyres fitted soon after.
![[Image: bdf6227e.jpg]](http://i674.photobucket.com/albums/vv103/pompey306mark/bdf6227e.jpg)
Finished alloys
![[Image: 64b6dfcd.jpg]](http://i674.photobucket.com/albums/vv103/pompey306mark/64b6dfcd.jpg)
![[Image: 74042e3b.jpg]](http://i674.photobucket.com/albums/vv103/pompey306mark/74042e3b.jpg)
New top spring cups for coilovers and alloy top mounts
![[Image: 1154e4dc.jpg]](http://i674.photobucket.com/albums/vv103/pompey306mark/1154e4dc.jpg)
![[Image: 08feca36.jpg]](http://i674.photobucket.com/albums/vv103/pompey306mark/08feca36.jpg)
Booked in with Kris on Saturday for hub change over and brakes so hopefully finished pics on the weekend, a little worried about the spacers being to small, but should be ok.
Pics of the new alloys and brakes, needs cleaning up, but other than that not bad.
15mm on the front and 20mm on the back. Feelings different to drive but should get use to it soon.
Going to replace all four hubs as there seems to be a lot of wear and tear on them and on the threads.
Might need lowering abit on the front still.
![[Image: Picture006-9.jpg]](http://i674.photobucket.com/albums/vv103/pompey306mark/Picture006-9.jpg)
![[Image: Picture005-10.jpg]](http://i674.photobucket.com/albums/vv103/pompey306mark/Picture005-10.jpg)
![[Image: Picture004-9.jpg]](http://i674.photobucket.com/albums/vv103/pompey306mark/Picture004-9.jpg)
![[Image: Picture003-9.jpg]](http://i674.photobucket.com/albums/vv103/pompey306mark/Picture003-9.jpg)
![[Image: Picture002-7.jpg]](http://i674.photobucket.com/albums/vv103/pompey306mark/Picture002-7.jpg)
![[Image: Picture001-7.jpg]](http://i674.photobucket.com/albums/vv103/pompey306mark/Picture001-7.jpg)
![[Image: Picture007-11.jpg]](http://i674.photobucket.com/albums/vv103/pompey306mark/Picture007-11.jpg)
New wheel bearings and hubs.
Car feels much better to drive now.
![[Image: 5abd1598.jpg]](http://i674.photobucket.com/albums/vv103/pompey306mark/5abd1598.jpg)
![[Image: 17d6d2fe.jpg]](http://i674.photobucket.com/albums/vv103/pompey306mark/17d6d2fe.jpg)
Here is the turbo, I hope its the right one.
![[Image: Picture001-11.jpg]](http://i674.photobucket.com/albums/vv103/pompey306mark/Picture001-11.jpg)
![[Image: Picture002-11.jpg]](http://i674.photobucket.com/albums/vv103/pompey306mark/Picture002-11.jpg)
![[Image: Picture004-13.jpg]](http://i674.photobucket.com/albums/vv103/pompey306mark/Picture004-13.jpg)
Reconditioned head, just need to drop it all off with Mr Kris B and get it back to its normal happy self before it goes bang.
![[Image: Picture005-14.jpg]](http://i674.photobucket.com/albums/vv103/pompey306mark/Picture005-14.jpg)
![[Image: Picture006-13.jpg]](http://i674.photobucket.com/albums/vv103/pompey306mark/Picture006-13.jpg)
![[Image: Picture007-15.jpg]](http://i674.photobucket.com/albums/vv103/pompey306mark/Picture007-15.jpg)
![[Image: Picture008-15.jpg]](http://i674.photobucket.com/albums/vv103/pompey306mark/Picture008-15.jpg)
Went up the new forest to watch the stars, took these before the sun went down, only on the Iphone so not great.
![[Image: 8d2aad34.jpg]](http://i674.photobucket.com/albums/vv103/pompey306mark/8d2aad34.jpg)
![[Image: 1817c734.jpg]](http://i674.photobucket.com/albums/vv103/pompey306mark/1817c734.jpg)
bumper in the process of being smoothed, plate recess will be going soon.
![[Image: 4766f19f.jpg]](http://i674.photobucket.com/albums/vv103/pompey306mark/4766f19f.jpg)
![[Image: 10c55af3.jpg]](http://i674.photobucket.com/albums/vv103/pompey306mark/10c55af3.jpg)
day two of bumper smoothing
![[Image: e4cdd965.jpg]](http://i674.photobucket.com/albums/vv103/pompey306mark/e4cdd965.jpg)
![[Image: 69410504.jpg]](http://i674.photobucket.com/albums/vv103/pompey306mark/69410504.jpg)
So bought another turbo just incase.
![[Image: d9382925.jpg]](http://i674.photobucket.com/albums/vv103/pompey306mark/d9382925.jpg)
![[Image: 8f9d8c93.jpg]](http://i674.photobucket.com/albums/vv103/pompey306mark/8f9d8c93.jpg)
![[Image: 777ad4f4.jpg]](http://i674.photobucket.com/albums/vv103/pompey306mark/777ad4f4.jpg)
![[Image: 538eee5d.jpg]](http://i674.photobucket.com/albums/vv103/pompey306mark/538eee5d.jpg)
Right quick little update. I have been working on my bumper.
![[Image: be108589.jpg]](http://i674.photobucket.com/albums/vv103/pompey306mark/be108589.jpg)
![[Image: 50b8a7e6.jpg]](http://i674.photobucket.com/albums/vv103/pompey306mark/50b8a7e6.jpg)
![[Image: 22604f84.jpg]](http://i674.photobucket.com/albums/vv103/pompey306mark/22604f84.jpg)
Also had this arrive from ben, will be sending mine back when I next see the car.
![[Image: 9e0ab259.jpg]](http://i674.photobucket.com/albums/vv103/pompey306mark/9e0ab259.jpg)
Bought these too Oz Superturismo's in 16s, not sure what I will be doing with them yet, two are sanded the other two will need it. But look ok.
![[Image: 7d646df7.jpg]](http://i674.photobucket.com/albums/vv103/pompey306mark/7d646df7.jpg)
Hopefully tomorrow I will see how far they have got with my seats and might get a pic if not finished.
A few coats of paint, I have been busy since Friday so no real progress on this or the rear bumper.
![[Image: Picture002-12.jpg]](http://i674.photobucket.com/albums/vv103/pompey306mark/Picture002-12.jpg)
![[Image: Picture003-13.jpg]](http://i674.photobucket.com/albums/vv103/pompey306mark/Picture003-13.jpg)
]![[Image: 106e4c0e.jpg]](http://i674.photobucket.com/albums/vv103/pompey306mark/106e4c0e.jpg)
![[Image: 9ee647d1.jpg]](http://i674.photobucket.com/albums/vv103/pompey306mark/9ee647d1.jpg)
Nothing interesting jar got bored.
![[Image: 1e9321cd.jpg]](http://i674.photobucket.com/albums/vv103/pompey306mark/1e9321cd.jpg)
![[Image: cd529f61.jpg]](http://i674.photobucket.com/albums/vv103/pompey306mark/cd529f61.jpg)
Bumper is coming along slowly, and still waiting to hear from kris on how the car is going.
I have been working on the house more than the car new front garden and driveway going in.
One smoothed rear bumper. Needs finishing off, as its not prefect.
![[Image: bf89d578.jpg]](http://i674.photobucket.com/albums/vv103/pompey306mark/bf89d578.jpg)
![[Image: 4b54760a.jpg]](http://i674.photobucket.com/albums/vv103/pompey306mark/4b54760a.jpg)
![[Image: bdceb0d8.jpg]](http://i674.photobucket.com/albums/vv103/pompey306mark/bdceb0d8.jpg)
Hmm not sure if I am happy with this just yet.
![[Image: 8914779b.jpg]](http://i674.photobucket.com/albums/vv103/pompey306mark/8914779b.jpg)
![[Image: 3bb2f195.jpg]](http://i674.photobucket.com/albums/vv103/pompey306mark/3bb2f195.jpg)
![[Image: ea6cc80f.jpg]](http://i674.photobucket.com/albums/vv103/pompey306mark/ea6cc80f.jpg)
Yea I am really missing my car. Cant wait to get it back and fit all my bits.
Going to check on my interior today, hopefully all the seats and door cards are finished.
I have been using an electric sanding for most of the sanding, but I will see if I can improve on the bumper this weekend.
New gauges turned up today so will be swapping them over for my old ones.
![[Image: b06f8f20.jpg]](http://i674.photobucket.com/albums/vv103/pompey306mark/b06f8f20.jpg)
Yea T25 XUD is custom off ebay, search personalised car stickers.
Powdercoated rocker cover.
![[Image: abcbe657.jpg]](http://i674.photobucket.com/albums/vv103/pompey306mark/abcbe657.jpg)
Seats almost finished now.
Just waiting on two door cards and the rear headrests.
Should be finished next week.
But below is the front seat and the rear bench.
![[Image: 6d061222.jpg]](http://i674.photobucket.com/albums/vv103/pompey306mark/6d061222.jpg)
![[Image: 16d12dd5.jpg]](http://i674.photobucket.com/albums/vv103/pompey306mark/16d12dd5.jpg)
Only a small update. Finished the vent mount.
![[Image: ec7ec4d9.jpg]](http://i674.photobucket.com/albums/vv103/pompey306mark/ec7ec4d9.jpg)
Was working on this yesterday, I am hoping its much smoother now than it was. Needs a few more coats of paint, but I have ran out.
![[Image: Picture001-13.jpg]](http://i674.photobucket.com/albums/vv103/pompey306mark/Picture001-13.jpg)
![[Image: Picture002-13.jpg]](http://i674.photobucket.com/albums/vv103/pompey306mark/Picture002-13.jpg)
![[Image: Picture003-14.jpg]](http://i674.photobucket.com/albums/vv103/pompey306mark/Picture003-14.jpg)
Finished door cards, Just waiting for rear head rests.
![[Image: 13b1addf.jpg]](http://i674.photobucket.com/albums/vv103/pompey306mark/13b1addf.jpg)
![[Image: 8569dcf5.jpg]](http://i674.photobucket.com/albums/vv103/pompey306mark/8569dcf5.jpg)
So saw a set of these on the 6 forum going for well over hundred quid I was tempted but gave up in the end.
Bought these off here for £45 well happy.
![[Image: 916be4bc.jpg]](http://i674.photobucket.com/albums/vv103/pompey306mark/916be4bc.jpg)
![[Image: 504bcc56.jpg]](http://i674.photobucket.com/albums/vv103/pompey306mark/504bcc56.jpg)
Work started on the engine.
![[Image: 64fd4cf1.jpg]](http://i674.photobucket.com/albums/vv103/pompey306mark/64fd4cf1.jpg)
For god sake... this forum logs you out all the time... Just typed out a massive reply. So o'll do it again.
Okay, finally started work on marks car, i've been pretty busy with Prior bookings and getting my rent paid etc... Had enough of feeling guilty 'cos it's been with me so long so I made the most of the Half day i had today and got cracking...
Stripped down the donor engine of all the bits that aren't needed and cleaned up the mating face of the block.
Started building up the head, making sure everythings cleaned and sealed and most bolts loctited. Cleaned up the bits one by one and gave them a quick blast with silver paint to look as fresh as the head does.
Stripped down the front end of the car ready for the engine to come out, just got a driveshaft and downpipe to undo then i can crane it out.
MLS gasket, gear oil, oil filter, fuel filter, head bolts, cambelt and waterpump have arrived. Now waiting on a few other bits.... crankshaft oilseals, driveshaft oil seals and guide bush seal, manifold gasket and a thermostat. Maybe one or two other peices, need to grab some fire seals from peugeot.
Some pics... I'll keep updating as and when i can.
![[Image: IMG00591-20110624-1301.jpg]](http://i568.photobucket.com/albums/ss125/kris306dt2009/Work/IMG00591-20110624-1301.jpg)
![[Image: IMG00593-20110624-1400.jpg]](http://i568.photobucket.com/albums/ss125/kris306dt2009/Work/IMG00593-20110624-1400.jpg)
![[Image: IMG00594-20110624-1402.jpg]](http://i568.photobucket.com/albums/ss125/kris306dt2009/Work/IMG00594-20110624-1402.jpg)
![[Image: IMG00595-20110624-1543.jpg]](http://i568.photobucket.com/albums/ss125/kris306dt2009/Work/IMG00595-20110624-1543.jpg)
Wow... Whats happened to the forum? No replies.
Anyway, i had a spare half day today, 38degrees in my workshop, sweltering hot... What a great excuse to get the engine out and get soaked using a pressure washer.
Before:
![[Image: IMG00596-20110627-1449.jpg]](http://i568.photobucket.com/albums/ss125/kris306dt2009/Work/IMG00596-20110627-1449.jpg)
![[Image: IMG00598-20110627-1450.jpg]](http://i568.photobucket.com/albums/ss125/kris306dt2009/Work/IMG00598-20110627-1450.jpg)
After:
![[Image: IMG00600-20110627-1550.jpg]](http://i568.photobucket.com/albums/ss125/kris306dt2009/Work/IMG00600-20110627-1550.jpg)
![[Image: IMG00602-20110627-1550.jpg]](http://i568.photobucket.com/albums/ss125/kris306dt2009/Work/IMG00602-20110627-1550.jpg)
After that, i'd had enough of the heat and went home.
Quick update guys.
Cleaned up the block as much as possible. If it's gotta be any cleaner then it'll need machining.
![[Image: IMG00603-20110629-1135.jpg]](http://i568.photobucket.com/albums/ss125/kris306dt2009/Work/IMG00603-20110629-1135.jpg)
Headhasket on. (Yes, the locating dowel went in for those beady eyed people).
[img]http://i568.photobucket.com/albums/ss125/kris306dt2009/Work/IMG00
I bought this car as I need a diesel for work, heard from a guy that these were good cars so went ou looking.
In the end i ended up with this only 93,000 on the clock two years ago, with no mods but the neons and sub in the boot and 205 gti wheels.
Over a period of time, i started to look at getting the car looking different.
Ended up purchasing some lexus rear lights, and angel eyes.
Then i went about, painting the trim and fitting a laguna front splitter and rear diffuser, along with a spoiler and front grill and side skirts
Also fitted a strut brace too.
After a few months I decided i want to go abit further and spray the car, (was feeling bored and had alot of spare time lol), I also decided that i wanted to get even more different some went on the hunt for some aggressive bumpers. After much searching i came up with the following paint scheme and body kit.
Now i know alot of the guys on the forum think bodykits are chavvy and looks shit, but i like to be different.
Even you old school 306 lovers must admit its a pretty aggressive front bumper, and the rear bumper i modified to fit my twin exit exhaust.
Up until this point i had not even thought about doing work to the engine bay and then i meet Kris.
I started loooking around at prices and parts and decided it was not for me, then i got a promotion and the rest they say is history lol.
My first visit too kris was about 20th Feb. I travelled up to get a bosch conversion and tune, fitting a new rear axle with disc brakes, lowering of the rear axle, fitting of bigger front brakes.
The day was going well we fitted the rear beam and lowered the rear, and cracked on with a few other smaller jobs then started with the tune. The day was turning into night but still kris cracked on, once we had the pump fitted we started her up and then there was a problem. The guy i bought the pump off had taken it apart and not put it together correctly. So we retired for the evening... while i relaxed on the sofa Kris did some serious research into the 306 pumps. Next day was great, car was running great tuned up and running a dream.
Even though we did not get the front brakes done I thought it was a weekend well spent, we also managed to mess up the rear brake compensator so i was driving without one for the time being.
My next visit to Kris's would be just as interesting, after sourcing a front mounted intercooler and ordering the replacement brake pipes from his local Pug dealership. I headed up to Kris to get it all fitted, after finding out Pug had messed up, me Kris and Pete spent the morning driving around looking for brake pipes. We had one made up for us, and headed back to his garage. We spent the rest of the day fitting the 266mm front brakes replacing the rear compensator brake pipe, only to find out there was another pipe that had become damaged while i was driving. We also fitted 3 of 4 Braided Brake cables as one of the original brake lines had seized.
We also worked out that the front mounted intercooler was for a phase 2 car lol, so we did fit it in the end.
http://s674.photobucket.com/albums/vv103...to0337.gif
http://s674.photobucket.com/albums/vv103...to0324.gif
http://s674.photobucket.com/albums/vv103...to0321.gif
So i travelled up to Kris's for another tempted at getting things done, this time Pug let us down again lol so we had one brake pipe but not the rear one we had been waiting for, so we drove off and found a brake building kit, after building loads of replacement pipes we fitted the other braided brake line and the whole rear brake compensator with all new pipes.
Next was the new Front Mounted Intercooler. After a little bit of fun and games we got it all sorted and fitted up to the car.
So we have pretty much sorted the car, I have fitted a Phase 2 Front bumper, fitted Fmic, bigger brakes, new rear axle, braided brake lines, and a twin exist exhaust, and de cat. You may also notice i have changed the lexus and angel eyes for black versions.
Coming up i have a new opal mantra exhaust, de middled box, a new rear bumper, 150bhp rated injectors, and a brand spanking new T2 turbo.
Heres some pics of the nightmares bay too.
Next up be new turbo, injectors, more tuning...
My interior too forgot about these.
Hello guys quick update before i go to kris's on friday for my hdi gear box, bought these £100 going to fit them soon, 16" OZ superturismo's
This Friday i travelled up to Kris's to start work on my Hdi Gearbox conversion,
Cool view over the downs early in the morning.
Well before we started on the gearbox i thought it would be a good chance to change out my rear bumper, for this one..
As you can also see I have changed my rear box, for a opel mantra de restricted box.
After this we attacked the gearbox, once the old one was removed we decided that we weren't just going to change the gearbox, but also the flywheel and clutch too.
So we decided to order a new clutch... while we were waiting I decided to paint up my front calipers.
Once the new clutch arrived, we fitted it and then fitted the new gearbox.
The drive is amazing now and anyone thinking of doing the upgrade should get it done.
Next up uprated injectors, new turbo and Meth injection.
New alloys are now on, let me know what you think as always.
Alright guys, thanks for all the comments, suggestions and critism so far lol. Just a quick update, got home from work and i thought i would quickly attach my front splitter before it rained.
Also guys if you could have a look at my photoshop thread and give me idea on paint schemes would be very helpful, or do some photo shopping yourself. (Kris thanks for all the help so far)
http://www.theywhoshallnotbenamed/forum/...hp?t=74651
cool, arrived back from New York to find all my bits had arrived. Now I know there are still going to be comments about the paint, just remember its a project, meaning its not finished.
Will be filling phase 2/3 bonnet and grill this weekend i hope, then changing the front end when i get chance. But here are the changes so far today......
Not a bad attempt for someone with no patience lol
and starting on the front bumer
yea new exhaust and my new air filter........
Tomorrow my new intercooler and door poopers will arrive
OK so i promised a few guys on here i would try and finish smoothing my new Ph3 front bumper, this weekend, well here is the almost finished version.
HOPE you all had a good time at FCS, wish i could of come next year maybe!!!
Next up some colour and then smoothing finish the bonnet and the start on the sides and tailgate.
Ok so i rollered my bonnet today, but i am not to sure of the finish....
What do you guys think of the colour and finish.
Ok so after the comments yesterday, i decide to attempt making the bonnet better, so i took my new electric sander to it and sanded off most of the rough bits then tried smoothing it out a bit better, it still not prefect i think but it looks like its about to rain so had to primer up the bits that i had touched up.
let me know what you think i just cant seem to get it right.
The cyclones have arrived!!!
Only cost me £102.
Just a quick pic, shouldnt of changed them really, cos i am ill and on aload of medicine but who cares.
And after a quick drive around the road it feels much nicer too....happy days
My lastest attempt at the bonnet
So after the good finish on the bonnet with my new paint i decided I would give my smoothed front bumper a good going over.
also picked up my new smoothed tailgate this morning so if i get time tomorrow i might try and paint that too.
Now just need to figure out how to get crystals wired up to a phase1 then i can change the front end.... anyone know?
So i went to go collect this off springs on the weekend, (thank you) I now have a spare phase 3 boot de wipered in green in the garage and a spare phase 1 spoiler. Now just need cleaning up.
Also got some new plates today, I know the front will be illegal but i will have the normal one in the window for day to day use.
And i tried to turn the image around but photobucket playing up.
Last bit of my front end done.
Just need to sort out how to wire up my crystals to Phase 1 wiring, and then fit it all.
Right so went to Kris's new unit today, really nice place.
Aim of the day complete phase 1 to phase 3 change over + new Rad and Intercooler.
First taking everything off.
Then putting in the new rad which would have been simple but i bought the wrong one, so ordered a new one then fitted it (anyone want a phase 2 nissen rad £80inc delivery.)
Then the new intercooler.
Next up the wiring of the crystal headlights, easier than i thought it was going to be, (well done kris) and the grill.
Then the bonnet.
Just playing with camera filter lenses.
So dan did these in the photoshop section so i though i would repost in here, what do guys think.
Next little update got these off ben, fitted them today and very happy with them pity you cant get the same thing for the rears.
SO got up this morning and the weather was ok so thought i would start on the splitter.
So as promised, here are some pics of my supercharger.
Its about the same size as a headlight unit.
ok so, i am at work just going some reading up and found this, not sure if it will help.
A twincharging system combines a supercharger and turbocharger in a complementary arrangement, with the intent of one component's advantage compensating for the other component's disadvantage. There are several different twincharging configurations. The two most common are series, and parallel.
Series systems, the more common of the two, are plumbed such that one compressor's output feeds the inlet of another. It is a sequentially-organized Roots type supercharger, connected to a medium- to large-sized turbocharger.[citation needed] The supercharger provides near-instant manifold pressure, when the turbocharger is otherwise not at its operating speed. Once the turbocharger has reached operating speed, the supercharger can either continue contributing air to the intake (yielding elevated intake pressures), or it can be bypassed and mechanically decoupled from the drivetrain via an electromagnetic clutch (increasing efficiency of the induction system).
Other series configurations exist where no bypass system is employed and both compressors are in continuous duty. As a result, compounded boost is always produced as the pressure ratios of the two compressors combine. This form of series twincharging allows for the production of boost pressures that would otherwise be unachieveable with other compressor arrangements. A significant advantage of this method is the reduction in charge temperature for a given pressure output versus that of a single compressor producing the same output.
Parallel systems typically always require the use of a bypass or diverter valve to "select" which compressor is feeding the engine. Parallel systems are not compounded by design, and maximum manifold pressure will be equal to the maximum output of the compressors, whichever is greatest. Parallel systems often employ complex electronics to control bypass valves selecting which compressor is utilized depending on several engine parameters, driver inputs, and environmental factors. Mechanically-controlled parallel twincharged systems typically cannot provide a transparent and seamless switch between compressors. As a result, power delivery can have abrubt spikes.
Right no news on the supercharger the weather was amazing today, so thought i would attack the side of the car. I started by removing the side strips on one side, so i have my side strips for sale in black with all the clips.
I thought i would beable to hammer the holes in a bit to give the filler something to hold to but it did not work, so i just used flexi-filler of ebay and covered the holes, and the rear handle.
Must easy with the help of my new sander, I sanded down the whole side of the car.
It needs cleaning, these pics are just to show people what it looks like.
So the side from yesterday looks a little bit now, and this is the other side too.
Well if you look back throught the thread there are some pics, with different colours, i was going to going blue and anthracite grey as it looks pretty good, but not sure yet.
Also picked up these nice door cards and this grill, which is not filled, so hopefully no cracking.
Nice me thinks
Right guys, what colour should i paint my cyclones. White, some random bright colour, black????? need some ideas.
Some ideas from before are below
Here you go mate
i think the orange looks good
Only done one as it looks like the weather is starting to get worse hopeing tomorrow will be better.
Some pics from the pompey meet.
So went to Kris on Friday and this is what we got done.
Sun strip.
Rear door poppers and cards.
Front door cards.
Now i know theres a few bits missing but I will be finding them shortly.
So today i have been to Kris, to get a bit more work done. We aimed to get my gti brakes fitted along with an oil cooler. However I need to get new discs and the clamps on the cooler werent great, so we ddi all the little things first.
Pug wing mirrors.
Lower Front Strut brace.
Mask Head Lights.
Finish off door cards and poppers.
Along with a few other things.
Now I know this wont be to everyones liking but its my car, and I am use to upsetting you lot now lol.
If you have not got a lower strut brace you need one in your life by the way, and more pics tomorrow.
]
New parcel self.
New Mats all round
Just thought i would post some pics of the exhaust.
Hopefully all going on, on Monday.
Hello guys so here is my update, after spending two days wih kris, have not got many pics of the car, but might take some more later.
So day one, arrive at Kris, and get to work first fitting the exhaust, we could not do the turbo first as we were waiting for parts.
So we put the car up on the ramp and got to work.
I have just realised i dont have a pic of the exhausted fitted was having to much fun working
Next up we started on the brakes, rear ones first.
The changed over the fronts from 266mm to Gti6 283mm, we had to wait for a small few things to turn up from the parts company which slowed us down, but by the end of the day, everything was working very well.
DJ_Xenobot turn up with his missus and decided to clean one of my cyclones lol thank you.
and now for a dirty ones lol.
Day two we attached the turbo, but we got delayed local PUG garage had no power in the morning so had to wait for the parts to turn up at one, then had to wait for the gasket to arrive, which did not turn up til 3 even though we ordered it first thing, oh and today was bloody cold, could thing Kris got is super heater work, but still have numb toes lol
So we started by removing all the parts and getting the turbo off, cleaned a few bits here and there.
Once the parts turned up, we refitted the turbo, but noticed the turbo exit was not pointing in the right direction so we removed the turbo and rotated the exit port and refitted the turbo, then went to work putting it all back together.
The drive home was good, seems to pull alot better with exhaust and turbo on. Have not turned the boost up as i want to let the turbo and brakes bed in. Then when my pump comes back, i will turn things up and see where we lie. I am really tired so might have forgot a few things lol.
Shower is calling as i am still pretty dirty lol.
My new alpine head unit
My car in the snow, this is only 2hrs of snow, and it was wet when it first rained.
]
My new gear knob for my new interior.
New Console and Head Unit.
Right seats are in, rear door cards are in, just need to sort out the speakers now, and the passenger side air vent.
Crappy Iphone pics but you get the idea.
Hmmm my reconned injectors.
Just a update, finished my interior apart from maybe uprating the rear speaker, but they seem pretty good all ready.
So here are the finished front door cards, now I know the colour coded door speaker covers wont be to everyones liking but I like blue and so does my car.
Next up a nice interior cleaning.
What a day, dropped my car off at the garage this morning, thank you Phil for the lift to and from.
Was expecting them to take three days as they had other jobs on, but get a call around 3 to say they had finished. Luckily I checked to see if they had done everything, forgot the bonnet, but did it while I was on my way over. Waited a little while for them to finish and here are the results.
So now i can put the door cards back on and clean the outside after giving it a little bit more of a sand down. Then primer and paint.
Spacers turned up today, but wrong size and not enough, only got two but ordered four. No doubt the comapny will be very helpful as they have been already.
I even got a lolly pop in one of the packs from them earlier, hopefully some more will turn up to say sorry for the mistake.
These arrived today.
Bought these, hoping they will closely match the paint work once its done to give it more of a smoothed/blended finish.
Drop links should be here early next week.
Rear with spacer.
Front with spacer.
Got bored so came up with some ideas, though not sure if the wheel company could do them.
IMG]http://i266.photobucket.com/albums/ii245/DJCJ69/306/pompey4.png[/IMG]
Hope that's useful fella'
Few more colours
Right spent the day smoothing another Phase 3 Front bumper, no pics, maybe when I am done.
Watched Utd beat Chelsea 3-1.
Then got bored and wanted to get some more pics of car. Just to see what needs doing.
Changed the Orange masks back to Crystals, they had to come off for when it gets painted, so thought I would remove them.
They came off with ease and no damage so they might still go back on, or I might change the colour to the same as the body.
Bumper needs to be raised up for sure, but I will most likely be changing that anyway. You will see I have moved the air filter, its a test, seems to work as the air flow over the grill while moving seems to work well. Only problem is heat from Rad, Rad Pipe, and Intercooler hoses.
]
New window tints.
And looked what happened on the way over, you might guess I am a bit pissed at the moment.
Not sure what happened I think someone last night removed two bolts, but no way of knowing for sure. Did not feel any problems til I was about 100 metres from the tinting place, felt and heard some strange noises going around a roundabout. So thought I would pull in and see what was up, as I slowly turned down a road wheel came off brakes hit the floor. Wheel went straight up into the arch.
So jacked it up found what was left of the spacer and attached the wheel with two bolts and drove to the tint place, I could not get a third bolt to fit but will try again once this is finished.
Right here are a few images of the car first one is just after the prep phase all sanded back.
Did not really get any pics of the working, as I left the camera in the car glove, and we masked everything up so could not get it out.
First day was prep day loads of sanding, and stripping of the glass and other bits.
Second day we masked everything up, and primered the car, we had to wait for the wing as that needed welding up so we lost time there, then loads more sanding.
Third day we were rained out because of a leaky roof so we fixed that and finished off the prep work, then off to the spray booth to start on the paint.
So here are a few of the car after the lacquer, now needs rubbing down and polishing then putting back together.
Will look very good once its done, will be taking my alloys to K&N this week/next week.
mwahahahaha
Much better, still needs a flat off and polish to get rid of a few minor defects, bootlid needs respraying or a good rub down 'might' sort it out.
Only problem is I will have two sets of cyclones to get rid of.
Right here are some pics, I know wheels need cleaning, but I needed to get home to get ready for Paris.
Car still needs flatten back and then given a good polish but I think it looks good.
And this is the 6 Kris is breaking..... I got to drive it for a week, nice sound, good car to pity to see it broken.
KrisB painted it, I love it, now just needing my new cyclones.
More pics with my big gun lol.
More shiny bits to sit along side my lovely gaz coilovers.
So this weekend I have had two project the rear garden and the car.
Wanted to finished the digging in the rear garden which I did. Now just need to buy another two tonne of stones. Then will be close to finishing bar buying some plants but that can wait til the summer now.
Next was to fix the drivers door, and lower the car.
lowering the car was easy, might need to go down a bit more but its good for now.
Drivers side door is being a bitch, basically you cant open it from the out side, the little bar on the inside of the door keeps falling out of the rear of the door handle.
I tried an easy fix, went for a drive came back and the thing is broke again, need to find the little white clip thats keeps the bar in place.
Just some quick pics of the shiney bits from Ripp which he asked for.
Hoping to get some new front brakes fitted next weekend as I believe one side is warped or slightly bent from when the wheel fell off as there is vibration under brakingRight went to Kris on Saturday, we changed the front disc and pads, as there was some vibration under braking. Car feels much better now.
Had some good fun driving down a few country roads car handles really well, might need the rear stiffening up a bit more.
Thinking of getting either, rear beam mounts or stiffer ARB.
Also I dont want to worry anyone, I am not dying but I cleaned my car tonight.
Dont get confused with others who detail their car this was just a quick clean at 5.30 after work. Think this might be the first time I have actually cleaned my car.
Parked the car up with morning, while waiting for the money from the scrap metal guy, got bored so took a few pics while I was waiting.
Right went to see Kris on Saturday, basically wiring up my poppers again so they stop blowing relays.
We turned up the fueling as I noticed my boost dropping at top end, which it no longer does, car feels much better now, as always the drive home was enjoyable.
So with the large amounts of front suspension mods I have been doing I am thinking I should really try and improve the dodgy rear end of the 306.
If you think I have gaz coilvers, Ripp drop links, Meyle lower arms. On the rear its just standard gti beam with gaz shocks.
Have been looking into the rear, solid axle mounts, thicker arb and thicker torsion bars. A lot of the 6 guys have these on their car and say they greatly improve the turn into a corner, and reduce the risk of lift off over steer. Its pretty expensive but I always look at suspension as something that if I do decide to change to a newer hdi or 6 in the future I can just swap it all over, so should get a lot of use out of it.
Right been looking into this a bit more.
Solid mounts £100 birk or davey. Was waiting to hear from davey in southampton as he was going to look at my top mounts as i think they need some slights mods to fit well with the strut brace.
Rear ARB we have two choices: hybrid ARB which is 28mm slightly smaller on one end due to the trailing arms. Or 30mm ARB but then I would have to get bigger trailing arms which is another £100.
Then you have the Torsion bars, of which there are two. Here again we have two choices: 21mm bars are around £150 for two, or 23mm bars are closer to £330.
People say the 21mm torsion bars are better for road use, and the 23mm ones are good for the track.
Hmmm decisions decisions. Either way its going to make for a fun handling car.
Solid rear beam mounts paid for.
Hybrid ARB reserved, just wanting for my new card so I can pay for it.
Rear torsions bars, just waiting to hear back from another guy on the 6 forum.
Then need to try and book it in with kris, along with getting the whole thing through an MOT test.
Right that's all my parts here.
Solid rear beam mounts.
Torsion bars and hybrid ARB in the boot. Along with gti6 front ARB.
Just got £300 from the scrap man for all the metal we took out the warehouse next door. So that's the work to get them done covered along with new engine mounts. All in all a good start to December, done most of my Xmas shopping too, and still have money left over for the Xmas meet.
Yea it's snowing in portsmouth.
Drove to work today that was fun.
Parts that were fitted.
One clean one dirty.
Wall of rubbish.
Pre Xmas meet clean inside and out. Only took pics of the outside though.
Right, car is great. Had a laugh with fooby in his 6 and jimmy in his rallye on the way back from the xmas meet.
The boost gauge lights are now blinking when I touch the brake, hit the wiper stalk or the indicator stalk. Its funny to watch at night while indicating.
I have been thinking about the next step of this project. Most people who have seen it like the car and it goes like stink as Fooby, Maria, Kyle and a few others will admit to.
I have noticed some damage to the paint work from the ice and crap weather. Which I knew would happen but was hoping it would not be so quick lol.
I would ideally like to get the power higher, but its just deciding how to go about it.
Right went to KrisB on Friday. stayed Friday and went to his garage on Saturday. Its a 30 mile journey which normally takes 45mins ish. On saturday it took over 3 and a half hours.
The idea was to change over the hand brake cables and sort out the electrical problem. Mine was a fit in job as Kris had a load of stuff to do for lanky. But because of the weather and the time it took we spent ages working on Lankys car and did not get chance to MOT and fit the hand brake cables.
But with regards to the electrical problem, I checked the front plug in the bumper its fine, even added another earth to it. I checked the drainage under the wiper unblocked a little wet but I doubt thats the problem, I cleaned both and sprayed with gt85. Next I went checking the boot earths but there are none. So that was a waste of time, did not get chance to check the one by the drivers seat.
ANyway while the front bumper engine loom plug was unplugged I re attached the battery, and the lights were still on. Its not the ignition barrel we checked that. The lights at light up are the battery, handbrake, stop light, plus the little red LED by the temp and the fuel gauge reads a level rather than going dead.
Tomorrow I am giving it to PUG as I really need it sorted, plus get them to do the MOT.
So car failed the MOT, no postcode on plates. To smokey even though I turned it down. Springs on coilovers are loose apparently. But they are not when it's on the ground. Handbrake cable which I told them to change. Headlights not aimed right.
They did not bother to look into the electrical problem but they did disconnect the battery so the alarm does not go off but it's sat on the forecourt with the dashlights still on. Also the car won't start as the immobiliser is armed. Not a happy person.
Right after the crap service from Pug, I went to see kris last night after work. Crashed at his and got up today, and started working on the car.
While Kris was attacking the handbrake cables, I attacked the drivers door. Refitted the door handle move the door pin so it does not catch on the door card, stopping me from opening the door.
Got some new plates made up, nothing special but at least it cant fail an MOT. It turned at the drivers rear caliper was seized so that had to be changed, Then we had a look at the springs, they were not really loose but we tighten them up anyway.
Then it was off to the MOT centre. Our MOT tester was from portsmouth which was a good start, then 45min later I had a MOT. Only thing it failed on was the aiming of the lights which he corrected.
Then it was back to the garage for a quick retune and a fun drive home.
Oh also the electrical fault was the standard alarm system in the car we removed the blown fuses, but did not replace them and all is now well.
I have been thinking about bits. Bigger turbo. Maybe carbon fibre bits. But I dont I will.
Its pretty quick as it is, and after todays tune it should be faster than it was at the xmas meet. T25 or hybrid will take power up to 180bhp ish. Then after that its down the darren route of rebuilt engine.
Dont you just love the Christmas cheer in my thread lol.
Going to see if the local rolling road is open tomorrow, likelihood is it isnt but I will go and see.
Today I have been looking around for bigger turbos, dont really want to have to do a load of fabrication so the hybrid ones might be the way to go. But they are unproven as yet.
Also went for a little drive, we have had snow here like everywhere else but now the weather is slighty different so here are some lovely shots of the portsmouth skyline from the top of the hill.
New wind deflectors.
Hoping to pick up thses in the next few days.
Then should be getting a set of 4 pot brakes. Meaning I will have a full set of Gti6 Calipers, discs and pads for sale.
Might be going for the compbrake 4 pot setup.
Just a few pics to show my car can be kinda clean sometimes.
Future plans:
Arianes in the garage awaiting powder coating in white.
Wrapped in Pereilli P Zero Nero 195/45/16 tyres.
Maybe 4 pots, still looking into this.
Alloy top mounts.
Followed by lower mileage engine, Xanita manifold, Saab T25(relocate).
Calipers have arrived. Need a good clean and a bit of touching up.
Arianes should be ready tomorrow, so hoping to get the tyres fitted soon after.
Finished alloys
New top spring cups for coilovers and alloy top mounts
Booked in with Kris on Saturday for hub change over and brakes so hopefully finished pics on the weekend, a little worried about the spacers being to small, but should be ok.
Pics of the new alloys and brakes, needs cleaning up, but other than that not bad.
15mm on the front and 20mm on the back. Feelings different to drive but should get use to it soon.
Going to replace all four hubs as there seems to be a lot of wear and tear on them and on the threads.
Might need lowering abit on the front still.
New wheel bearings and hubs.
Car feels much better to drive now.
Here is the turbo, I hope its the right one.
Reconditioned head, just need to drop it all off with Mr Kris B and get it back to its normal happy self before it goes bang.
Went up the new forest to watch the stars, took these before the sun went down, only on the Iphone so not great.
bumper in the process of being smoothed, plate recess will be going soon.
day two of bumper smoothing
So bought another turbo just incase.
Right quick little update. I have been working on my bumper.
Also had this arrive from ben, will be sending mine back when I next see the car.
Bought these too Oz Superturismo's in 16s, not sure what I will be doing with them yet, two are sanded the other two will need it. But look ok.
Hopefully tomorrow I will see how far they have got with my seats and might get a pic if not finished.
A few coats of paint, I have been busy since Friday so no real progress on this or the rear bumper.
]
Nothing interesting jar got bored.
Bumper is coming along slowly, and still waiting to hear from kris on how the car is going.
I have been working on the house more than the car new front garden and driveway going in.
One smoothed rear bumper. Needs finishing off, as its not prefect.
Hmm not sure if I am happy with this just yet.
Yea I am really missing my car. Cant wait to get it back and fit all my bits.
Going to check on my interior today, hopefully all the seats and door cards are finished.
I have been using an electric sanding for most of the sanding, but I will see if I can improve on the bumper this weekend.
New gauges turned up today so will be swapping them over for my old ones.
Yea T25 XUD is custom off ebay, search personalised car stickers.
Powdercoated rocker cover.
Seats almost finished now.
Just waiting on two door cards and the rear headrests.
Should be finished next week.
But below is the front seat and the rear bench.
Only a small update. Finished the vent mount.
Was working on this yesterday, I am hoping its much smoother now than it was. Needs a few more coats of paint, but I have ran out.
Finished door cards, Just waiting for rear head rests.
So saw a set of these on the 6 forum going for well over hundred quid I was tempted but gave up in the end.
Bought these off here for £45 well happy.
Work started on the engine.
For god sake... this forum logs you out all the time... Just typed out a massive reply. So o'll do it again.
Okay, finally started work on marks car, i've been pretty busy with Prior bookings and getting my rent paid etc... Had enough of feeling guilty 'cos it's been with me so long so I made the most of the Half day i had today and got cracking...
Stripped down the donor engine of all the bits that aren't needed and cleaned up the mating face of the block.
Started building up the head, making sure everythings cleaned and sealed and most bolts loctited. Cleaned up the bits one by one and gave them a quick blast with silver paint to look as fresh as the head does.
Stripped down the front end of the car ready for the engine to come out, just got a driveshaft and downpipe to undo then i can crane it out.
MLS gasket, gear oil, oil filter, fuel filter, head bolts, cambelt and waterpump have arrived. Now waiting on a few other bits.... crankshaft oilseals, driveshaft oil seals and guide bush seal, manifold gasket and a thermostat. Maybe one or two other peices, need to grab some fire seals from peugeot.
Some pics... I'll keep updating as and when i can.
Wow... Whats happened to the forum? No replies.
Anyway, i had a spare half day today, 38degrees in my workshop, sweltering hot... What a great excuse to get the engine out and get soaked using a pressure washer.
Before:
After:
After that, i'd had enough of the heat and went home.
Quick update guys.
Cleaned up the block as much as possible. If it's gotta be any cleaner then it'll need machining.
Headhasket on. (Yes, the locating dowel went in for those beady eyed people).
[img]http://i568.photobucket.com/albums/ss125/kris306dt2009/Work/IMG00
![[Image: Picture009-14.jpg]](http://i674.photobucket.com/albums/vv103/pompey306mark/Picture009-14.jpg)
![[Image: Picture008-17.jpg]](http://i674.photobucket.com/albums/vv103/pompey306mark/Picture008-17.jpg)
![[Image: Picture007-17.jpg]](http://i674.photobucket.com/albums/vv103/pompey306mark/Picture007-17.jpg)
![[Image: Picture006-14.jpg]](http://i674.photobucket.com/albums/vv103/pompey306mark/Picture006-14.jpg)
![[Image: Picture004-16.jpg]](http://i674.photobucket.com/albums/vv103/pompey306mark/Picture004-16.jpg)
![[Image: Picture001-16.jpg]](http://i674.photobucket.com/albums/vv103/pompey306mark/Picture001-16.jpg)
![[Image: Picture002-16.jpg]](http://i674.photobucket.com/albums/vv103/pompey306mark/Picture002-16.jpg)
![[Image: Picture003-18.jpg]](http://i674.photobucket.com/albums/vv103/pompey306mark/Picture003-18.jpg)
![[Image: CheddarFMICOct11012.jpg]](http://i245.photobucket.com/albums/gg47/Dum-Dum1986/FMIC%20and%20Cheddar%20Oct2011/CheddarFMICOct11012.jpg)
![[Image: CheddarFMICOct11013.jpg]](http://i245.photobucket.com/albums/gg47/Dum-Dum1986/FMIC%20and%20Cheddar%20Oct2011/CheddarFMICOct11013.jpg)
![[Image: CheddarFMICOct11014.jpg]](http://i245.photobucket.com/albums/gg47/Dum-Dum1986/FMIC%20and%20Cheddar%20Oct2011/CheddarFMICOct11014.jpg)
![[Image: CheddarFMICOct11017.jpg]](http://i245.photobucket.com/albums/gg47/Dum-Dum1986/FMIC%20and%20Cheddar%20Oct2011/CheddarFMICOct11017.jpg)
![[Image: CheddarFMICOct11018.jpg]](http://i245.photobucket.com/albums/gg47/Dum-Dum1986/FMIC%20and%20Cheddar%20Oct2011/CheddarFMICOct11018.jpg)
![[Image: CheddarFMICOct11020.jpg]](http://i245.photobucket.com/albums/gg47/Dum-Dum1986/FMIC%20and%20Cheddar%20Oct2011/CheddarFMICOct11020.jpg)
![[Image: CheddarFMICOct11021.jpg]](http://i245.photobucket.com/albums/gg47/Dum-Dum1986/FMIC%20and%20Cheddar%20Oct2011/CheddarFMICOct11021.jpg)
![[Image: Picture001-9.jpg]](http://i674.photobucket.com/albums/vv103/pompey306mark/Picture001-9.jpg)
![[Image: Picture006-11.jpg]](http://i674.photobucket.com/albums/vv103/pompey306mark/Picture006-11.jpg)
![[Image: Picture007-13.jpg]](http://i674.photobucket.com/albums/vv103/pompey306mark/Picture007-13.jpg)
![[Image: Picture010-8.jpg]](http://i674.photobucket.com/albums/vv103/pompey306mark/Picture010-8.jpg)
![[Image: Picture011-10.jpg]](http://i674.photobucket.com/albums/vv103/pompey306mark/Picture011-10.jpg)
![[Image: Picture016-8.jpg]](http://i674.photobucket.com/albums/vv103/pompey306mark/Picture016-8.jpg)
![[Image: Picture018-6.jpg]](http://i674.photobucket.com/albums/vv103/pompey306mark/Picture018-6.jpg)
![[Image: Picture020-6.jpg]](http://i674.photobucket.com/albums/vv103/pompey306mark/Picture020-6.jpg)
![[Image: Picture021-6.jpg]](http://i674.photobucket.com/albums/vv103/pompey306mark/Picture021-6.jpg)
![[Image: Picture022-5.jpg]](http://i674.photobucket.com/albums/vv103/pompey306mark/Picture022-5.jpg)
![[Image: Picture025-4.jpg]](http://i674.photobucket.com/albums/vv103/pompey306mark/Picture025-4.jpg)
![[Image: Picture027-3.jpg]](http://i674.photobucket.com/albums/vv103/pompey306mark/Picture027-3.jpg)
![[Image: Picture026-4.jpg]](http://i674.photobucket.com/albums/vv103/pompey306mark/Picture026-4.jpg)
![[Image: Picture029-4.jpg]](http://i674.photobucket.com/albums/vv103/pompey306mark/Picture029-4.jpg)
![[Image: Picture041-5.jpg]](http://i674.photobucket.com/albums/vv103/pompey306mark/Picture041-5.jpg)
![[Image: Picture040-3.jpg]](http://i674.photobucket.com/albums/vv103/pompey306mark/Picture040-3.jpg)
![[Image: Picture049-4.jpg]](http://i674.photobucket.com/albums/vv103/pompey306mark/Picture049-4.jpg)
![[Image: Picture051-5.jpg]](http://i674.photobucket.com/albums/vv103/pompey306mark/Picture051-5.jpg)
![[Image: Picture050-4.jpg]](http://i674.photobucket.com/albums/vv103/pompey306mark/Picture050-4.jpg)
![[Image: Picture004-19.jpg]](http://i674.photobucket.com/albums/vv103/pompey306mark/Picture004-19.jpg)
![[Image: Picture003-20.jpg]](http://i674.photobucket.com/albums/vv103/pompey306mark/Picture003-20.jpg)
![[Image: Picture002-18.jpg]](http://i674.photobucket.com/albums/vv103/pompey306mark/Picture002-18.jpg)
![[Image: Picture001-19.jpg]](http://i674.photobucket.com/albums/vv103/pompey306mark/Picture001-19.jpg)
![[Image: Picture006-18.jpg]](http://i674.photobucket.com/albums/vv103/pompey306mark/Picture006-18.jpg)
![[Image: Picture007-20.jpg]](http://i674.photobucket.com/albums/vv103/pompey306mark/Picture007-20.jpg)
![[Image: Picture008-20.jpg]](http://i674.photobucket.com/albums/vv103/pompey306mark/Picture008-20.jpg)
![[Image: Picture009-17.jpg]](http://i674.photobucket.com/albums/vv103/pompey306mark/Picture009-17.jpg)
![[Image: Picture010-14.jpg]](http://i674.photobucket.com/albums/vv103/pompey306mark/Picture010-14.jpg)
![[Image: Picture011-15.jpg]](http://i674.photobucket.com/albums/vv103/pompey306mark/Picture011-15.jpg)
![[Image: Picture012-12.jpg]](http://i674.photobucket.com/albums/vv103/pompey306mark/Picture012-12.jpg)
![[Image: Picture013-12.jpg]](http://i674.photobucket.com/albums/vv103/pompey306mark/Picture013-12.jpg)
![[Image: Picture020-8.jpg]](http://i674.photobucket.com/albums/vv103/pompey306mark/Picture020-8.jpg)
![[Image: Picture019-9.jpg]](http://i674.photobucket.com/albums/vv103/pompey306mark/Picture019-9.jpg)
![[Image: Picture021-10.jpg]](http://i674.photobucket.com/albums/vv103/pompey306mark/Picture021-10.jpg)
![[Image: Picture018-11.jpg]](http://i674.photobucket.com/albums/vv103/pompey306mark/Picture018-11.jpg)
![[Image: Picture016-12.jpg]](http://i674.photobucket.com/albums/vv103/pompey306mark/Picture016-12.jpg)
![[Image: Picture024-8.jpg]](http://i674.photobucket.com/albums/vv103/pompey306mark/Picture024-8.jpg)
![[Image: Picture022-9.jpg]](http://i674.photobucket.com/albums/vv103/pompey306mark/Picture022-9.jpg)
![[Image: DSC05764.jpg]](http://i1186.photobucket.com/albums/z370/182carlos/Xmas%20Meet/DSC05764.jpg)
![[Image: DSC05770.jpg]](http://i1186.photobucket.com/albums/z370/182carlos/Xmas%20Meet/DSC05770.jpg)
![[Image: DSC05772.jpg]](http://i1186.photobucket.com/albums/z370/182carlos/Xmas%20Meet/DSC05772.jpg)
![[Image: DSC05769.jpg]](http://i1186.photobucket.com/albums/z370/182carlos/Xmas%20Meet/DSC05769.jpg)
![[Image: DSC05771.jpg]](http://i1186.photobucket.com/albums/z370/182carlos/Xmas%20Meet/DSC05771.jpg)
![[Image: CrimboMeet2011066.jpg]](http://i245.photobucket.com/albums/gg47/Dum-Dum1986/Christmas%20Meet%202011/CrimboMeet2011066.jpg)
![[Image: CrimboMeet2011067.jpg]](http://i245.photobucket.com/albums/gg47/Dum-Dum1986/Christmas%20Meet%202011/CrimboMeet2011067.jpg)
![[Image: b527bc46.jpg]](http://i290.photobucket.com/albums/ll257/niallharper/Christmas%20meet/b527bc46.jpg)
![[Image: DSCF3655.jpg]](http://i789.photobucket.com/albums/yy175/DanHargrave/DSCF3655.jpg)
![[Image: DSCF3652.jpg]](http://i789.photobucket.com/albums/yy175/DanHargrave/DSCF3652.jpg)
![[Image: DSCF3730.jpg]](http://i789.photobucket.com/albums/yy175/DanHargrave/DSCF3730.jpg)
![[Image: DSC05591.jpg]](http://i1186.photobucket.com/albums/z370/182carlos/Xmas%20Meet/DSC05591.jpg)
![[Image: DSC05613.jpg]](http://i1186.photobucket.com/albums/z370/182carlos/Xmas%20Meet/DSC05613.jpg)
![[Image: DSC05615.jpg]](http://i1186.photobucket.com/albums/z370/182carlos/Xmas%20Meet/DSC05615.jpg)
![[Image: 0d1fb0b4.jpg]](http://i77.photobucket.com/albums/j74/Jord_-/0d1fb0b4.jpg)
![[Image: cca80914.jpg]](http://i77.photobucket.com/albums/j74/Jord_-/cca80914.jpg)
![[Image: DSC_0139_1023x680.jpg]](http://i127.photobucket.com/albums/p157/Snoopy2005uk/Pug306%20net%20xmas%20meet%202011/DSC_0139_1023x680.jpg)
![[Image: DSCF3643.jpg]](http://i789.photobucket.com/albums/yy175/DanHargrave/DSCF3643.jpg)
![[Image: DSC_0163_680x1023.jpg]](http://i127.photobucket.com/albums/p157/Snoopy2005uk/Pug306%20net%20xmas%20meet%202011/DSC_0163_680x1023.jpg)
 Atleast its fapping awesome now though
![[Image: connorsig.jpg]](http://www.306oc.co.uk/forum/images/uploads/connorsig.jpg)
![[Image: Untitled-1_zpsc57da38e.jpg]](http://s112.photobucket.com/user/w1n_2006/media/Untitled-1_zpsc57da38e.jpg.html)


![[Image: 9e8638f5.jpg]](http://i674.photobucket.com/albums/vv103/pompey306mark/9e8638f5.jpg)
![[Image: d99a0023.jpg]](http://i674.photobucket.com/albums/vv103/pompey306mark/d99a0023.jpg)

![[Image: 20A1806D-891D-40FB-BD52-AD519177A607-734...391753.jpg]](http://i35.photobucket.com/albums/d196/mattbush/20A1806D-891D-40FB-BD52-AD519177A607-7340-0000058F46391753.jpg)
![[Image: 27b06376.jpg]](http://i674.photobucket.com/albums/vv103/pompey306mark/27b06376.jpg)
![[Image: 3777bbe1.jpg]](http://i674.photobucket.com/albums/vv103/pompey306mark/3777bbe1.jpg)
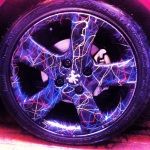
![[Image: b93163f7.jpg]](http://i674.photobucket.com/albums/vv103/pompey306mark/b93163f7.jpg)


