Posts: 83
Threads: 20
Joined: Dec 2013
Location: Huddersfield
Car Model/Spec: 2.0 HDI (Phase 3)
Thanks: 0
Given 0 thank(s) in 0 post(s)
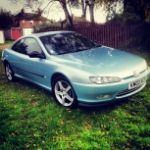
Someone told me the wings are spot welded in place and require drilling out, is this right?
I've done wing before on my 406 coupe and they were just bolted on.
Posts: 1,204
Threads: 195
Joined: Jul 2013
Reputation:
6
Location: Wolverhampton
Car Model/Spec: 2000 Xs 1.8 16v
Thanks: 0
Given 0 thank(s) in 0 post(s)
The later model there is 2 rivets you have to drill out, but they still kept the top 10mm bolt.
Posts: 83
Threads: 20
Joined: Dec 2013
Location: Huddersfield
Car Model/Spec: 2.0 HDI (Phase 3)
Thanks: 0
Given 0 thank(s) in 0 post(s)
Ah, so when re fitting it needs welding back on?
Posts: 1,204
Threads: 195
Joined: Jul 2013
Reputation:
6
Location: Wolverhampton
Car Model/Spec: 2000 Xs 1.8 16v
Thanks: 0
Given 0 thank(s) in 0 post(s)
No all I did was put the wing into place, then put a self tapper where the rivet used to be. The rivet is only small which drills out in seconds.
Posts: 83
Threads: 20
Joined: Dec 2013
Location: Huddersfield
Car Model/Spec: 2.0 HDI (Phase 3)
Thanks: 0
Given 0 thank(s) in 0 post(s)
Ah, cheers. Where are the rivets located?
Posts: 7,825
Threads: 465
Joined: Dec 2011
Reputation:
114
Location: Cullompton Devon
Car Model/Spec: Vauxhall


Thanks: 1
Given 98 thank(s) in 92 post(s)
[attachment=12502]
green top of wing is rivets to drill out,
red m6 bolts to remove,
red/orange m6 bolt to slacken as slots in wing panel,
yellow screw for arch liner
green lower rivets securing sill trim makes easer wing removal
blue sill trim to wing panal clip
Posts: 83
Threads: 20
Joined: Dec 2013
Location: Huddersfield
Car Model/Spec: 2.0 HDI (Phase 3)
Thanks: 0
Given 0 thank(s) in 0 post(s)
Cheers, that's a big help


![[Image: ForumSignature.jpg]](http://i458.photobucket.com/albums/qq301/Rombix/ForumSignature.jpg)
