28-06-2018, 11:03 AM
Hi all. Decided to tackle armour with pump still fitted. Probably not best decision, but was concerned about the tamper proof bolts.
5 inch grinder across top right edge, front and back edges.
Then used (Lidl bought) Dremel type tool to make horizontal cut.

Have to say pretty impressed with the tool. Thought the little cutting wheels/discs wouldn't last, but because they are thinner than the angle grinder discs you cut less metal. The problem is you have to hold the dremel absolutely vertical. If not, the disc breaks.
After removing top section for a look, decided to cut sides down further. Then used the hole that the immobilizer wires enter to save a bit of cutting. Unfortunately I should have gone a bit lower, as mentioned in a while.
After removing this 2nd section, I could see what I assume was the immobilizer module. I hacked into this with hammer and chisel. You work through the circuit board followed by some gelatin like sealant.

This revealed a plastic base held by 2 allen bolts, with a wire visible at the top going behind the plastic (to the solenoid). The hole I made wasn't big enough get this plastic base out, so I hacked at the bottom of it. Then I realised the top half was actually a metal box covered in plastic. It slid towards the hole, but was just slightly too big. So dremel again to cut a bit of the armour around the original immobilizer wire hole.

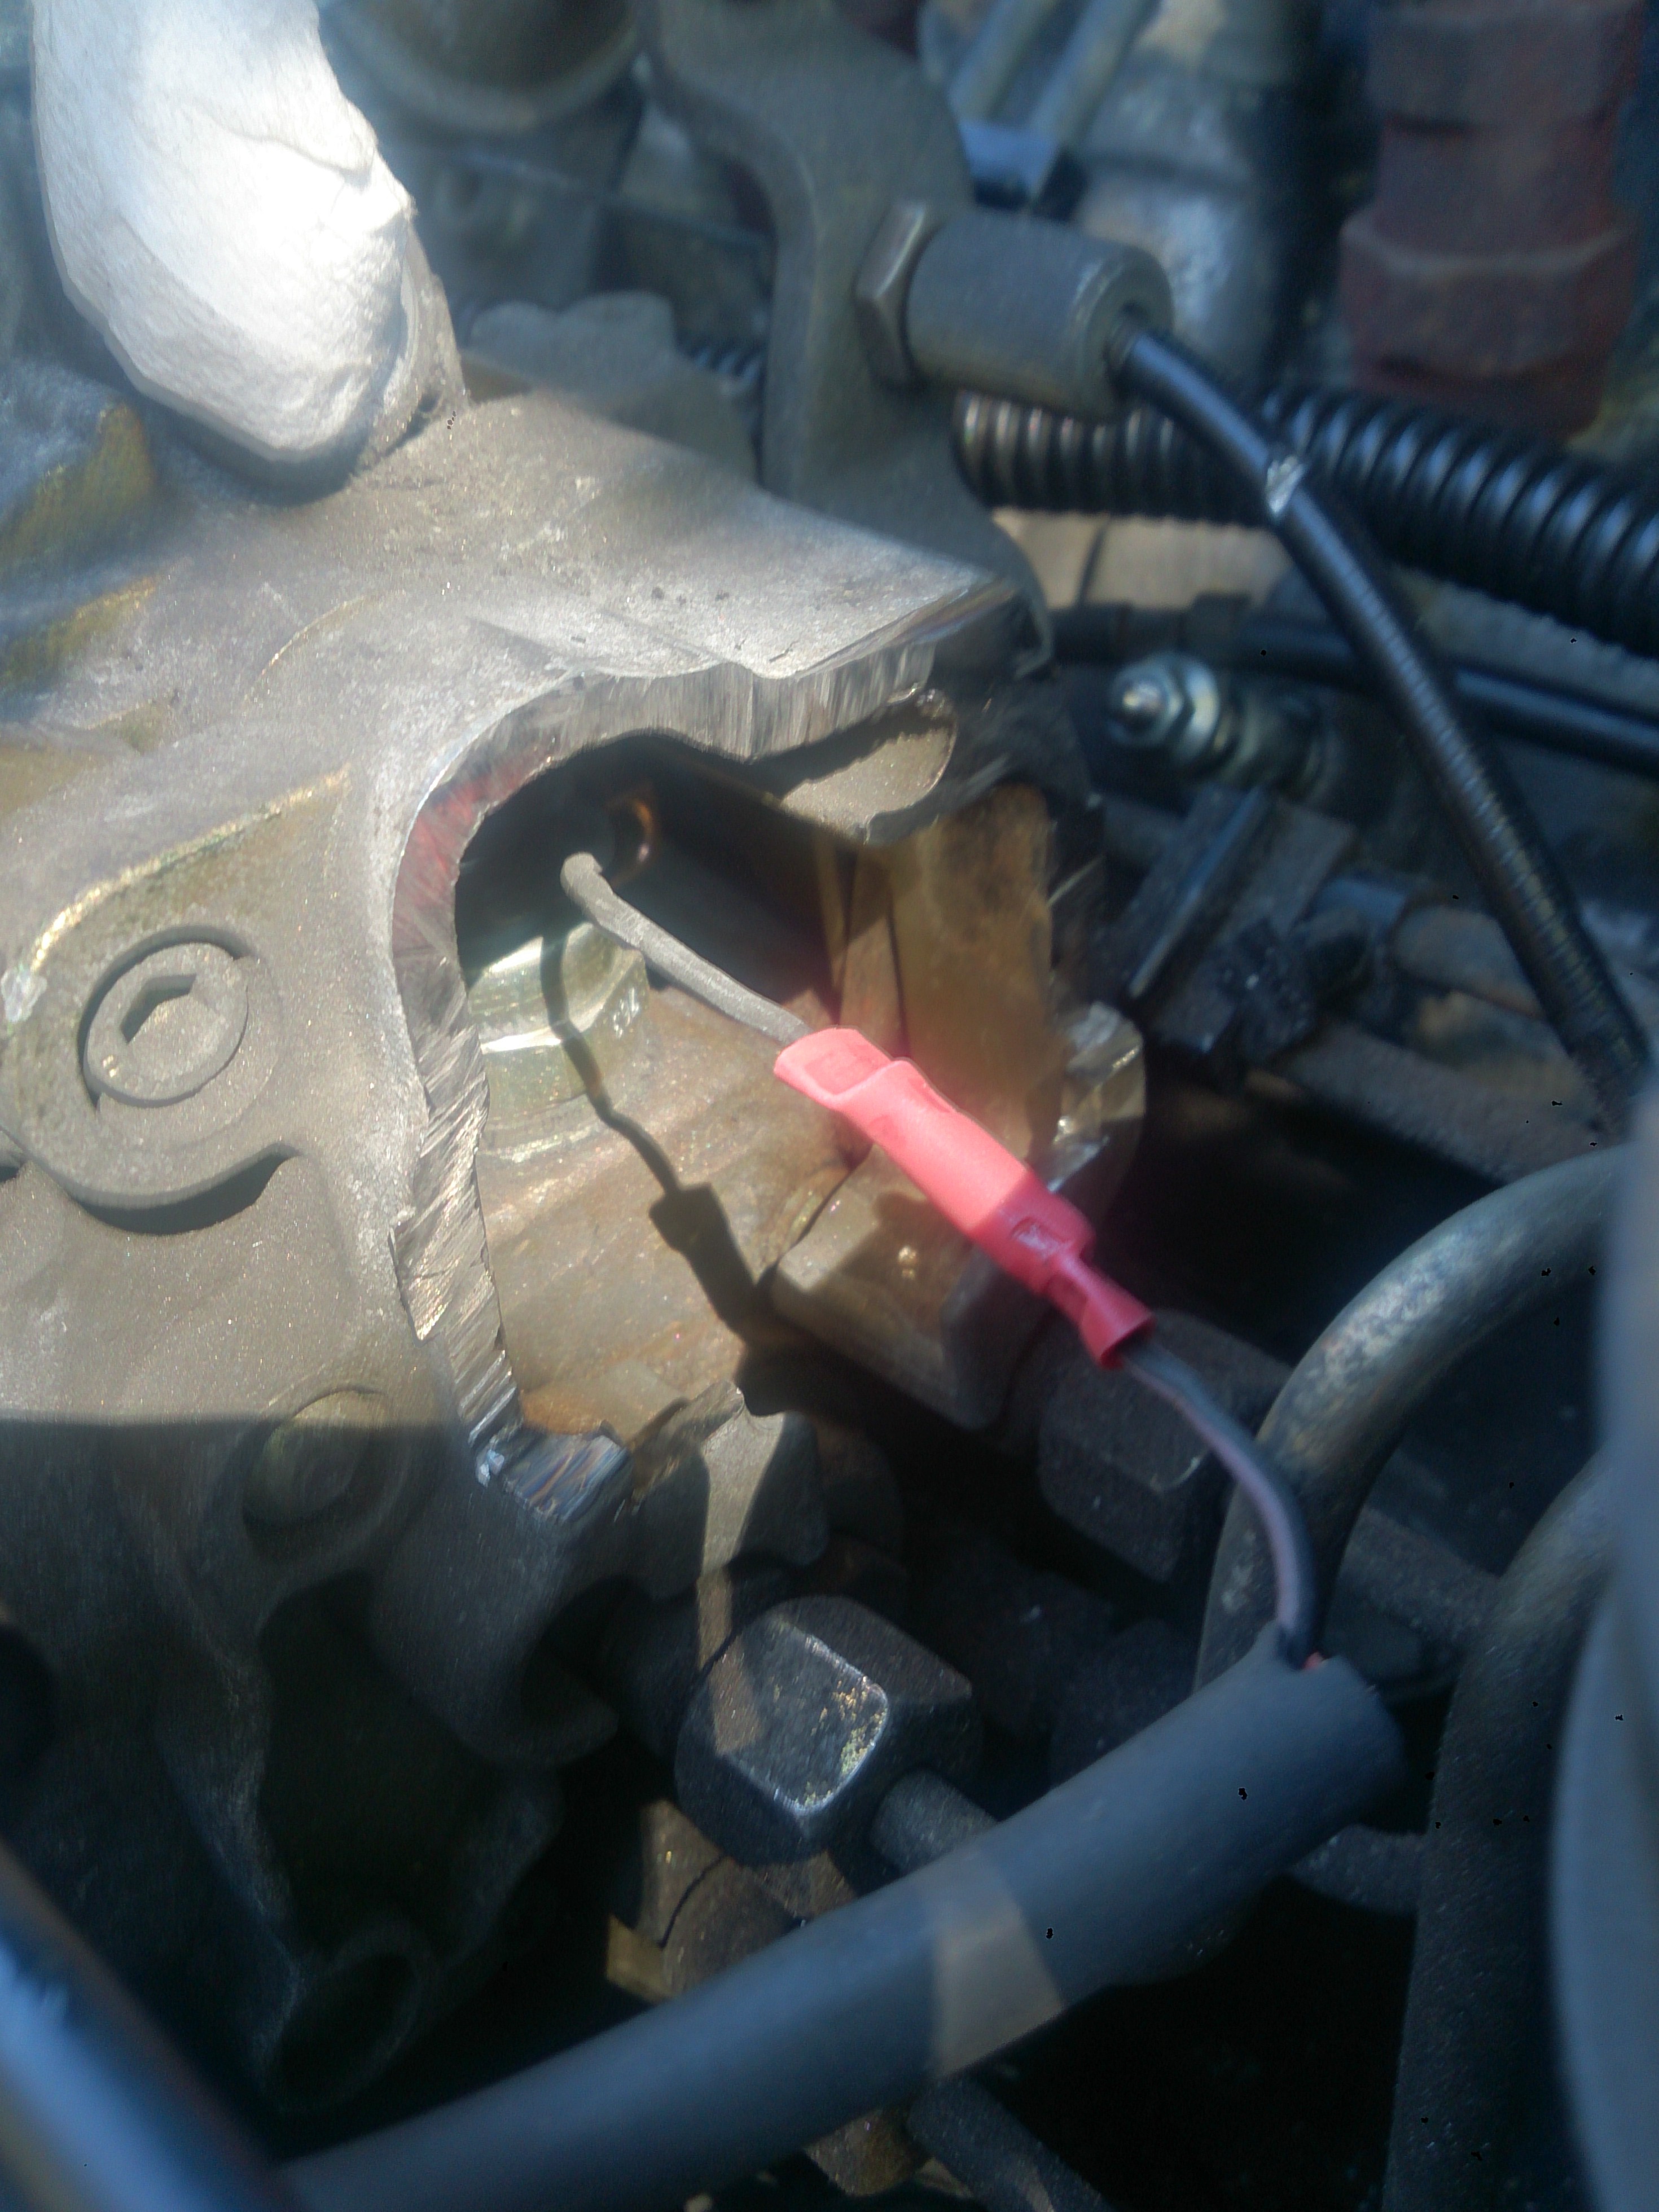
Eventually the metal box slid out to reveal the shut off solenoid. Red wire from the immobilizer loom, previously measured as switched 12V, connected to solenoid wire.

Then she started first turn of the key!
So thanks guys for the help and your patience.
If the solenoid had been faulty, not sure I could get it out without more cutting.
Should have wrapped crimp with insulation tape when I had access.
Need to set cold start cable, as removed this. Note also removed throttle cable and top right fuel line to allow grinder access.
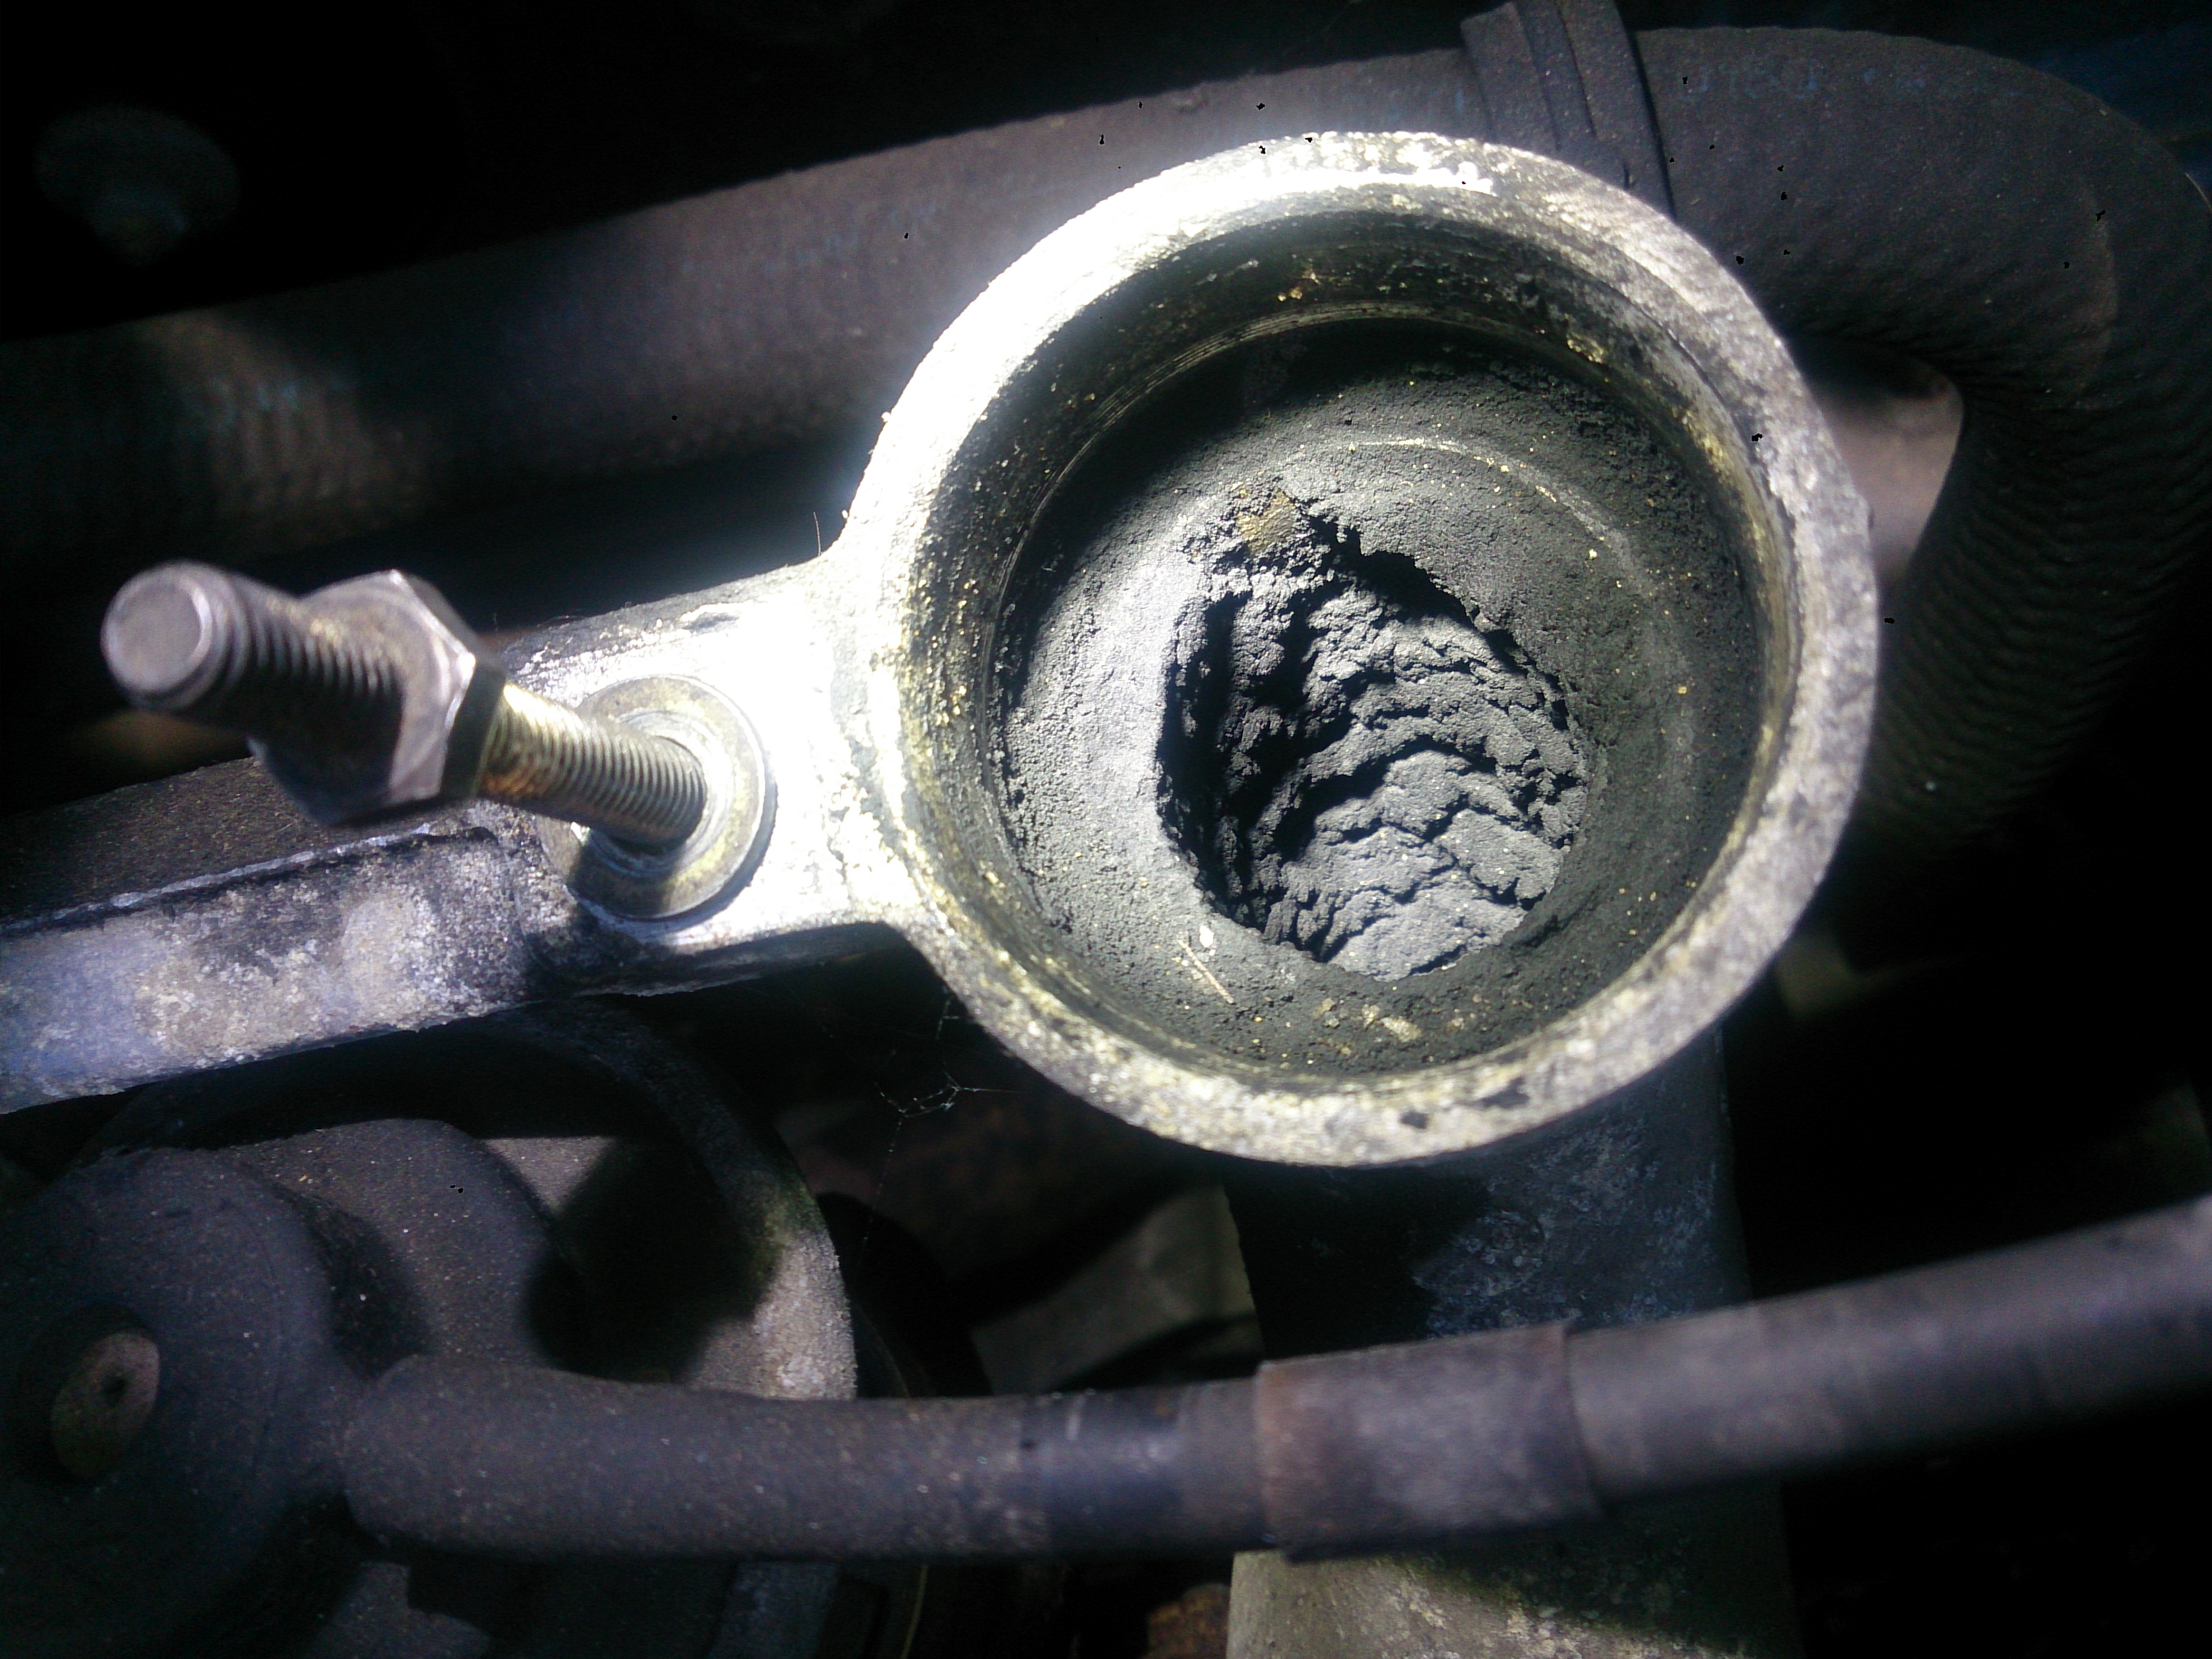
Inlet air pipes look pretty bad. The ones closer to the battery are the worst. Presumably crankcase breather fumes being recirculated through air distribution chamber.

5 inch grinder across top right edge, front and back edges.
Then used (Lidl bought) Dremel type tool to make horizontal cut.
Have to say pretty impressed with the tool. Thought the little cutting wheels/discs wouldn't last, but because they are thinner than the angle grinder discs you cut less metal. The problem is you have to hold the dremel absolutely vertical. If not, the disc breaks.
After removing top section for a look, decided to cut sides down further. Then used the hole that the immobilizer wires enter to save a bit of cutting. Unfortunately I should have gone a bit lower, as mentioned in a while.
After removing this 2nd section, I could see what I assume was the immobilizer module. I hacked into this with hammer and chisel. You work through the circuit board followed by some gelatin like sealant.
This revealed a plastic base held by 2 allen bolts, with a wire visible at the top going behind the plastic (to the solenoid). The hole I made wasn't big enough get this plastic base out, so I hacked at the bottom of it. Then I realised the top half was actually a metal box covered in plastic. It slid towards the hole, but was just slightly too big. So dremel again to cut a bit of the armour around the original immobilizer wire hole.
Eventually the metal box slid out to reveal the shut off solenoid. Red wire from the immobilizer loom, previously measured as switched 12V, connected to solenoid wire.
Then she started first turn of the key!
So thanks guys for the help and your patience.
If the solenoid had been faulty, not sure I could get it out without more cutting.
Should have wrapped crimp with insulation tape when I had access.
Need to set cold start cable, as removed this. Note also removed throttle cable and top right fuel line to allow grinder access.
Inlet air pipes look pretty bad. The ones closer to the battery are the worst. Presumably crankcase breather fumes being recirculated through air distribution chamber.


