16-08-2013, 12:00 PM
Common signs of old stretched or failing handbrake cables are lots of travel in the handbrake with little effect or a very stiff handbrake. Replacing the cables is easy and not too expensive and makes a huge difference!
I bought my new cables from ECP for the grand price of £24 for both. If your lucky, original Peugeot ones pop up on ebay from time to time for about the same price. id recommend getting these. There is a big difference between genuine and pattern!
Bear in mind when ordering, disc cables are different to drum ones so make sure you order the correct ones.
Step 1
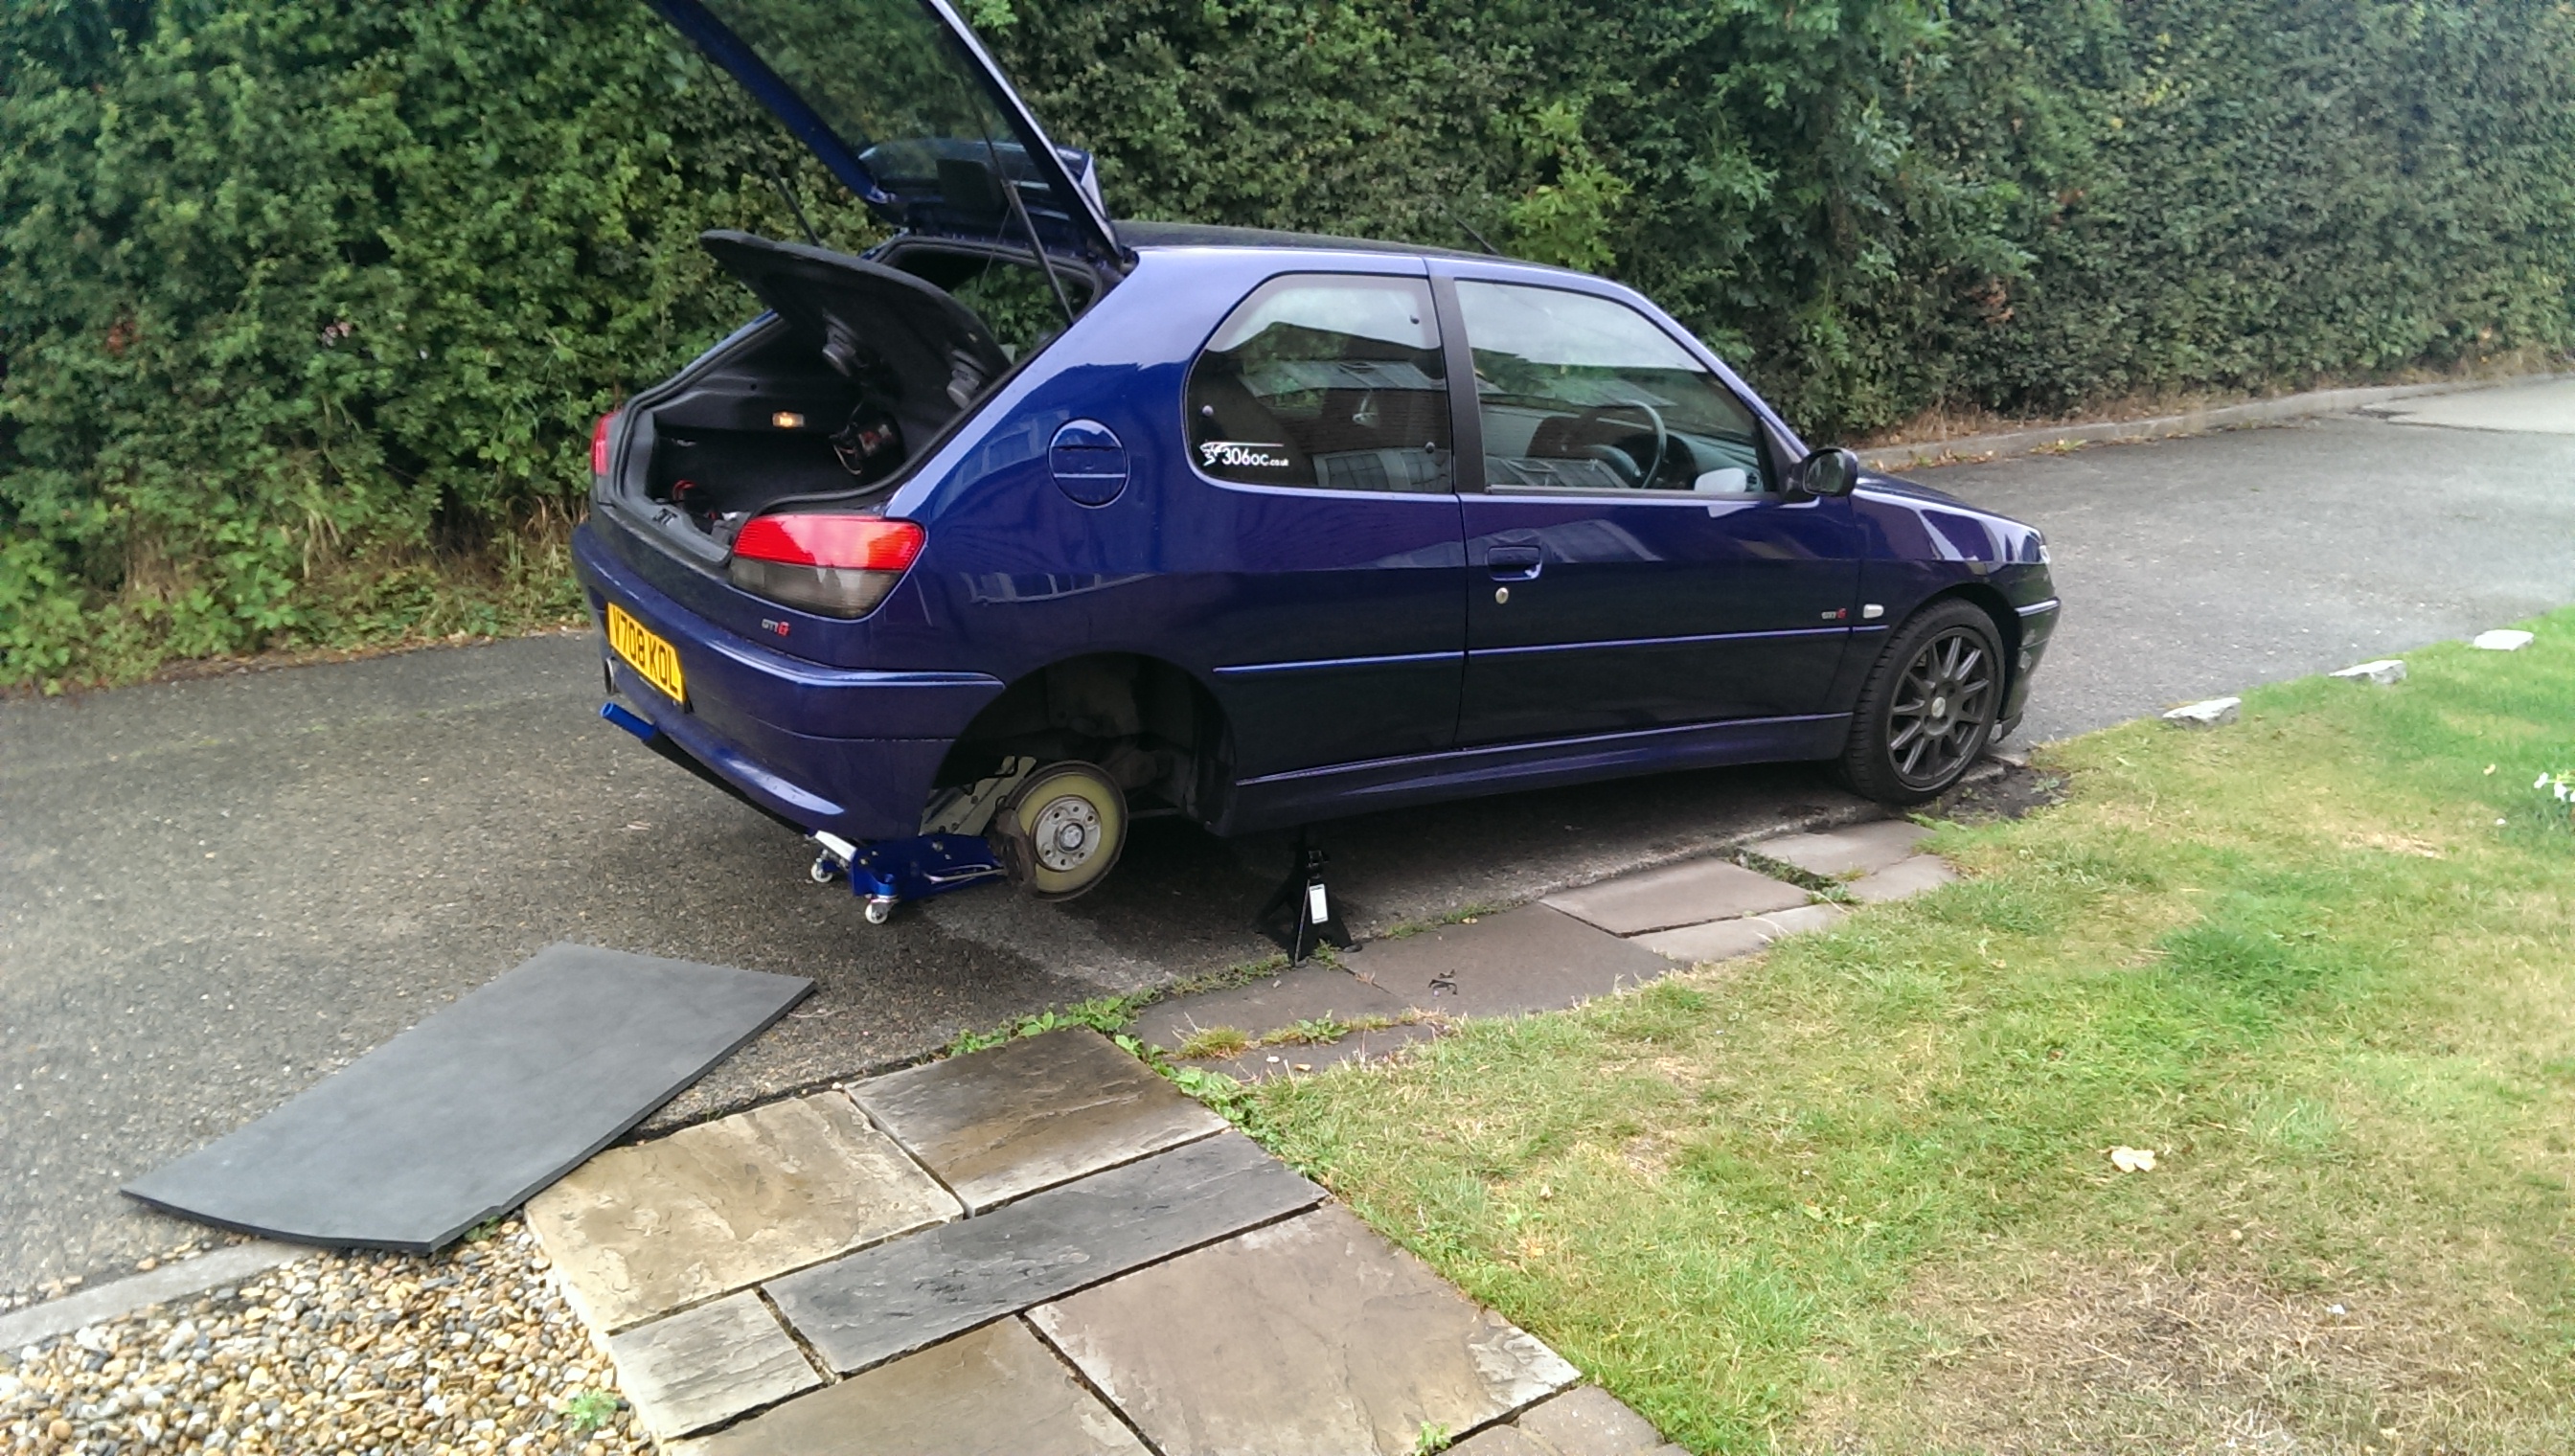
Jack up the rear of the car, support safely and remove wheels

Step 2
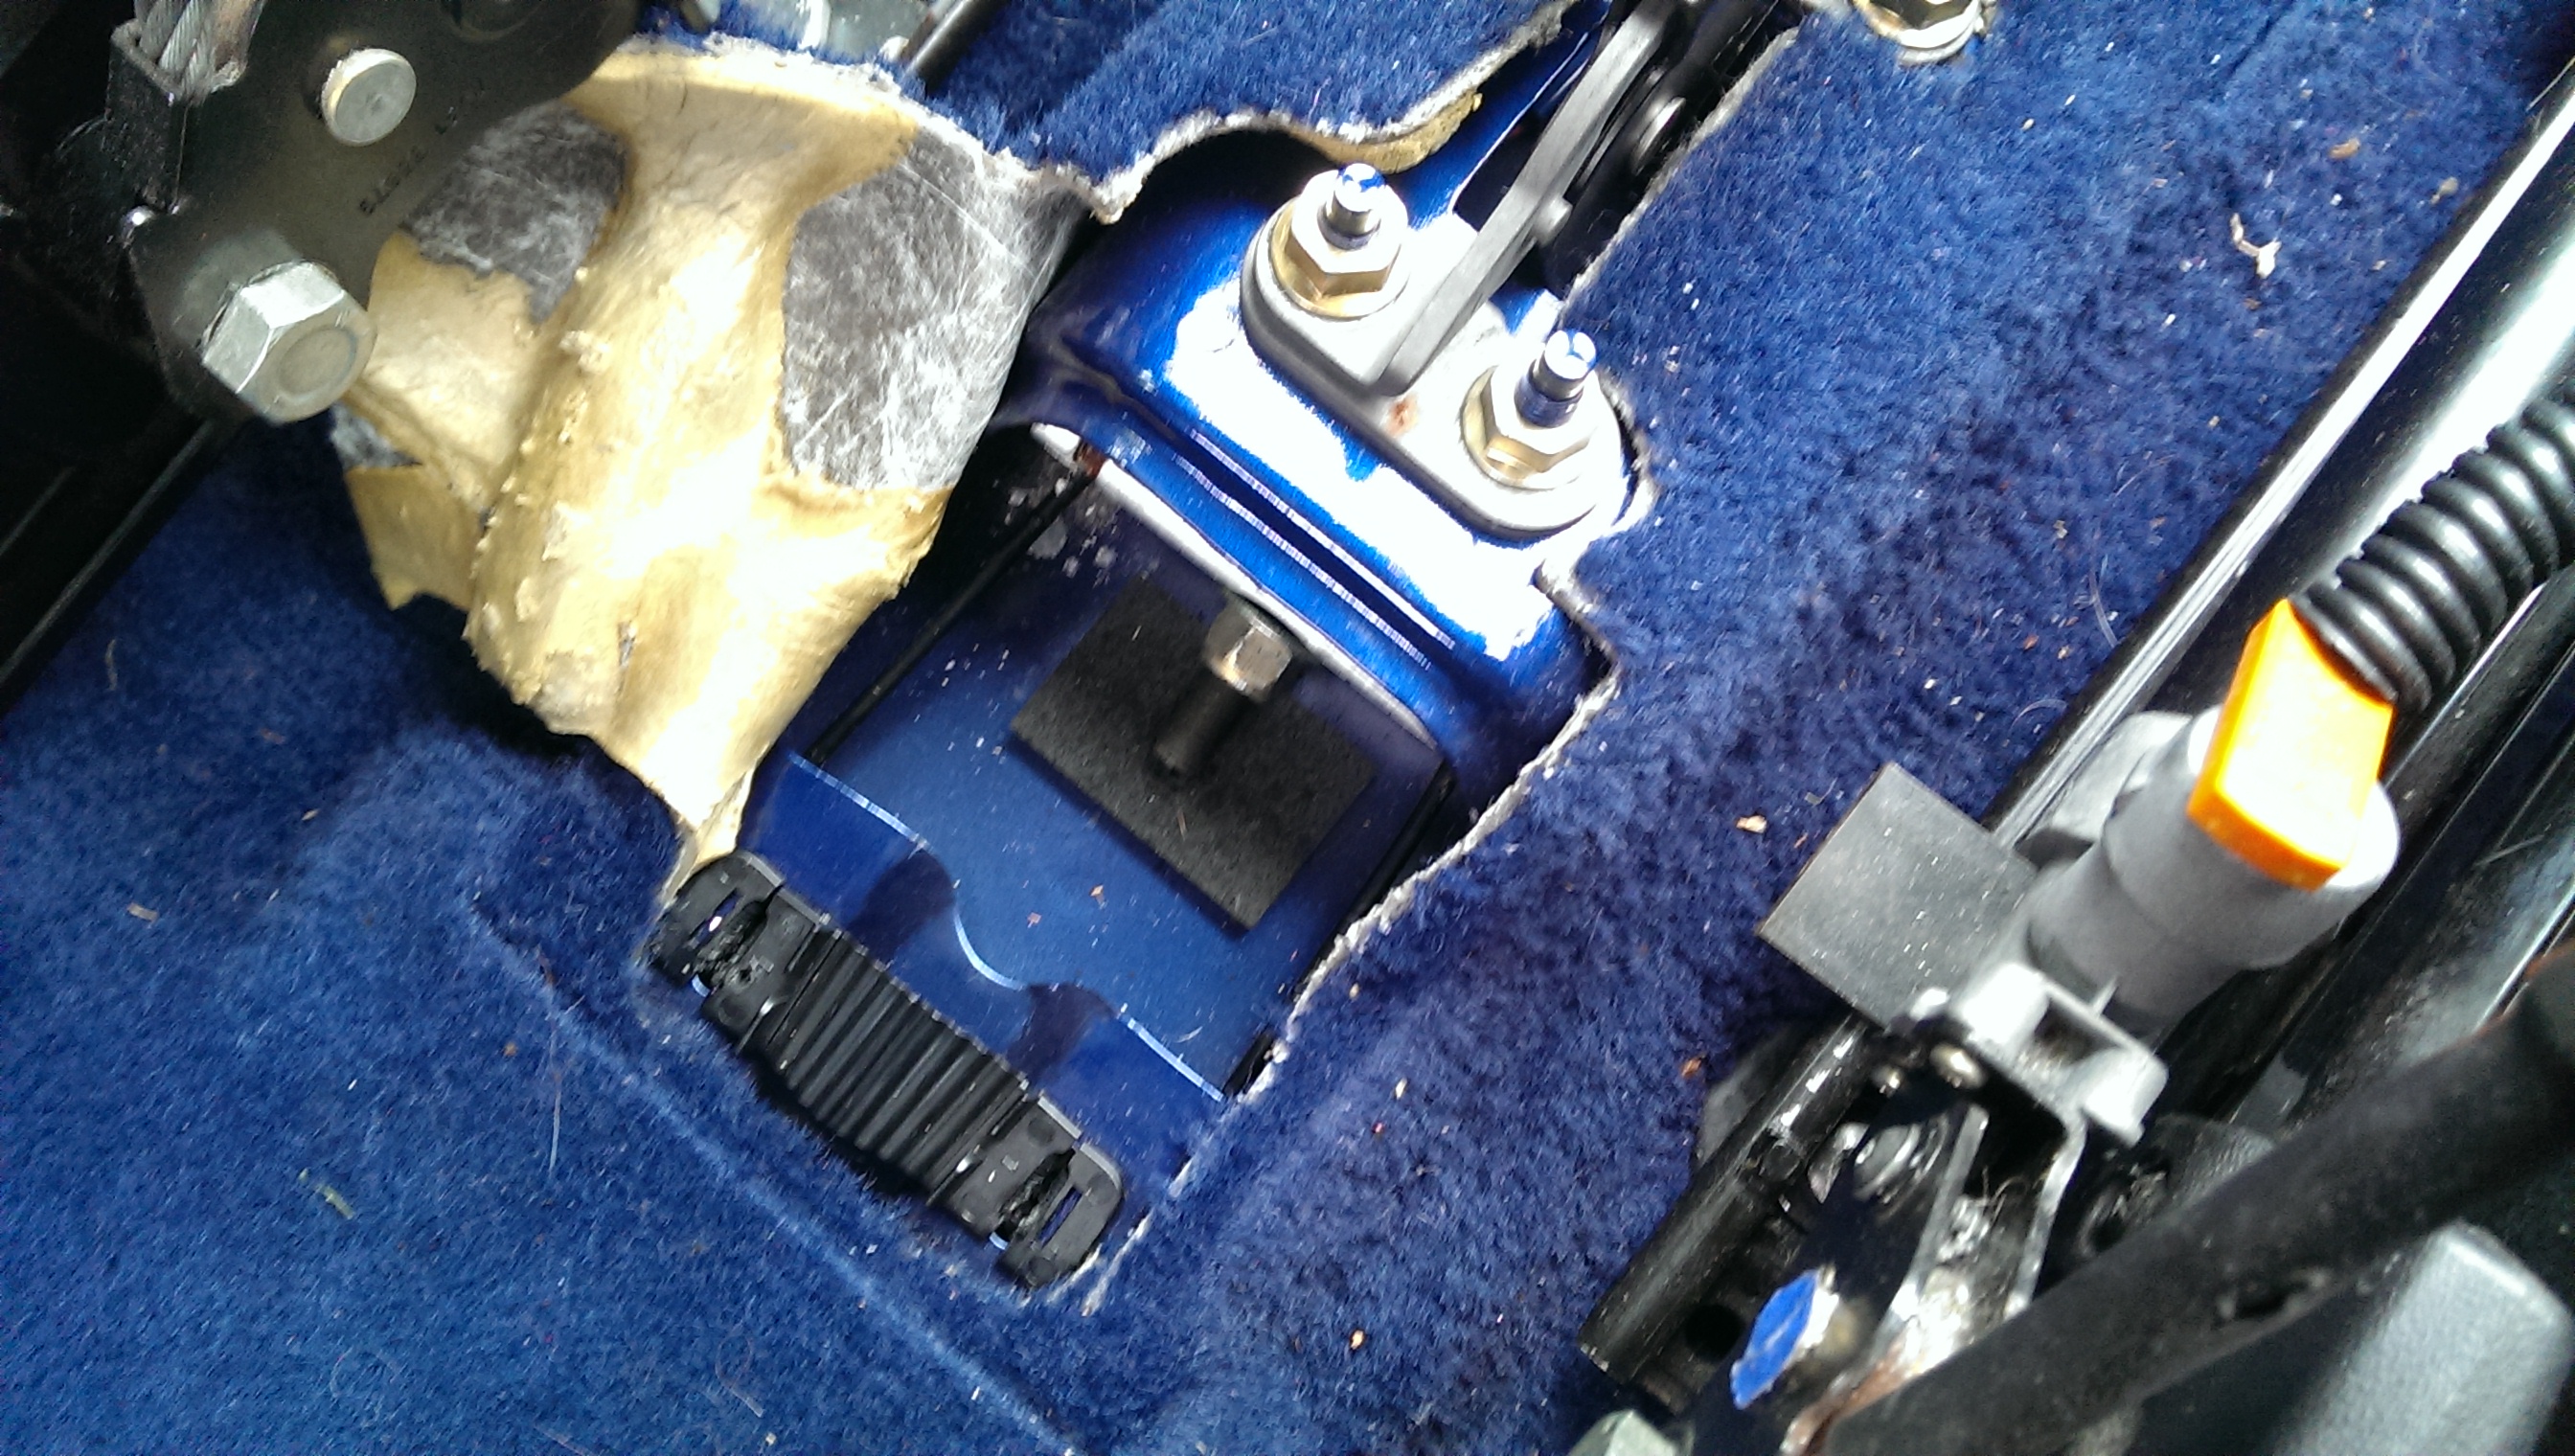
Inside the car, let the handbrake off (make sure the front wheels are chocked and in gear) and remove the centre console around it. There are two T20 torx screws under the rear ashtray and 2 10mm nuts under the gear stick cover. Remove and lift up the flap of carpet at the rear of the handbrake to reveal

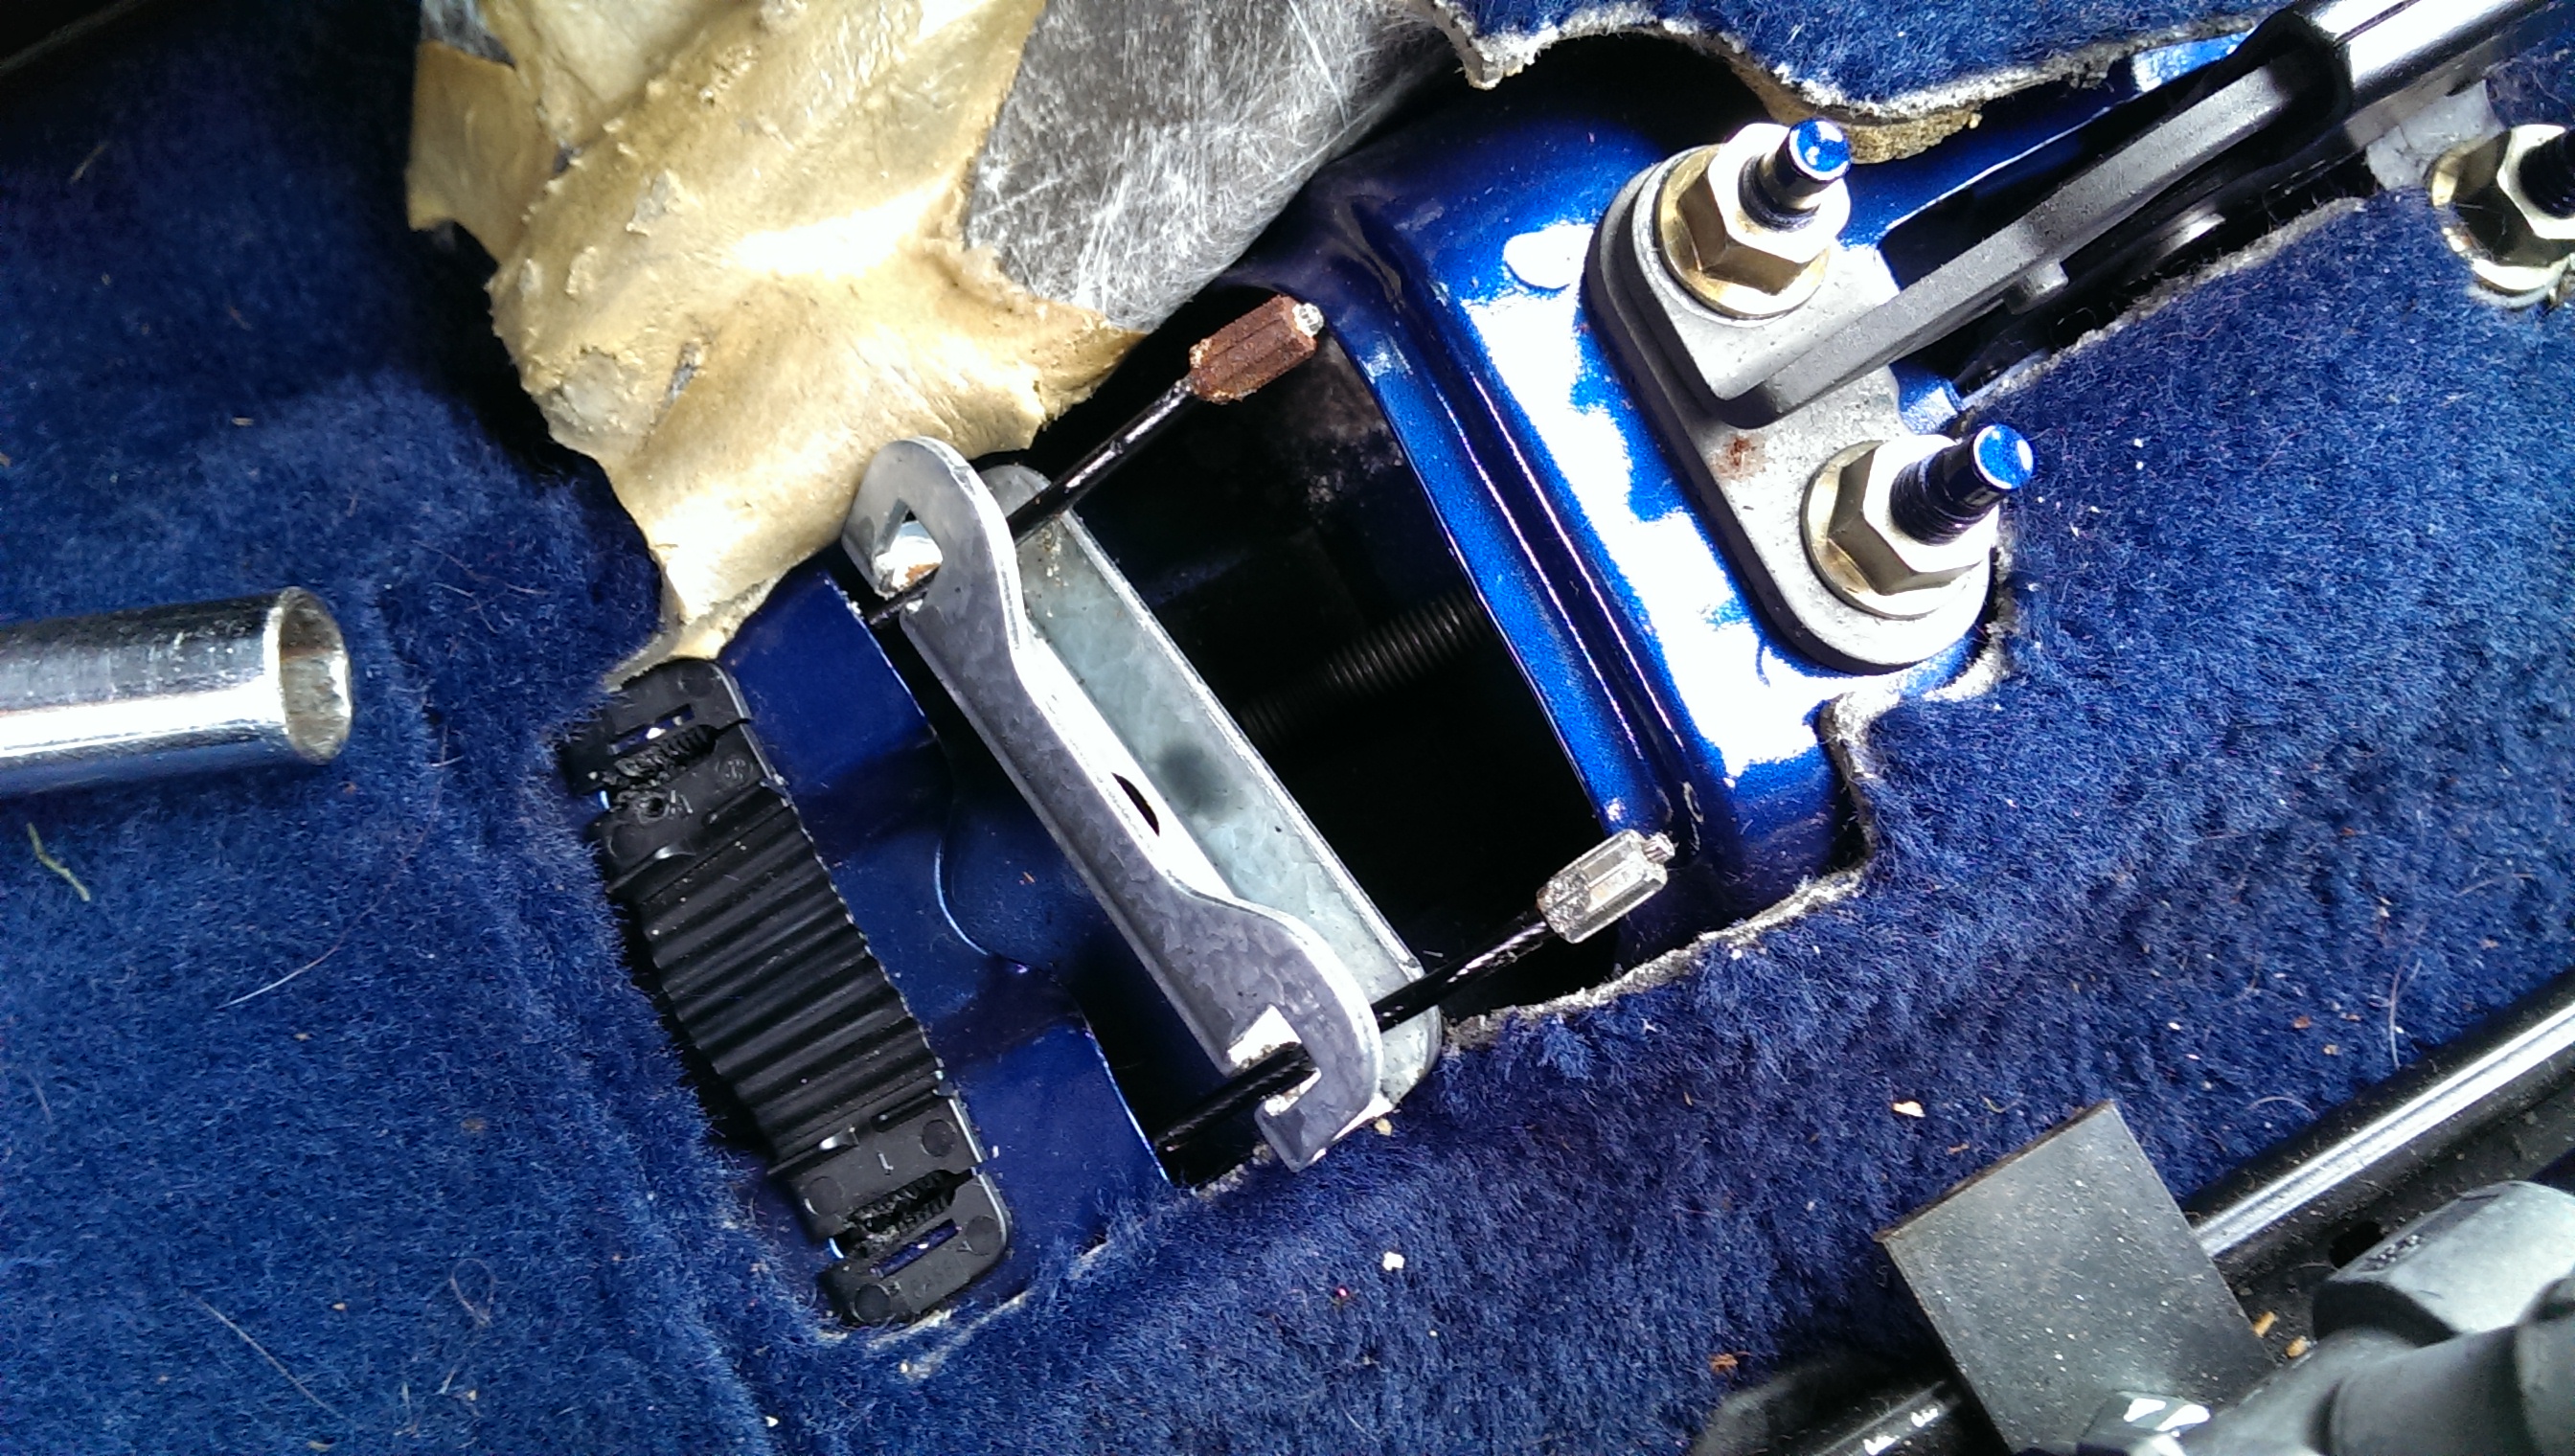
Undo the 13mm nut all the way, remove the nut and washer and pull the bar off of the threaded bar. Once you have done that, remove the two cable ends from the bar.

Tie some string to your first handbrake cable, leave some slack and tie the other end to something in the car.
Step 3.
Under the car, there is several clips holding the cable onto the underside. Remove the cable from these so its dangling then go to the calliper.

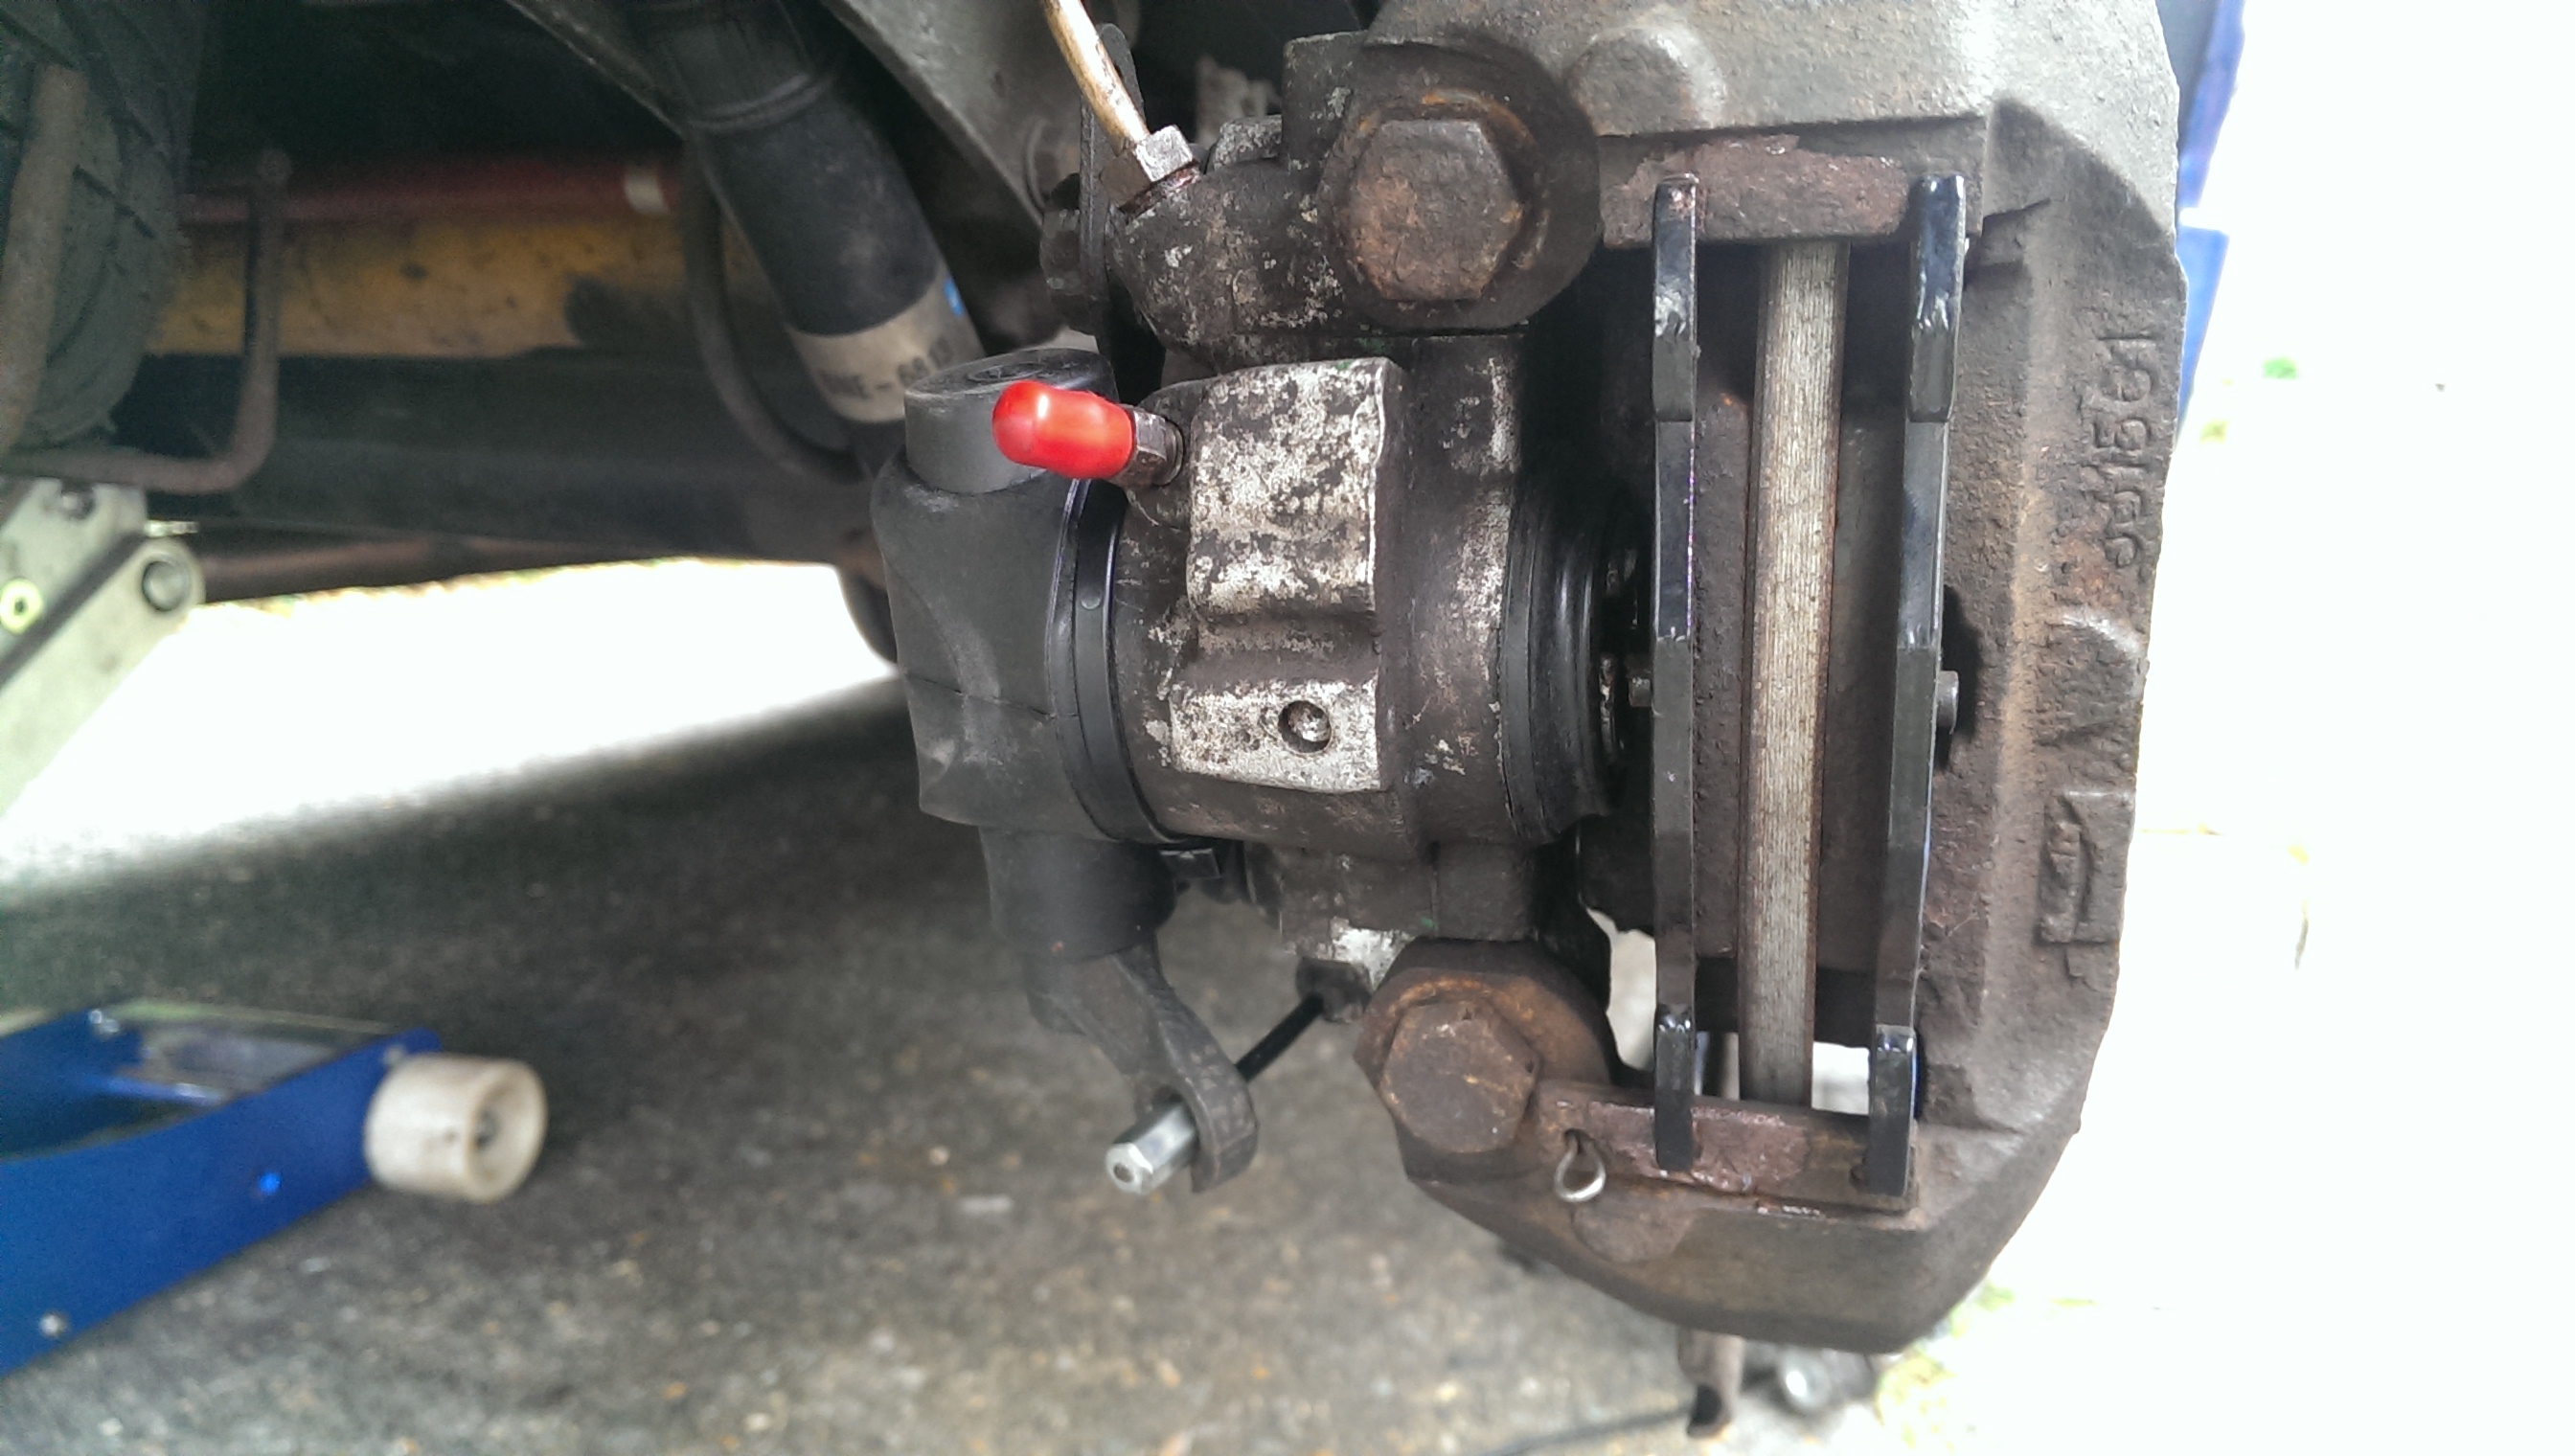
Remove the cable from the pivoting arm on the calliper and then use a screwdriver or chisel to smash the cable housing out of the calliper. This can be a bit of a bastard to do! Pull the cable and it should come out the car relatively easy.
Step 4
Once removed, untie the string and tie your new one on. Pull the cable through and into the car. Give it a good tug and you should feel the cable housing seat where it should on the body of the car. Fit it to the clips under the car (might need some cable ties to secure it. My new cables were slightly thinner than the old ones)
Step 5
Cover the cable housing end at the calliper end in copper slip (should ease removal again if its ever needed) and push into the calliper. Hook up cable end to pivot arm

Step 6
Do the same for the other side. Now you have 2 new cables on the car, refit the metal bar and slide it over the threaded stud. Do it up until you feel some slight tension in the cables and then lift the handbrake. You may feel a few bits click and move and the handbrake may suddenly go slack. This is just the housing seating properly. Drop the handbrake and retighten. ideally you want the handbrake to come on hard after 3 clicks
so adjust it to suit.
Step 7
put everything back together, drop the car back down then go to mcdonnalds and try some handbrake turns!
Note
The cables will stretch over the next few weeks of use. Use the car for a few weeks then you will more than likely have to adjust the handbrake again. This is completely normal so dont worry about having dodgy cables!
I bought my new cables from ECP for the grand price of £24 for both. If your lucky, original Peugeot ones pop up on ebay from time to time for about the same price. id recommend getting these. There is a big difference between genuine and pattern!
Bear in mind when ordering, disc cables are different to drum ones so make sure you order the correct ones.
Step 1
Jack up the rear of the car, support safely and remove wheels
Step 2
Inside the car, let the handbrake off (make sure the front wheels are chocked and in gear) and remove the centre console around it. There are two T20 torx screws under the rear ashtray and 2 10mm nuts under the gear stick cover. Remove and lift up the flap of carpet at the rear of the handbrake to reveal
Undo the 13mm nut all the way, remove the nut and washer and pull the bar off of the threaded bar. Once you have done that, remove the two cable ends from the bar.
Tie some string to your first handbrake cable, leave some slack and tie the other end to something in the car.
Step 3.
Under the car, there is several clips holding the cable onto the underside. Remove the cable from these so its dangling then go to the calliper.
Remove the cable from the pivoting arm on the calliper and then use a screwdriver or chisel to smash the cable housing out of the calliper. This can be a bit of a bastard to do! Pull the cable and it should come out the car relatively easy.
Step 4
Once removed, untie the string and tie your new one on. Pull the cable through and into the car. Give it a good tug and you should feel the cable housing seat where it should on the body of the car. Fit it to the clips under the car (might need some cable ties to secure it. My new cables were slightly thinner than the old ones)
Step 5
Cover the cable housing end at the calliper end in copper slip (should ease removal again if its ever needed) and push into the calliper. Hook up cable end to pivot arm
Step 6
Do the same for the other side. Now you have 2 new cables on the car, refit the metal bar and slide it over the threaded stud. Do it up until you feel some slight tension in the cables and then lift the handbrake. You may feel a few bits click and move and the handbrake may suddenly go slack. This is just the housing seating properly. Drop the handbrake and retighten. ideally you want the handbrake to come on hard after 3 clicks
so adjust it to suit.
Step 7
put everything back together, drop the car back down then go to mcdonnalds and try some handbrake turns!
Note
The cables will stretch over the next few weeks of use. Use the car for a few weeks then you will more than likely have to adjust the handbrake again. This is completely normal so dont worry about having dodgy cables!
Team Eaton
1999 China Blue 306 GTi6 - Eaton Supercharged - 214.5bhp 181lbft
1999 China Blue 306 GTi6 - Eaton Supercharged - 214.5bhp 181lbft


![[Image: 00000000-0000-0000-0000-00000000014E_zpsprynorkl.jpg]](http://i873.photobucket.com/albums/ab292/craigus123/00000000-0000-0000-0000-00000000014E_zpsprynorkl.jpg)

![[Image: 6b0c7309-5184-463c-9f73-2a7b96601418_zpsfdf041fe.jpg]](http://i512.photobucket.com/albums/t326/kent16_2008/6b0c7309-5184-463c-9f73-2a7b96601418_zpsfdf041fe.jpg)


